[FLUTTER] 안드로이드 스튜디오에 연결된 가상 장치 조회하기
■ 안드로이드 스튜디오에 연결된 가상 장치를 조회하는 방법을 보여준다. 1. [Windows PowerShel]을 실행한다. 2. 아래 명령을 실행해 현재 디렉토리를 변경한다. ▶ 실행
■ TextField 클래스의 keyboardType/controller 속성을 사용하는 방법을 보여준다. ▶ 예제 코드 (DART)
1 2 3 4 5 6 7 8 |
TextEditingController controller = TextEditingController(); TextField( keyboardType: TextInputType.number, controller: controller, ) |
■ EdgeInsets 클래스의 only 생성자를 사용하는 방법을 보여준다. ▶ 예제 코드 (DART)
1 2 3 |
EdgeInsets.only(left: 20, right: 20) |
■ EdgeInsets 클래스의 all 생성자를 사용하는 방법을 보여준다. ▶ 예제 코드 (DART)
1 2 3 |
EdgeInsets.all(15) |
■ 사칙연산 계산기를 만드는 방법을 보여준다. ▶ main.dart
1 2 3 4 5 6 7 8 9 10 11 12 13 14 15 16 17 18 19 20 21 22 23 24 25 26 27 28 29 30 31 32 33 34 35 36 37 38 39 40 41 42 43 44 45 46 47 48 49 50 51 52 53 54 55 56 57 58 59 60 61 62 63 64 65 66 67 68 69 70 71 72 73 74 75 76 77 78 79 80 81 82 83 84 85 86 87 88 89 90 91 92 93 94 95 96 97 98 99 100 101 102 103 104 105 106 107 108 109 110 111 112 113 114 115 116 117 118 119 120 121 122 123 124 |
import 'package:flutter/material.dart'; void main() => runApp(TestApplication()); class TestApplication extends StatelessWidget { static const String _title = 'Test Application'; @override Widget build(BuildContext context) { return MaterialApp( title: _title, home: MainPage(), ); } } class MainPage extends StatefulWidget { MainPage({Key key}) : super(key: key); @override _MainPageState createState() => _MainPageState(); } class _MainPageState extends State<MainPage> { List<String> _buttonTextList = ['더하기', '빼기', '곱하기', '나누기']; List<DropdownMenuItem<String>> _menuItemList = List<DropdownMenuItem<String>>(); String _currentButtonText; String _resultText = ''; TextEditingController controller1 = TextEditingController(); TextEditingController controller2 = TextEditingController(); @override void initState() { super.initState(); for (String buttonText in _buttonTextList) { _menuItemList .add(DropdownMenuItem(value: buttonText, child: Text(buttonText))); } _currentButtonText = _menuItemList[0].value; } Widget build(BuildContext context) { return Scaffold( appBar: AppBar( title: Text('Test Application'), ), body: Container( child: Center( child: Column( children: <Widget>[ Padding( padding: EdgeInsets.all(15), child: Text( '결과 : $_resultText', style: TextStyle(fontSize: 20), ), ), Padding( padding: EdgeInsets.only(left: 20, right: 20), child: TextField( keyboardType: TextInputType.number, controller: controller1, ), ), Padding( padding: EdgeInsets.only(left: 20, right: 20), child: TextField( keyboardType: TextInputType.number, controller: controller2, ), ), Padding( padding: EdgeInsets.all(15), child: RaisedButton( child: Row( children: <Widget>[ Icon(Icons.add), Text(_currentButtonText), ], ), color: Colors.amber, onPressed: () { setState(() { double value1 = double.parse(controller1.value.text); double value2 = double.parse(controller2.value.text); double result; if (_currentButtonText == '더하기') { result = value1 + value2; } else if (_currentButtonText == '빼기') { result = value1 - value2; } else if (_currentButtonText == '곱하기') { result = value1 * value2; } else { result = value1 / value2; } _resultText = result.toString(); }); }), ), Padding( padding: EdgeInsets.all(15), child: DropdownButton( items: _menuItemList, onChanged: (value) { setState(() { _currentButtonText = value; }); }, value: _currentButtonText, ), ), ], ), ), ), ); } } |
test_app.zip
■ 폰트 파일을 추가하는 방법을 보여준다. ▶ pubspec.yaml
1 2 3 4 5 6 7 8 9 10 11 12 13 14 15 16 17 18 19 20 21 22 23 24 25 26 27 28 29 |
name: test_app description: A new Flutter application. publish_to: 'none' version: 1.0.0+1 environment: sdk: ">=2.7.0 <3.0.0" dependencies: flutter: sdk: flutter cupertino_icons: ^1.0.2 dev_dependencies: flutter_test: sdk: flutter flutter: uses-material-design: true assets: - image/flutter.png fonts: - family: Pacifico fonts: - asset: font/Pacifico-Regular.ttf weight: 400 |
▶ imagePage.dart
1 2 3 4 5 6 7 8 9 10 11 12 13 14 15 16 17 18 19 20 21 22 23 24 25 26 27 28 29 30 31 32 33 34 35 36 37 38 39 40 41 42 43 44 |
import 'package:flutter/material.dart'; class ImagePage extends StatefulWidget { @override State<StatefulWidget> createState() { return _ImagePageState(); } } class _ImagePageState extends State<ImagePage> { @override Widget build(BuildContext context) { return Scaffold( appBar: AppBar( title: Text('Test Application'), ), body: Container( child: Center( child: Column( mainAxisAlignment: MainAxisAlignment.center, children: [ Image.asset( 'image/flutter.png', width: 200, height: 200, fit: BoxFit.fill, ), Text( 'Hello Flutter', style: TextStyle( fontFamily: 'Pacifico', fontSize: 30, color: Colors.blue, ), ) ], ), ) ), ); } } |
▶ main.dart
1 2 3 4 5 6 7 8 9 10 11 12 13 14 15 16 17 18 19 20 21 |
import 'package:flutter/material.dart'; import 'imagePage.dart'; void main() { runApp(TestApplication()); } class TestApplication extends StatelessWidget { @override Widget build(BuildContext context) { return MaterialApp( title: 'Test Application', theme: ThemeData( primarySwatch: Colors.blue, ), home: ImagePage(), ); } } |
test_app.zip
■ Import 키워드를 사용해 파일을 임포트하는 방법을 보여준다. ▶ ImagePage.dart
1 2 3 4 5 6 7 8 9 10 11 12 13 14 15 16 17 18 19 20 21 22 23 24 25 26 27 28 29 30 31 32 33 34 35 36 |
import 'package:flutter/material.dart'; class ImagePage extends StatefulWidget { @override State<StatefulWidget> createState() { return _ImagePageState(); } } class _ImagePageState extends State<ImagePage> { @override Widget build(BuildContext context) { return Scaffold( appBar: AppBar( title: Text('Test Application'), ), body: Container( child: Center( child: Column( mainAxisAlignment: MainAxisAlignment.center, children: [ Image.asset( 'image/flutter.png', width: 200, height: 200, fit: BoxFit.fill, ), ], ), ) ), ); } } |
▶ MainPage.dart
1 2 3 4 5 6 7 8 9 10 11 12 13 14 15 16 17 18 19 20 21 |
import 'package:flutter/material.dart'; import 'imagePage.dart'; void main() { runApp(TestApplication()); } class TestApplication extends StatelessWidget { @override Widget build(BuildContext context) { return MaterialApp( title: 'Test Application', theme: ThemeData( primarySwatch: Colors.blue, ), home: ImagePage(), ); } } |
test_app.zip
■ Image 클래스의 width/height/fit 속성을 사용하는 방법을 보여준다. ▶ pubspec.yaml
1 2 3 4 5 6 7 8 9 10 11 12 13 14 15 16 17 18 19 20 21 22 23 24 |
name: test_app description: A new Flutter application. publish_to: 'none' version: 1.0.0+1 environment: sdk: ">=2.7.0 <3.0.0" dependencies: flutter: sdk: flutter cupertino_icons: ^1.0.2 dev_dependencies: flutter_test: sdk: flutter flutter: uses-material-design: true assets: - image/flutter.png |
▶ ImagePage.dart
1 2 3 4 5 6 7 8 9 10 11 12 13 14 15 16 17 18 19 20 21 22 23 24 25 26 27 28 29 30 31 32 33 34 35 36 |
import 'package:flutter/material.dart'; class ImagePage extends StatefulWidget { @override State<StatefulWidget> createState() { return _ImagePageState(); } } class _ImagePageState extends State<ImagePage> { @override Widget build(BuildContext context) { return Scaffold( appBar: AppBar( title: Text('Test Application'), ), body: Container( child: Center( child: Column( mainAxisAlignment: MainAxisAlignment.center, children: [ Image.asset( 'image/flutter.png', width: 200, height: 200, fit: BoxFit.fill, ), ], ), ) ), ); } } |
▶ MainPage.dart
1 2 3 4 5 6 7 8 9 10 11 12 13 14 15 16 17 18 19 20 21 |
import 'package:flutter/material.dart'; import 'imagePage.dart'; void main() { runApp(TestApplication()); } class TestApplication extends StatelessWidget { @override Widget build(BuildContext context) { return MaterialApp( title: 'Test Application', theme: ThemeData( primarySwatch: Colors.blue, ), home: ImagePage(), ); } } |
test_app.zip
■ TextStyle 클래스를 사용하는 방법을 보여준다. ▶ 예제 코드 (DART)
1 2 3 4 5 6 7 8 9 |
TextStyle( fontSize: 40.0, fontStyle: FontStyle.italic, fontWeight: FontWeight.bold, color: Colors.red, letterSpacing: 4.0, ) |
■ Text 클래스의 textAlign 속성을 사용해 수평 정렬하는 방법을 보여준다. ▶ 예제 코드 (DART)
1 2 3 4 5 6 |
Text( 'hello\nFlutter', textAlign: TextAlign.center, ) |
■ ThemeData 클래스의 visualDensity 속성을 사용하는 방법을 보여준다. ▶ 예제 코드 (DART)
1 2 3 4 5 6 |
ThemeData( primarySwatch: Colors.blue, visualDensity: VisualDensity.adaptivePlatformDensity, ) |
■ 할 일 관리 앱 만드는 방법을 보여준다. (파이어베이스 연동) 1. 웹 브라우저에서 아래 파이어베이스 웹사이트에 접속하고 구글 계정으로 로그인한다. ▶ URL
■ 할 일 관리 앱을 만드는 방법을 보여준다. ▶ main.dart
1 2 3 4 5 6 7 8 9 10 11 12 13 14 15 16 17 18 19 20 21 22 23 24 25 26 27 28 29 30 31 32 33 34 35 36 37 38 39 40 41 42 43 44 45 46 47 48 49 50 51 52 53 54 55 56 57 58 59 60 61 62 63 64 65 66 67 68 69 70 71 72 73 74 75 76 77 78 79 80 81 82 83 84 85 86 87 88 89 90 91 92 93 94 95 96 97 98 99 100 101 102 103 104 105 106 107 108 109 110 111 112 113 114 115 116 |
import 'package:flutter/material.dart'; void main() { runApp(TestApplication()); } class Todo { String title; bool isDone; Todo(this.title, {this.isDone = false}); } class TestApplication extends StatelessWidget { @override Widget build(BuildContext context) { return MaterialApp( title: 'Test Application', theme: ThemeData( primarySwatch: Colors.blue, ), home: MainPage(), ); } } class MainPage extends StatefulWidget { @override _MainPageState createState() => _MainPageState(); } class _MainPageState extends State<MainPage> { final _itemList = <Todo>[]; var _todoController = TextEditingController(); @override void dispose() { _todoController.dispose(); super.dispose(); } @override Widget build(BuildContext context) { return Scaffold( appBar: AppBar( title: Text('남은 할 일'), ), body: Padding( padding: const EdgeInsets.all(8.0), child: Column( children: <Widget>[ Row( children: <Widget>[ Expanded( child: TextField( controller: _todoController, ), ), RaisedButton( child: Text('추가'), onPressed: () => _addTodo(Todo(_todoController.text)), ), ], ), Expanded( child: ListView( children: _itemList.map((todo) => _buildItem(todo)).toList(), ), ), ], ), ), ); } Widget _buildItem(Todo todo) { return ListTile( title: Text( todo.title, style: todo.isDone ? TextStyle( decoration: TextDecoration.lineThrough, fontStyle: FontStyle.italic, ) : null, ), trailing: IconButton( icon: Icon(Icons.delete_forever), onPressed: () => _deleteTodo(todo), ), onTap: () => _toggleTodo(todo), ); } void _addTodo(Todo todo) { setState(() { _itemList.add(todo); _todoController.text = ""; }); } void _deleteTodo(Todo todo) { setState(() { _itemList.remove(todo); }); } void _toggleTodo(Todo todo) { setState(() { todo.isDone = !todo.isDone; }); } } |
test_app.zip
■ Timer 클래스에서 periodic 팩토리 생성자를 사용하는 방법을 보여준다. ▶ main.dart
1 2 3 4 5 6 7 8 9 10 11 12 13 14 15 16 17 18 19 20 21 22 23 24 25 26 27 28 29 30 31 32 33 34 35 36 37 38 39 40 41 42 43 44 45 46 47 48 49 50 51 52 53 54 55 56 57 58 59 60 61 62 63 64 65 66 67 68 69 70 71 72 73 74 75 76 77 78 79 80 81 82 83 84 85 86 87 |
import 'dart:async'; import 'package:flutter/material.dart'; void main() { runApp(TestApplication()); } class TestApplication extends StatelessWidget { @override Widget build(BuildContext context) { return MaterialApp( title: 'Test Application', theme: ThemeData( primarySwatch: Colors.blue, ), home: MainPage(), ); } } class MainPage extends StatefulWidget { @override _MainPageState createState() => _MainPageState(); } class _MainPageState extends State<MainPage> { Timer _timer; bool _isRunning = false; int _timerCount = 0; String _buttonText = 'Start'; @override void dispose() { _timer?.cancel(); super.dispose(); } @override Widget build(BuildContext context) { return Scaffold( appBar: AppBar( title: Text('Test Application'), ), body: Center( child: Column( mainAxisAlignment: MainAxisAlignment.center, children: [ RaisedButton( child: Text("$_buttonText"), color: Colors.orange, onPressed: () { _isRunning = !_isRunning; if (_isRunning) { setState(() { _timerCount = 0; _buttonText = 'Stop'; }); _timer = Timer.periodic(Duration(milliseconds: 10), (timer) { setState(() { _timerCount++; }); }); } else { _timer?.cancel(); setState(() { _buttonText = 'Start'; }); } }, ), Padding( padding: const EdgeInsets.only(top: 10.0), child: Text("$_timerCount"), ), ], ), ), ); } } |
test_app.zip
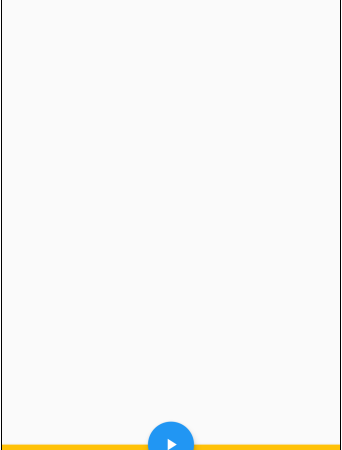
■ BottomAppBar 클래스를 사용하는 방법을 보여준다. ▶ main.dart
1 2 3 4 5 6 7 8 9 10 11 12 13 14 15 16 17 18 19 20 21 22 23 24 25 26 27 28 29 30 31 32 33 34 35 36 37 38 39 40 41 |
import 'package:flutter/material.dart'; void main() => runApp(TestApplication()); class TestApplication extends StatelessWidget { @override Widget build(BuildContext context) { return MaterialApp( title: 'Test Application', theme: ThemeData( primarySwatch: Colors.blue, ), home: MainPage(), ); } } class MainPage extends StatelessWidget { @override Widget build(BuildContext context) { return Scaffold( appBar: AppBar( title: Text('Test Application'), ), body: Container(), bottomNavigationBar: BottomAppBar( child: Container( height: 50.0, color: Colors.amber, ), ), floatingActionButton: FloatingActionButton( child: Icon(Icons.play_arrow), onPressed: () { }, ), floatingActionButtonLocation: FloatingActionButtonLocation.centerDocked, ); } } |
test_app.zip
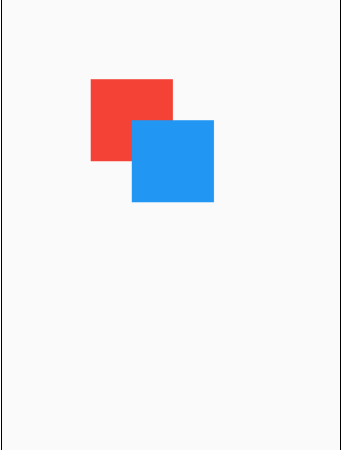
■ Positioned 클래스를 사용하는 방법을 보여준다. ▶ main.dart
1 2 3 4 5 6 7 8 9 10 11 12 13 14 15 16 17 18 19 20 21 22 23 24 25 26 27 28 29 30 31 32 33 34 35 36 37 38 39 40 41 42 43 44 45 46 47 48 49 50 51 52 53 54 55 56 57 |
import 'package:flutter/material.dart'; void main() { runApp(TestApplication()); } class TestApplication extends StatelessWidget { @override Widget build(BuildContext context) { return MaterialApp( title: 'Test Application', theme: ThemeData( primarySwatch: Colors.blue, ), home: MainPage(), ); } } class MainPage extends StatelessWidget { @override Widget build(BuildContext context) { return Scaffold( appBar: AppBar( title: Text('Test Application'), ), body: Stack( children: [ Positioned( left: 100, top: 100, child: Container( color: Colors.red, width: 100, height: 100, padding: const EdgeInsets.all(8.0), margin: const EdgeInsets.all(8.0), ), ), Positioned( left: 150, top: 150, child: Container( color: Colors.blue, width: 100, height: 100, padding: const EdgeInsets.all(8.0), margin: const EdgeInsets.all(8.0), ), ), ] ), ); } } |
test_app.zip
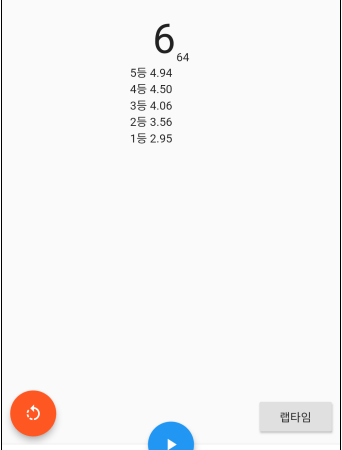
■ 스톱워치(Stopwatch)를 만드는 방법을 보여준다. ▶ main.dart
1 2 3 4 5 6 7 8 9 10 11 12 13 14 15 16 17 18 19 20 21 22 23 24 25 26 27 28 29 30 31 32 33 34 35 36 37 38 39 40 41 42 43 44 45 46 47 48 49 50 51 52 53 54 55 56 57 58 59 60 61 62 63 64 65 66 67 68 69 70 71 72 73 74 75 76 77 78 79 80 81 82 83 84 85 86 87 88 89 90 91 92 93 94 95 96 97 98 99 100 101 102 103 104 105 106 107 108 109 110 111 112 113 114 115 116 117 118 119 120 121 122 123 124 125 126 127 128 129 130 131 132 133 134 135 136 137 138 139 140 141 142 143 144 145 146 147 148 149 150 151 152 153 |
import 'dart:async'; import 'package:flutter/material.dart'; void main() => runApp(TestApplication()); class TestApplication extends StatelessWidget { @override Widget build(BuildContext context) { return MaterialApp( title: 'Test Application', theme: ThemeData( primarySwatch: Colors.blue, ), home: MainPage(), ); } } class MainPage extends StatefulWidget { MainPage({Key key}) : super(key: key); @override _MainPageState createState() => _MainPageState(); } class _MainPageState extends State<MainPage> { Timer _timer; int _timeCount = 0; bool _isRunning = false; List<String> _lapTimeList = []; @override void dispose() { _timer?.cancel(); super.dispose(); } Widget build(BuildContext context) { return Scaffold( appBar: AppBar( title: Text('스톱워치'), ), body: _buildBody(), bottomNavigationBar: BottomAppBar( child: Container( height: 50.0, ), ), floatingActionButton: FloatingActionButton( child: _isRunning ? Icon(Icons.pause) : Icon(Icons.play_arrow), onPressed: () => setState(() { _clickPlayButton(); }), ), floatingActionButtonLocation: FloatingActionButtonLocation.centerDocked, ); } Widget _buildBody() { int secondCount = _timeCount ~/ 100; String hundredthCount = '${_timeCount % 100}'.padLeft(2, '0'); return Center( child: Padding( padding: const EdgeInsets.only(top: 30), child: Stack( children: <Widget>[ Column( children: <Widget>[ Row( mainAxisAlignment: MainAxisAlignment.center, crossAxisAlignment: CrossAxisAlignment.end, children: <Widget>[ Text( '$secondCount', style: TextStyle(fontSize: 50.0), ), Text('$hundredthCount'), ], ), Container( width: 100, height: 200, child: ListView( children: _lapTimeList.map((time) => Text(time)).toList(), ), ) ], ), Positioned( left: 10, bottom: 10, child: FloatingActionButton( backgroundColor: Colors.deepOrange, onPressed: _clickResetButton, child: Icon(Icons.rotate_left), ), ), Positioned( right: 10, bottom: 10, child: RaisedButton( onPressed: () { setState(() { _recordLapTime('$secondCount.$hundredthCount'); }); }, child: Text('랩타임'), ), ) ], ), ), ); } void _start() { _timer = Timer.periodic(Duration(milliseconds: 10), (timer) { setState(() { _timeCount++; }); }); } void _pause() { _timer?.cancel(); } void _clickPlayButton() { _isRunning = !_isRunning; if (_isRunning) { _start(); } else { _pause(); } } void _clickResetButton() { setState(() { _isRunning = false; _timer?.cancel(); _lapTimeList.clear(); _timeCount = 0; }); } void _recordLapTime(String time) { _lapTimeList.insert(0, '${_lapTimeList.length + 1}등 $time'); } } |
test_app.zip
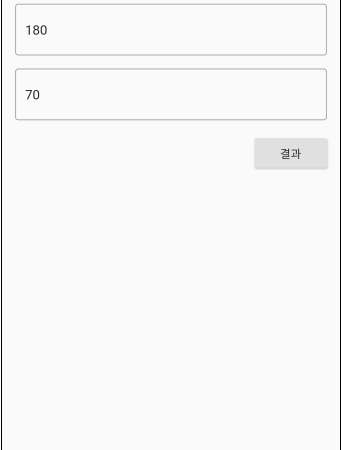
■ 비만도 계산기를 만드는 방법을 보여준다. ▶ main.dart
1 2 3 4 5 6 7 8 9 10 11 12 13 14 15 16 17 18 19 20 21 22 23 24 25 26 27 28 29 30 31 32 33 34 35 36 37 38 39 40 41 42 43 44 45 46 47 48 49 50 51 52 53 54 55 56 57 58 59 60 61 62 63 64 65 66 67 68 69 70 71 72 73 74 75 76 77 78 79 80 81 82 83 84 85 86 87 88 89 90 91 92 93 94 95 96 97 98 99 100 101 102 103 104 105 106 107 108 109 110 111 112 113 114 115 116 117 118 119 120 121 122 123 124 125 126 127 128 129 130 131 132 133 134 135 136 137 138 139 140 141 142 143 144 145 146 147 148 149 150 151 152 153 154 155 156 157 158 159 160 161 162 163 164 165 166 167 168 169 170 171 172 173 174 175 176 |
import 'package:flutter/material.dart'; void main() => runApp(TestApplication()); class TestApplication extends StatelessWidget { @override Widget build(BuildContext context) { return MaterialApp( title: 'Test Application', theme: ThemeData( primarySwatch: Colors.blue, ), home: MainPage(), ); } } class MainPage extends StatefulWidget { @override _MainPageState createState() => _MainPageState(); } class _MainPageState extends State<MainPage> { final GlobalKey<FormState> _formKey = GlobalKey<FormState>(); final _heightController = TextEditingController(); final _weightController = TextEditingController(); @override void dispose() { _heightController.dispose(); _weightController.dispose(); super.dispose(); } @override Widget build(BuildContext context) { return Scaffold( appBar: AppBar(title: Text('비만도 계산기')), body: Container( padding: const EdgeInsets.all(16.0), child: Form( key: _formKey, child: Column( children: <Widget>[ TextFormField( decoration: InputDecoration( border: OutlineInputBorder(), hintText: '신장', ), controller: _heightController, keyboardType: TextInputType.number, validator: (value) { if (value.trim().isEmpty) { return '신장(cm)을 입력해 주시기 바랍니다.'; } return null; }, ), SizedBox( height: 16.0, ), TextFormField( decoration: InputDecoration( border: OutlineInputBorder(), hintText: '체중', ), controller: _weightController, keyboardType: TextInputType.number, validator: (value) { if (value.trim().isEmpty) { return '체중(kg)을 입력해 주시기 바랍니다.'; } return null; }, ), Container( margin: const EdgeInsets.only(top: 16.0), alignment: Alignment.centerRight, child: RaisedButton( onPressed: () { if (_formKey.currentState.validate()) { Navigator.push( context, MaterialPageRoute( builder: (context) => ResultPage( double.parse(_heightController.text.trim()), double.parse(_weightController.text.trim()), ), ), ); } }, child: Text('결과'), ), ) ], ), ), ), ); } } class ResultPage extends StatelessWidget { final double height; final double weight; ResultPage(this.height, this.weight); @override Widget build(BuildContext context) { final double bmi = weight / ((height / 100) * (height / 100)); return Scaffold( appBar: AppBar(title: Text('비만도 계산기')), body: Center( child: Column( mainAxisAlignment: MainAxisAlignment.center, children: <Widget>[ Text( _getText(bmi), style: TextStyle(fontSize: 36), ), SizedBox( height: 16, ), _getIcon(bmi), ], ), ), ); } String _getText(double bmi) { String result = '저체중'; if (bmi >= 35) { result = '고도 비만'; } else if (bmi >= 30) { result = '2단계 비만'; } else if (bmi >= 25) { result = '1단계 비만'; } else if (bmi >= 23) { result = '과체중'; } else if (bmi >= 18.5) { result = '정상'; } return result; } Widget _getIcon(double bmi) { if (bmi >= 23) { return Icon( Icons.sentiment_very_dissatisfied, color: Colors.red, size: 100, ); } else if (bmi >= 18.5) { return Icon( Icons.sentiment_satisfied, color: Colors.green, size: 100, ); } else { return Icon( Icons.sentiment_dissatisfied, color: Colors.orange, size: 100, ); } } } |
test_app.zip
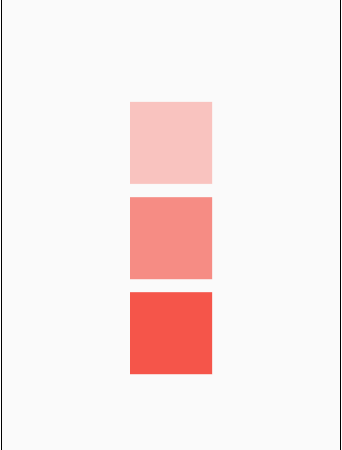
■ Opacity 클래스의 opacity 속성을 사용해 불투명도를 표시하는 방법을 보여준다. ▶ main.dart
1 2 3 4 5 6 7 8 9 10 11 12 13 14 15 16 17 18 19 20 21 22 23 24 25 26 27 28 29 30 31 32 33 34 35 36 37 38 39 40 41 42 43 44 45 46 47 48 49 50 51 52 53 54 55 56 57 58 59 60 61 62 63 64 65 66 67 68 |
import 'package:flutter/material.dart'; void main() { runApp(TestApplication()); } class TestApplication extends StatelessWidget { @override Widget build(BuildContext context) { return MaterialApp( title: 'Test Application', theme: ThemeData( primarySwatch: Colors.blue, ), home: MainPage(), ); } } class MainPage extends StatelessWidget { @override Widget build(BuildContext context) { return Scaffold( appBar: AppBar( title: Text('Test Application'), ), body: Center( child: Column( mainAxisAlignment: MainAxisAlignment.center, children: [ Opacity( opacity: 0.3, child: Container( color: Colors.red, width: 100, height: 100, padding: const EdgeInsets.all(8.0), margin: const EdgeInsets.all(8.0), ), ), Opacity( opacity: 0.6, child: Container( color: Colors.red, width: 100, height: 100, padding: const EdgeInsets.all(8.0), margin: const EdgeInsets.all(8.0), ), ), Opacity( opacity: 0.9, child: Container( color: Colors.red, width: 100, height: 100, padding: const EdgeInsets.all(8.0), margin: const EdgeInsets.all(8.0), ), ), ], ), ), ); } } |
test_app.zip
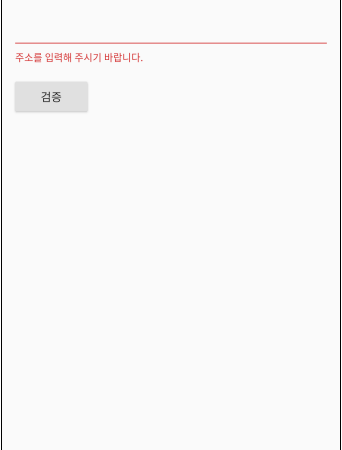
■ ScaffoldState 클래스의 showSnackBar 메소드를 사용해 스낵바를 표시하는 방법을 보여준다. ▶ main.dart
1 2 3 4 5 6 7 8 9 10 11 12 13 14 15 16 17 18 19 20 21 22 23 24 25 26 27 28 29 30 31 32 33 34 35 36 37 38 39 40 41 42 43 44 45 46 47 48 49 50 51 52 53 54 55 56 57 58 59 60 61 62 63 |
import 'package:flutter/material.dart'; void main() => runApp(TestApplication()); class TestApplication extends StatelessWidget { @override Widget build(BuildContext context) { return MaterialApp( title: 'Test Application', home: Scaffold( appBar: AppBar( title: Text('Test Application'), ), body: MainPage(), ), ); } } class MainPage extends StatefulWidget { @override _MainPageState createState() => _MainPageState(); } class _MainPageState extends State<MainPage> { final GlobalKey<FormState> _formKey = GlobalKey<FormState>(); @override Widget build(BuildContext context) { return Padding( padding: const EdgeInsets.all(16.0), child: Form( key: _formKey, child: Column( crossAxisAlignment: CrossAxisAlignment.start, children: <Widget>[ TextFormField( validator: (value) { if (value.isEmpty) { return '주소를 입력해 주시기 바랍니다.'; } return null; }, ), Padding( padding: const EdgeInsets.symmetric(vertical: 16.0), child: RaisedButton( child: Text('검증'), onPressed: () { if (_formKey.currentState.validate()) { Scaffold.of(context).showSnackBar(SnackBar(content: Text('정상적으로 입력되었습니다.'))); } }, ), ), ], ), ), ); } } |
■ TextFormField 클래스의 validator 속성을 사용해 입력 값을 검증하는 방법을 보여준다. ▶ main.dart
1 2 3 4 5 6 7 8 9 10 11 12 13 14 15 16 17 18 19 20 21 22 23 24 25 26 27 28 29 30 31 32 33 34 35 36 37 38 39 40 41 42 43 44 45 46 47 48 49 50 51 52 53 54 55 56 57 58 59 60 61 62 63 |
import 'package:flutter/material.dart'; void main() => runApp(TestApplication()); class TestApplication extends StatelessWidget { @override Widget build(BuildContext context) { return MaterialApp( title: 'Test Application', home: Scaffold( appBar: AppBar( title: Text('Test Application'), ), body: MainPage(), ), ); } } class MainPage extends StatefulWidget { @override _MainPageState createState() => _MainPageState(); } class _MainPageState extends State<MainPage> { final GlobalKey<FormState> _formKey = GlobalKey<FormState>(); @override Widget build(BuildContext context) { return Padding( padding: const EdgeInsets.all(16.0), child: Form( key: _formKey, child: Column( crossAxisAlignment: CrossAxisAlignment.start, children: <Widget>[ TextFormField( validator: (value) { if (value.isEmpty) { return '주소를 입력해 주시기 바랍니다.'; } return null; }, ), Padding( padding: const EdgeInsets.symmetric(vertical: 16.0), child: RaisedButton( child: Text('검증'), onPressed: () { if (_formKey.currentState.validate()) { Scaffold.of(context).showSnackBar(SnackBar(content: Text('정상적으로 입력되었습니다.'))); } }, ), ), ], ), ), ); } } |
■ Form 클래스에서 입력 값을 검증하는 방법을 보여준다. ▶ main.dart
1 2 3 4 5 6 7 8 9 10 11 12 13 14 15 16 17 18 19 20 21 22 23 24 25 26 27 28 29 30 31 32 33 34 35 36 37 38 39 40 41 42 43 44 45 46 47 48 49 50 51 52 53 54 55 56 57 58 59 60 61 62 63 |
import 'package:flutter/material.dart'; void main() => runApp(TestApplication()); class TestApplication extends StatelessWidget { @override Widget build(BuildContext context) { return MaterialApp( title: 'Test Application', home: Scaffold( appBar: AppBar( title: Text('Test Application'), ), body: MainPage(), ), ); } } class MainPage extends StatefulWidget { @override _MainPageState createState() => _MainPageState(); } class _MainPageState extends State<MainPage> { final GlobalKey<FormState> _formKey = GlobalKey<FormState>(); @override Widget build(BuildContext context) { return Padding( padding: const EdgeInsets.all(16.0), child: Form( key: _formKey, child: Column( crossAxisAlignment: CrossAxisAlignment.start, children: <Widget>[ TextFormField( validator: (value) { if (value.isEmpty) { return '주소를 입력해 주시기 바랍니다.'; } return null; }, ), Padding( padding: const EdgeInsets.symmetric(vertical: 16.0), child: RaisedButton( child: Text('검증'), onPressed: () { if (_formKey.currentState.validate()) { Scaffold.of(context).showSnackBar(SnackBar(content: Text('정상적으로 입력되었습니다.'))); } }, ), ), ], ), ), ); } } |
test_app.zip
■ TextEditingController 클래스를 사용하는 방법을 보여준다. ▶ main.dart
1 2 3 4 5 6 7 8 9 10 11 12 13 14 15 16 17 18 19 20 21 22 23 24 25 26 27 28 29 30 31 32 33 34 35 36 37 38 39 40 41 42 43 44 45 46 47 48 49 50 51 52 53 54 55 56 57 58 59 60 61 62 63 64 |
import 'package:flutter/material.dart'; void main() => runApp(TestApplication()); class TestApplication extends StatelessWidget { @override Widget build(BuildContext context) { return MaterialApp( title: 'Test Application', home: MainPage(), ); } } class MainPage extends StatefulWidget { @override _MainPageState createState() => _MainPageState(); } class _MainPageState extends State<MainPage> { final controller = TextEditingController(); @override void initState() { super.initState(); controller.addListener(_printLatestValue); } @override void dispose() { controller.dispose(); super.dispose(); } @override Widget build(BuildContext context) { return Scaffold( appBar: AppBar( title: Text('Test Application'), ), body: Padding( padding: const EdgeInsets.all(16.0), child: Column( children: <Widget>[ TextField( onChanged: (text) { print("첫 번째 텍스트 필드 : $text"); }, ), TextField( controller: controller, ), ], ), ), ); } _printLatestValue() { print("두 번째 텍스트 필드 : ${controller.text}"); } } |
test_app.zip
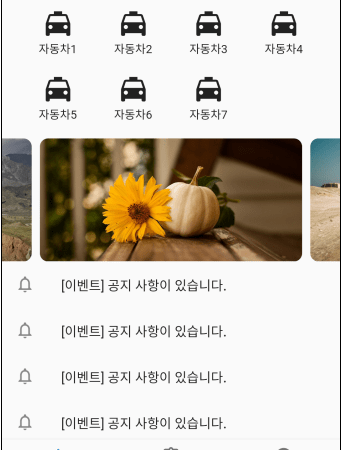
■ CarouselSlider 클래스에서 자동 스크롤 슬라이더를 사용하는 방법을 보여준다. ▶ pubspec.yaml
1 2 3 4 5 6 7 8 9 10 11 12 13 14 15 16 17 18 19 20 21 22 |
name: test_app description: A new Flutter application. publish_to: 'none' version: 1.0.0+1 environment: sdk: ">=2.7.0 <3.0.0" dependencies: flutter: sdk: flutter cupertino_icons: ^1.0.2 carousel_slider: ^3.0.0 dev_dependencies: flutter_test: sdk: flutter flutter: uses-material-design: true assets: - assets/image1.jpg - assets/image2.jpg - assets/image3.jpg |
▶ main.dart
1 2 3 4 5 6 7 8 9 10 11 12 13 14 15 16 17 18 19 20 21 22 23 24 25 26 27 28 29 30 31 32 33 34 35 36 37 38 39 40 41 42 43 44 45 46 47 48 49 50 51 52 53 54 55 56 57 58 59 60 61 62 63 64 65 66 67 68 69 70 71 72 73 74 75 76 77 78 79 80 81 82 83 84 85 86 87 88 89 90 91 92 93 94 95 96 97 98 99 100 101 102 103 104 105 106 107 108 109 110 111 112 113 114 115 116 117 118 119 120 121 122 123 124 125 126 127 128 129 130 131 132 133 134 135 136 137 138 139 140 141 142 143 144 145 146 147 148 149 150 151 152 153 154 155 156 157 158 159 160 161 162 163 164 165 166 167 168 169 170 171 172 173 174 175 176 177 178 179 180 181 182 183 184 185 186 187 188 189 190 191 192 193 194 195 196 197 198 199 200 201 202 203 204 205 206 207 208 209 210 211 212 213 214 215 216 217 218 219 220 221 222 223 224 225 226 227 228 229 230 231 232 233 234 235 236 237 238 239 240 241 242 243 244 245 246 247 248 249 250 251 252 253 254 255 256 257 258 259 260 261 262 263 264 265 266 267 268 269 270 271 272 273 274 275 276 277 278 279 280 281 282 283 284 285 286 287 288 289 290 291 |
import 'package:flutter/material.dart'; import 'package:carousel_slider/carousel_slider.dart'; final imageList = [ Image.asset('assets/image1.jpg', fit: BoxFit.cover), Image.asset('assets/image2.jpg', fit: BoxFit.cover), Image.asset('assets/image3.jpg', fit: BoxFit.cover), ]; void main() { runApp(TestApplication()); } class TestApplication extends StatelessWidget { @override Widget build(BuildContext context) { return MaterialApp( title: 'Test Application', theme: ThemeData( primarySwatch: Colors.blue, ), home: MainPage(), ); } } class MainPage extends StatefulWidget { @override _MainPageState createState() => _MainPageState(); } class _MainPageState extends State<MainPage> { int _index = 0; List<StatelessWidget> _pageList = [ HomePage(), ServicePage(), ProfilePage(), ]; @override Widget build(BuildContext context) { return Scaffold( appBar: AppBar( backgroundColor: Colors.white, centerTitle: true, title: Text( 'Test Application', style: TextStyle(color: Colors.black), ), actions: <Widget>[ IconButton( icon: Icon( Icons.add, color: Colors.black, ), onPressed: () {}, ), ], ), body: _pageList[_index], bottomNavigationBar: BottomNavigationBar( items: [ BottomNavigationBarItem( icon: Icon(Icons.home), label: 'Home', ), BottomNavigationBarItem( icon: Icon(Icons.assignment), label: 'Service', ), BottomNavigationBarItem( icon: Icon(Icons.account_circle), label: 'Profiles', ), ], onTap: (index) { setState(() { _index = index; }); }, ), ); } } class HomePage extends StatelessWidget { @override Widget build(BuildContext context) { return ListView( children: <Widget>[ _buildTop(), _buildMiddle(), _buildBottom(), ], ); } Widget _buildTop() { return Padding( padding: const EdgeInsets.only(top: 20, bottom: 20), child: Column( children: [ Row( mainAxisAlignment: MainAxisAlignment.spaceEvenly, children: [ GestureDetector( child: Column( children: <Widget>[ Icon( Icons.local_taxi, size: 40, ), Text('자동차1'), ], ), onTap: () { print('자동차1 클릭'); }, ), GestureDetector( child: Column( children: <Widget>[ Icon( Icons.local_taxi, size: 40, ), Text('자동차2'), ], ), onTap: () { print('자동차2 클릭'); }, ), GestureDetector( child: Column( children: <Widget>[ Icon( Icons.local_taxi, size: 40, ), Text('자동차3'), ], ), onTap: () { print('자동차3 클릭'); }, ), GestureDetector( child: Column( children: <Widget>[ Icon( Icons.local_taxi, size: 40, ), Text('자동차4'), ], ), onTap: () { print('자동차4 클릭'); }, ), ], ), SizedBox( height: 20, ), Row( mainAxisAlignment: MainAxisAlignment.spaceEvenly, children: [ GestureDetector( child: Column( children: <Widget>[ Icon( Icons.local_taxi, size: 40, ), Text('자동차5'), ], ), onTap: () { print('자동차5 클릭'); }, ), GestureDetector( child: Column( children: <Widget>[ Icon( Icons.local_taxi, size: 40, ), Text('자동차6'), ], ), onTap: () { print('자동차6 클릭'); }, ), GestureDetector( child: Column( children: <Widget>[ Icon( Icons.local_taxi, size: 40, ), Text('자동차7'), ], ), onTap: () { print('자동차7 클릭'); }, ), Opacity( opacity: 0.0, child: Column( children: <Widget>[ Icon( Icons.local_taxi, size: 40, ), Text('자동차8'), ], ), ), ], ), ], ), ); } Widget _buildMiddle() { return CarouselSlider( options: CarouselOptions(height: 150.0, autoPlay: true), items: imageList.map((image) { return Builder( builder: (BuildContext context) { return Container( width: MediaQuery.of(context).size.width, margin: EdgeInsets.symmetric(horizontal: 5.0), child: ClipRRect( borderRadius: BorderRadius.circular(10.0), child: image, ), ); }, ); }).toList(), ); } Widget _buildBottom() { final _itemList = List.generate(10, (i) { return ListTile( leading: Icon(Icons.notifications_none), title: Text('[이벤트] 공지 사항이 있습니다.'), ); }); return ListView( physics: NeverScrollableScrollPhysics(), shrinkWrap: true, children: _itemList, ); } } class ServicePage extends StatelessWidget { @override Widget build(BuildContext context) { return Center( child: Text( 'Service', style: TextStyle(fontSize: 40), ), ); } } class ProfilePage extends StatelessWidget { @override Widget build(BuildContext context) { return Center( child: Text( 'Profile', style: TextStyle(fontSize: 40), ), ); } } |
test_app.zip
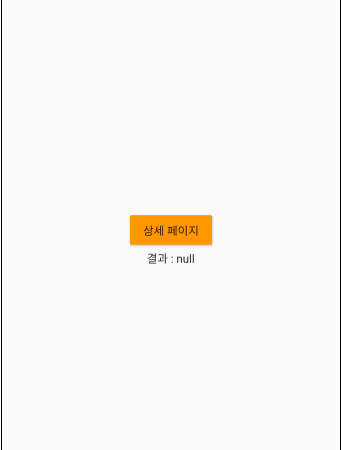
■ Navigator 클래스의 pushNamed 정적 메소드를 사용해 화면을 이동하는 방법을 보여준다. ▶ person.dart
1 2 3 4 5 6 7 8 |
class Person { String name; int age; Person(this.name, this.age); } |
▶ detail_page.dart
1 2 3 4 5 6 7 8 9 10 11 12 13 14 15 16 17 18 19 20 21 22 23 24 25 26 27 28 29 30 31 32 33 34 35 36 37 |
import 'package:flutter/material.dart'; import 'package:test_app/person.dart'; class DetailPage extends StatelessWidget { @override Widget build(BuildContext context) { final Person person = ModalRoute.of(context).settings.arguments; return Scaffold( appBar: AppBar( title: Text('Test Application / Detail Page'), ), body: Center( child: Column( mainAxisAlignment: MainAxisAlignment.center, children: <Widget>[ Text( '${person.name}, ${person.age}' ), SizedBox( height: 10, ), RaisedButton( child: Text('메인 페이지'), color: Colors.orange, onPressed: () { Navigator.pop(context, 'OK'); }, ) ], ), ), ); } } |
▶ main_page.dart
1 2 3 4 5 6 7 8 9 10 11 12 13 14 15 16 17 18 19 20 21 22 23 24 25 26 27 28 29 30 31 32 33 34 35 36 37 38 39 40 41 42 43 44 45 46 47 48 49 50 51 52 53 54 |
import 'package:flutter/material.dart'; import 'package:test_app/person.dart'; import 'package:test_app/detail_page.dart'; class MainPage extends StatefulWidget { @override _MainPageState createState() => _MainPageState(); } class _MainPageState extends State<MainPage> { String _result; @override Widget build(BuildContext context) { return Scaffold( appBar: AppBar( title: Text('Test Application / Main Page'), ), body: Center( child: Column( mainAxisAlignment: MainAxisAlignment.center, children: <Widget>[ RaisedButton( child: Text('상세 페이지'), color: Colors.orange, onPressed: () async { setState(() { _result = ''; }); final Person person = Person('홍길동', 20); final result = await Navigator.pushNamed( context, '/detail', arguments: person, ); setState(() { _result = result; }); }, ), Text( '결과 : $_result', ), ], ), ), ); } } |
▶ main.dart