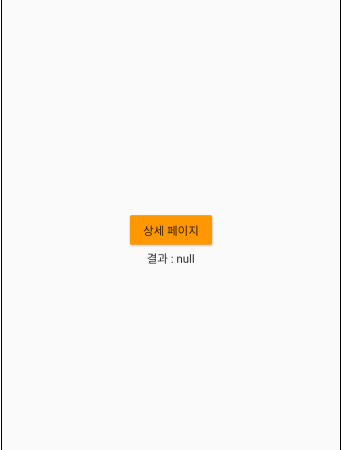
■ Navigator 클래스의 push/pop 정적 메소드를 사용해 화면을 이동하는 방법을 보여준다. ▶ person.dart
|
class Person { String name; int age; Person(this.name, this.age); } |
▶ detail_page.dart
1 2 3 4 5 6 7 8 9 10 11 12 13 14 15 16 17 18 19 20 21 22 23 24 25 26 27 28 29 30 31 32 33 34 35 36 37 38 39
|
import 'package:flutter/material.dart'; import 'package:test_app/person.dart'; class DetailPage extends StatelessWidget { final Person person; DetailPage({@required this.person}); @override Widget build(BuildContext context) { return Scaffold( appBar: AppBar( title: Text('Test Application / Detail Page'), ), body: Center( child: Column( mainAxisAlignment: MainAxisAlignment.center, children: <Widget>[ Text( '${person.name}, ${person.age}' ), SizedBox( height: 10, ), RaisedButton( child: Text('메인 페이지'), color: Colors.orange, onPressed: () { Navigator.pop(context, 'OK'); }, ) ], ), ), ); } } |
▶ main_page.dart
1 2 3 4 5 6 7 8 9 10 11 12 13 14 15 16 17 18 19 20 21 22 23 24 25 26 27 28 29 30 31 32 33 34 35 36 37 38 39 40 41 42 43 44 45 46 47 48 49 50 51 52 53
|
import 'package:flutter/material.dart'; import 'package:test_app/person.dart'; import 'package:test_app/detail_page.dart'; class MainPage extends StatefulWidget { @override _MainPageState createState() => _MainPageState(); } class _MainPageState extends State<MainPage> { String _result; @override Widget build(BuildContext context) { return Scaffold( appBar: AppBar( title: Text('Test Application / Main Page'), ), body: Center( child: Column( mainAxisAlignment: MainAxisAlignment.center, children: <Widget>[ RaisedButton( child: Text('상세 페이지'), color: Colors.orange, onPressed: () async { setState(() { _result = ''; }); final Person person = Person('홍길동', 20); final result = await Navigator.push( context, MaterialPageRoute(builder: (context) => DetailPage(person: person)), ); setState(() { _result = result; }); }, ), Text( '결과 : $_result', ), ], ), ), ); } } |
▶ main.dart
더 읽기
■ import 키워드를 사용해 파일을 분할하는 방법을 보여준다. ▶ person.dart
|
class Person { String name; int age; Person(this.name, this.age); } |
▶ detail_page.dart
1 2 3 4 5 6 7 8 9 10 11 12 13 14 15 16 17 18 19 20 21 22 23 24 25 26 27 28 29 30 31 32 33 34 35 36 37 38 39
|
import 'package:flutter/material.dart'; import 'package:test_app/person.dart'; class DetailPage extends StatelessWidget { final Person person; DetailPage({@required this.person}); @override Widget build(BuildContext context) { return Scaffold( appBar: AppBar( title: Text('Test Application / Detail Page'), ), body: Center( child: Column( mainAxisAlignment: MainAxisAlignment.center, children: <Widget>[ Text( '${person.name}, ${person.age}' ), SizedBox( height: 10, ), RaisedButton( child: Text('메인 페이지'), color: Colors.orange, onPressed: () { Navigator.pop(context, 'OK'); }, ) ], ), ), ); } } |
▶ main_page.dart
1 2 3 4 5 6 7 8 9 10 11 12 13 14 15 16 17 18 19 20 21 22 23 24 25 26 27 28 29 30 31 32 33 34 35 36 37 38 39 40 41 42 43 44 45 46 47 48 49 50 51 52 53
|
import 'package:flutter/material.dart'; import 'package:test_app/person.dart'; import 'package:test_app/detail_page.dart'; class MainPage extends StatefulWidget { @override _MainPageState createState() => _MainPageState(); } class _MainPageState extends State<MainPage> { String _result; @override Widget build(BuildContext context) { return Scaffold( appBar: AppBar( title: Text('Test Application / Main Page'), ), body: Center( child: Column( mainAxisAlignment: MainAxisAlignment.center, children: <Widget>[ RaisedButton( child: Text('상세 페이지'), color: Colors.orange, onPressed: () async { setState(() { _result = ''; }); final Person person = Person('홍길동', 20); final result = await Navigator.push( context, MaterialPageRoute(builder: (context) => DetailPage(person: person)), ); setState(() { _result = result; }); }, ), Text( '결과 : $_result', ), ], ), ), ); } } |
▶ main.dart
1 2 3 4 5 6 7 8 9 10 11 12 13 14 15 16 17 18 19 20 21
|
import 'package:flutter/material.dart'; import 'package:test_app/main_page.dart'; void main() { runApp(TestApplication()); } class TestApplication extends StatelessWidget { @override Widget build(BuildContext context) { return MaterialApp( title: 'Test Application', theme: ThemeData( primarySwatch: Colors.blue, ), home: MainPage(), ); } } |
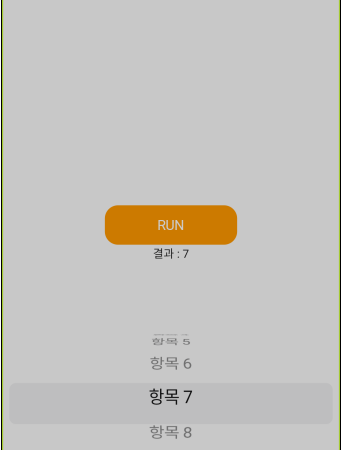
■ CupertinoPicker 클래스를 사용하는 방법을 보여준다. ▶ main.dart
1 2 3 4 5 6 7 8 9 10 11 12 13 14 15 16 17 18 19 20 21 22 23 24 25 26 27 28 29 30 31 32 33 34 35 36 37 38 39 40 41 42 43 44 45 46 47 48 49 50 51 52 53 54 55 56 57 58 59 60 61 62 63 64 65 66 67 68 69 70 71 72 73
|
import 'package:flutter/cupertino.dart'; import 'package:flutter/material.dart'; void main() { runApp(TestApplication()); } class TestApplication extends StatelessWidget { @override Widget build(BuildContext context) { return MaterialApp( title: 'Test Application', theme: ThemeData( primarySwatch: Colors.blue, ), home: MainPage(), ); } } class MainPage extends StatefulWidget { @override _MainPageState createState() => _MainPageState(); } class _MainPageState extends State<MainPage> { final _itemList = List.generate(10, (i) => i); int _result = 0; @override Widget build(BuildContext context) { return Scaffold( appBar: CupertinoNavigationBar( middle: Text('Test Application'), ), body: Center( child: Column( mainAxisAlignment: MainAxisAlignment.center, children: <Widget>[ CupertinoButton( borderRadius: BorderRadius.circular(16.0), color: Colors.orange, child: Text('RUN'), onPressed: () async { await showCupertinoModalPopup( context: context, builder: (context) => Container( height: 200.0, child: CupertinoPicker( children: _itemList.map((e) => Text('항목 $e')).toList(), itemExtent: 50.0, scrollController: FixedExtentScrollController(initialItem: _result), onSelectedItemChanged: (int index) { setState(() { _result = _itemList[index]; }); }, ) ), ); }, ), Text( '결과 : $_result', ), ], ), ), ); } } |
test_app.zip
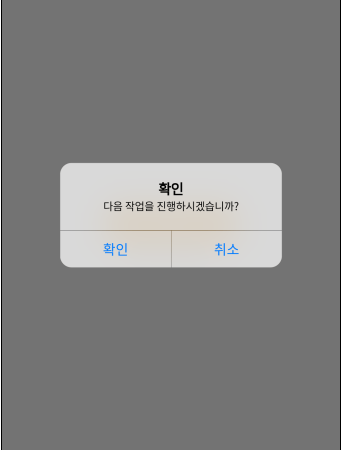
■ CupertinoAlertDialog 클래스에서 알림 대화 상자를 사용하는 방법을 보여준다. ▶ main.dart
1 2 3 4 5 6 7 8 9 10 11 12 13 14 15 16 17 18 19 20 21 22 23 24 25 26 27 28 29 30 31 32 33 34 35 36 37 38 39 40 41 42 43 44 45 46 47 48 49 50 51 52 53 54 55 56 57 58 59 60 61 62 63 64 65 66 67 68 69 70 71 72 73 74 75 76 77 78 79 80 81
|
import 'package:flutter/cupertino.dart'; import 'package:flutter/material.dart'; void main() { runApp(TestApplication()); } class TestApplication extends StatelessWidget { @override Widget build(BuildContext context) { return MaterialApp( title: 'Test Application', theme: ThemeData( primarySwatch: Colors.blue, ), home: MainPage(), ); } } class MainPage extends StatefulWidget { @override _MainPageState createState() => _MainPageState(); } class _MainPageState extends State<MainPage> { String _dialogResult = ''; @override Widget build(BuildContext context) { return Scaffold( appBar: CupertinoNavigationBar( middle: Text('Test Application'), ), body: Center( child: Column( mainAxisAlignment: MainAxisAlignment.center, children: <Widget>[ CupertinoButton( borderRadius: BorderRadius.circular(16.0), color: Colors.orange, child: Text('RUN'), onPressed: () async { String result = await showDialog( context: context, builder: (context) => CupertinoAlertDialog( title: Text('확인'), content: Text('다음 작업을 진행하시겠습니까?'), actions: [ CupertinoDialogAction( child: Text('확인'), onPressed: () { Navigator.of(context).pop('OK'); }, ), CupertinoDialogAction( child: Text('취소'), onPressed: () { Navigator.of(context).pop('CANCEL'); }, ), ], ), ); setState(() { _dialogResult = result; }); }, ), Text( '결과 : $_dialogResult', ), ], ), ), ); } } |
test_app.zip
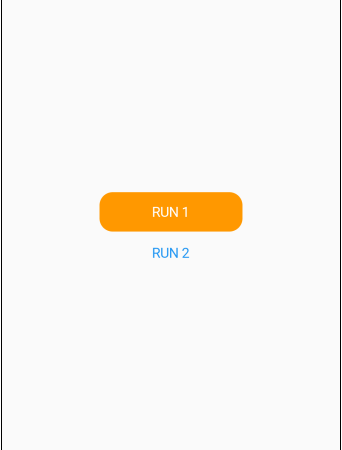
■ CupertinoButton 클래스를 사용하는 방법을 보여준다. ▶ main.dart
1 2 3 4 5 6 7 8 9 10 11 12 13 14 15 16 17 18 19 20 21 22 23 24 25 26 27 28 29 30 31 32 33 34 35 36 37 38 39 40 41 42 43 44 45 46 47 48 49 50 51 52 53 54
|
import 'package:flutter/cupertino.dart'; import 'package:flutter/material.dart'; void main() { runApp(TestApplication()); } class TestApplication extends StatelessWidget { @override Widget build(BuildContext context) { return MaterialApp( title: 'Test Application', theme: ThemeData( primarySwatch: Colors.blue, ), home: MainPage(), ); } } class MainPage extends StatefulWidget { @override _MainPageState createState() => _MainPageState(); } class _MainPageState extends State<MainPage> { @override Widget build(BuildContext context) { return Scaffold( appBar: CupertinoNavigationBar( middle: Text('Test Application'), ), body: Center( child: Column( mainAxisAlignment: MainAxisAlignment.center, children: <Widget>[ CupertinoButton( borderRadius: BorderRadius.circular(16.0), color: Colors.orange, child: Text('RUN 1'), onPressed: () { }, ), CupertinoButton( child: Text('RUN 2'), onPressed: () { }, ), ], ), ), ); } } |
test_app.zip
■ CupertinoSwitch 클래스를 사용하는 방법을 보여준다. ▶ main.dart
1 2 3 4 5 6 7 8 9 10 11 12 13 14 15 16 17 18 19 20 21 22 23 24 25 26 27 28 29 30 31 32 33 34 35 36 37 38 39 40 41 42 43 44 45 46 47 48 49 50 51 52 53 54
|
import 'package:flutter/cupertino.dart'; import 'package:flutter/material.dart'; void main() { runApp(TestApplication()); } class TestApplication extends StatelessWidget { @override Widget build(BuildContext context) { return MaterialApp( title: 'Test Application', theme: ThemeData( primarySwatch: Colors.blue, ), home: MainPage(), ); } } class MainPage extends StatefulWidget { @override _MainPageState createState() => _MainPageState(); } class _MainPageState extends State<MainPage> { bool _isON = false; @override Widget build(BuildContext context) { return Scaffold( appBar: CupertinoNavigationBar( middle: Text('Test Application'), ), body: Center( child: Column( mainAxisAlignment: MainAxisAlignment.center, children: <Widget>[ CupertinoSwitch( value: _isON, onChanged: (bool value) { setState(() { _isON = value; }); }, ), ], ), ), ); } } |
test_app.zip
■ CupertinoNavigationBar 클래스를 사용하는 방법을 보여준다. ▶ main.dart
1 2 3 4 5 6 7 8 9 10 11 12 13 14 15 16 17 18 19 20 21 22 23 24 25 26 27 28 29 30 31 32 33 34 35 36 37 38 39 40 41 42 43 44 45 46 47 48 49 50 51 52 53 54
|
import 'package:flutter/cupertino.dart'; import 'package:flutter/material.dart'; void main() { runApp(TestApplication()); } class TestApplication extends StatelessWidget { @override Widget build(BuildContext context) { return MaterialApp( title: 'Test Application', theme: ThemeData( primarySwatch: Colors.blue, ), home: MainPage(), ); } } class MainPage extends StatefulWidget { @override _MainPageState createState() => _MainPageState(); } class _MainPageState extends State<MainPage> { bool _isON = false; @override Widget build(BuildContext context) { return Scaffold( appBar: CupertinoNavigationBar( middle: Text('Test Application'), ), body: Center( child: Column( mainAxisAlignment: MainAxisAlignment.center, children: <Widget>[ CupertinoSwitch( value: _isON, onChanged: (bool value) { setState(() { _isON = value; }); }, ), ], ), ), ); } } |
test_app.zip
■ import 키워드를 사용해 큐퍼티노 디자인 패키지를 임포트하는 방법을 보여준다. ▶ 예제 코드 (DART)
|
import 'package:flutter/cupertino.dart'; |
■ SliverAppBar/SliverList 클래스를 사용하는 방법을 보여준다. ▶ main.dart
1 2 3 4 5 6 7 8 9 10 11 12 13 14 15 16 17 18 19 20 21 22 23 24 25 26 27 28 29 30 31 32 33 34 35 36 37 38 39 40 41 42 43 44 45 46 47 48 49 50 51 52 53 54
|
import 'package:flutter/material.dart'; void main() { runApp(TestApplication()); } class TestApplication extends StatelessWidget { @override Widget build(BuildContext context) { return MaterialApp( title: 'Test Application', theme: ThemeData( primarySwatch: Colors.blue, ), home: MainPage(), ); } } class MainPage extends StatelessWidget { final _itemList = List.generate(50, (i) => ListTile(title: Text('항목 $i'))); @override Widget build(BuildContext context) { return Scaffold( body:CustomScrollView( slivers: <Widget>[ SliverAppBar( pinned: true, expandedHeight: 180.0, flexibleSpace: FlexibleSpaceBar( title: Text('Test Application'), background: Image.asset( 'assets/sample.png', fit: BoxFit.cover, ), ), actions: <Widget>[ IconButton( icon: Icon(Icons.access_alarm), onPressed: () {}, ) ], ), SliverList( delegate: SliverChildListDelegate(_itemList), ), ], ), ); } } |
test_app.zip
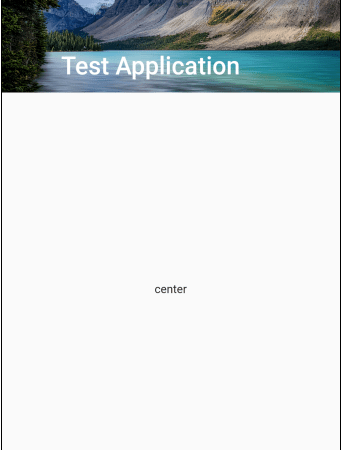
■ SliverAppBar/SliverFillRemaining 클래스를 사용하는 방법을 보여준다. ▶ main.dart
1 2 3 4 5 6 7 8 9 10 11 12 13 14 15 16 17 18 19 20 21 22 23 24 25 26 27 28 29 30 31 32 33 34 35 36 37 38 39 40 41 42 43 44 45 46 47 48
|
import 'package:flutter/material.dart'; void main() { runApp(TestApplication()); } class TestApplication extends StatelessWidget { @override Widget build(BuildContext context) { return MaterialApp( title: 'Test Application', theme: ThemeData( primarySwatch: Colors.blue, ), home: MainPage(), ); } } class MainPage extends StatelessWidget { @override Widget build(BuildContext context) { return Scaffold( body:CustomScrollView( slivers: <Widget>[ SliverAppBar( pinned: true, expandedHeight: 180.0, flexibleSpace: FlexibleSpaceBar( title: Text('Test Application'), background: Image.asset( 'assets/sample.png', fit: BoxFit.cover, ), ), ), SliverFillRemaining( child: Center( child: Text('center'), ), ), ], ), ); } } |
test_app.zip
■ AnimatedContainer 클래스를 사용하는 방법을 보여준다. ▶ main.dart
1 2 3 4 5 6 7 8 9 10 11 12 13 14 15 16 17 18 19 20 21 22 23 24 25 26 27 28 29 30 31 32 33 34 35 36 37 38 39 40 41 42 43 44 45 46 47 48 49 50 51 52 53 54 55 56 57 58 59 60 61
|
import 'dart:math'; import 'package:flutter/material.dart'; void main() { runApp(TestApplication()); } class TestApplication extends StatelessWidget { @override Widget build(BuildContext context) { return MaterialApp( title: 'Test Application', theme: ThemeData( primarySwatch: Colors.blue, ), home: MainPage(), ); } } class MainPage extends StatefulWidget { @override _MainPageState createState() => _MainPageState(); } class _MainPageState extends State<MainPage> { double _size = 100.0; @override Widget build(BuildContext context) { return Scaffold( appBar: AppBar( title: Text('Test Application'), ), body: Center( child: Column( mainAxisAlignment: MainAxisAlignment.center, children: <Widget>[ GestureDetector( onTap: () { final random = Random(); setState(() { _size = random.nextInt(200).toDouble() + 100; }); }, child: AnimatedContainer( duration: Duration(seconds: 1), width: _size, height: _size, child: Image.asset('assets/sample.png'), curve: Curves.fastOutSlowIn, ), ), ], ), ), ); } } |
test_app.zip
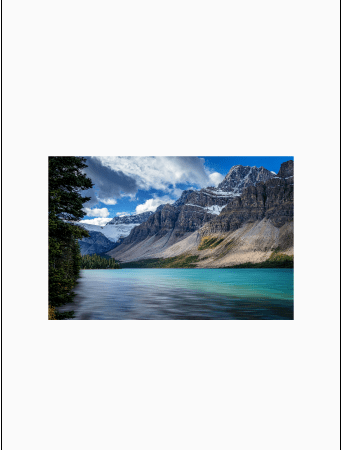
■ Hero 클래스를 사용하는 방법을 보여준다. ▶ main.dart
1 2 3 4 5 6 7 8 9 10 11 12 13 14 15 16 17 18 19 20 21 22 23 24 25 26 27 28 29 30 31 32 33 34 35 36 37 38 39 40 41 42 43 44 45 46 47 48 49 50 51 52 53 54 55 56 57 58 59 60 61 62 63 64 65 66 67
|
import 'package:flutter/material.dart'; void main() { runApp(TestApplication()); } class TestApplication extends StatelessWidget { @override Widget build(BuildContext context) { return MaterialApp( title: 'Test Application', theme: ThemeData( primarySwatch: Colors.blue, ), home: MainPage(), ); } } class MainPage extends StatelessWidget { @override Widget build(BuildContext context) { return Scaffold( appBar: AppBar( title: Text('Test Application / Main page'), ), body: Center( child: GestureDetector( onTap: () { Navigator.push( context, MaterialPageRoute(builder: (context) => DetailPage()), ); }, child: Hero( tag: 'image', child: Image.asset( 'assets/sample.png', width: 100, height: 100, ) ), ), ), ); } } class DetailPage extends StatelessWidget { @override Widget build(BuildContext context) { return Scaffold( appBar: AppBar( title: Text('Test Application / Detail page'), ), body: Hero( tag: 'image', child: Padding( padding: const EdgeInsets.all(10), child: Image.asset('assets/sample.png') ), ), ); } } |
test_app.zip
■ InkWell 클래스를 사용하는 방법을 보여준다. ▶ main.dart
1 2 3 4 5 6 7 8 9 10 11 12 13 14 15 16 17 18 19 20 21 22 23 24 25 26 27 28 29 30 31 32 33 34 35 36 37 38 39 40 41 42 43 44 45 46 47 48 49
|
import 'package:flutter/material.dart'; void main() { runApp(TestApplication()); } class TestApplication extends StatelessWidget { @override Widget build(BuildContext context) { return MaterialApp( title: 'Test Application', theme: ThemeData( primarySwatch: Colors.blue, ), home: MainPage(), ); } } class MainPage extends StatefulWidget { @override _MainPageState createState() => _MainPageState(); } class _MainPageState extends State<MainPage> { @override Widget build(BuildContext context) { return Scaffold( appBar: AppBar( title: Text('Test Application'), ), body: Center( child: Column( mainAxisAlignment: MainAxisAlignment.center, children: <Widget>[ InkWell( onTap: () { print('Clicked : ${DateTime.now()}'); }, child: Text('RUN'), ), ], ), ), ); } } |
test_app.zip
■ GestureDetector 클래스를 사용하는 방법을 보여준다. ▶ main.dart
1 2 3 4 5 6 7 8 9 10 11 12 13 14 15 16 17 18 19 20 21 22 23 24 25 26 27 28 29 30 31 32 33 34 35 36 37 38 39 40 41 42 43 44 45 46 47 48 49
|
import 'package:flutter/material.dart'; void main() { runApp(TestApplication()); } class TestApplication extends StatelessWidget { @override Widget build(BuildContext context) { return MaterialApp( title: 'Test Application', theme: ThemeData( primarySwatch: Colors.blue, ), home: MainPage(), ); } } class MainPage extends StatefulWidget { @override _MainPageState createState() => _MainPageState(); } class _MainPageState extends State<MainPage> { @override Widget build(BuildContext context) { return Scaffold( appBar: AppBar( title: Text('Test Application'), ), body: Center( child: Column( mainAxisAlignment: MainAxisAlignment.center, children: <Widget>[ GestureDetector( onTap: () { print('Clicked : ${DateTime.now()}'); }, child: Text('RUN'), ), ], ), ), ); } } |
test_app.zip
■ showTimePicker 함수를 사용해 시간을 선택하는 방법을 보여준다. ▶ main.dart
1 2 3 4 5 6 7 8 9 10 11 12 13 14 15 16 17 18 19 20 21 22 23 24 25 26 27 28 29 30 31 32 33 34 35 36 37 38 39 40 41 42 43 44 45 46 47 48 49 50 51 52 53 54 55 56 57 58 59 60 61 62 63 64 65 66 67 68 69
|
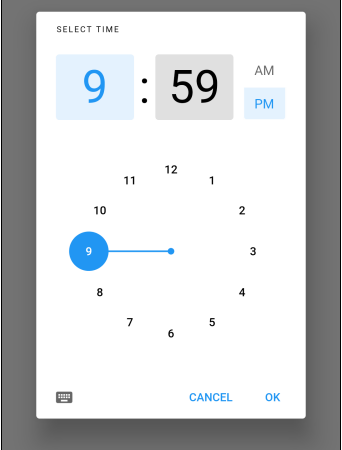
import 'package:flutter/material.dart'; void main() { runApp(TestApplication()); } class TestApplication extends StatelessWidget { @override Widget build(BuildContext context) { return MaterialApp( title: 'Test Application', theme: ThemeData( primarySwatch: Colors.blue, ), home: MainPage(), ); } } class MainPage extends StatefulWidget { @override _MainPageState createState() => _MainPageState(); } class _MainPageState extends State<MainPage> { String _selectedTime; @override Widget build(BuildContext context) { return Scaffold( appBar: AppBar( title: Text('Test Application'), ), body: Center( child: Column( mainAxisAlignment: MainAxisAlignment.center, children: <Widget>[ RaisedButton( child: Text('Run'), color: Colors.blue, textColor: Colors.white, onPressed: () { Future<TimeOfDay> future = showTimePicker( context: context, initialTime: TimeOfDay.now(), ); future.then((timeOfDay) { setState(() { if (timeOfDay == null) { _selectedTime = null; } else { _selectedTime = '${timeOfDay.hour}:${timeOfDay.minute}'; } }); }); }, ), Text( '결과 : $_selectedTime', ), ], ), ), ); } } |
test_app.zip
■ Theme 클래스를 사용해 다크 테마를 설정하는 방법을 보여준다. ▶ main.dart
1 2 3 4 5 6 7 8 9 10 11 12 13 14 15 16 17 18 19 20 21 22 23 24 25 26 27 28 29 30 31 32 33 34 35 36 37 38 39 40 41 42 43 44 45 46 47 48 49 50 51 52 53 54 55 56 57 58 59 60 61 62 63 64 65 66 67 68 69 70 71 72 73
|
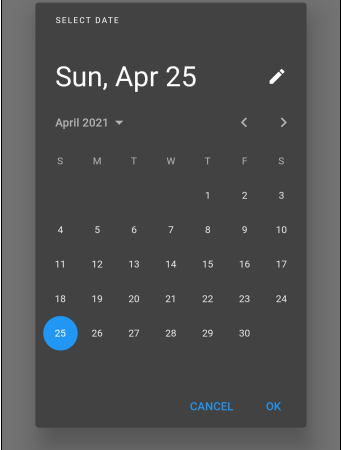
import 'package:flutter/material.dart'; void main() { runApp(TestApplication()); } class TestApplication extends StatelessWidget { @override Widget build(BuildContext context) { return MaterialApp( title: 'Test Application', theme: ThemeData( primarySwatch: Colors.blue, ), home: MainPage(), ); } } class MainPage extends StatefulWidget { @override _MainPageState createState() => _MainPageState(); } class _MainPageState extends State<MainPage> { DateTime _selectedDate; @override Widget build(BuildContext context) { return Scaffold( appBar: AppBar( title: Text('Test Application'), ), body: Center( child: Column( mainAxisAlignment: MainAxisAlignment.center, children: <Widget>[ RaisedButton( child: Text('Run'), color: Colors.blue, textColor: Colors.white, onPressed: () { Future<DateTime> future = showDatePicker( context: context, initialDate: DateTime.now(), firstDate: DateTime(2018), lastDate: DateTime(2030), builder: (BuildContext context, Widget child) { return Theme( data: ThemeData.dark(), child: child, ); }, ); future.then((date) { setState(() { _selectedDate = date; }); }); }, ), Text( '결과 : $_selectedDate', ), ], ), ), ); } } |
■ Future<T> 클래스의 then 메소드를 사용하는 방법을 보여준다. ▶ main.dart
1 2 3 4 5 6 7 8 9 10 11 12 13 14 15 16 17 18 19 20 21 22 23 24 25 26 27 28 29 30 31 32 33 34 35 36 37 38 39 40 41 42 43 44 45 46 47 48 49 50 51 52 53 54 55 56 57 58 59 60 61 62 63 64 65 66 67 68 69 70 71 72 73
|
import 'package:flutter/material.dart'; void main() { runApp(TestApplication()); } class TestApplication extends StatelessWidget { @override Widget build(BuildContext context) { return MaterialApp( title: 'Test Application', theme: ThemeData( primarySwatch: Colors.blue, ), home: MainPage(), ); } } class MainPage extends StatefulWidget { @override _MainPageState createState() => _MainPageState(); } class _MainPageState extends State<MainPage> { DateTime _selectedDate; @override Widget build(BuildContext context) { return Scaffold( appBar: AppBar( title: Text('Test Application'), ), body: Center( child: Column( mainAxisAlignment: MainAxisAlignment.center, children: <Widget>[ RaisedButton( child: Text('Run'), color: Colors.blue, textColor: Colors.white, onPressed: () { Future<DateTime> future = showDatePicker( context: context, initialDate: DateTime.now(), firstDate: DateTime(2018), lastDate: DateTime(2030), builder: (BuildContext context, Widget child) { return Theme( data: ThemeData.dark(), child: child, ); }, ); future.then((date) { setState(() { _selectedDate = date; }); }); }, ), Text( '결과 : $_selectedDate', ), ], ), ), ); } } |
■ showDatePicker 함수를 사용해 날짜를 선택하는 방법을 보여준다. ▶ main.dart
1 2 3 4 5 6 7 8 9 10 11 12 13 14 15 16 17 18 19 20 21 22 23 24 25 26 27 28 29 30 31 32 33 34 35 36 37 38 39 40 41 42 43 44 45 46 47 48 49 50 51 52 53 54 55 56 57 58 59 60 61 62 63 64 65 66 67 68 69 70 71 72 73
|
import 'package:flutter/material.dart'; void main() { runApp(TestApplication()); } class TestApplication extends StatelessWidget { @override Widget build(BuildContext context) { return MaterialApp( title: 'Test Application', theme: ThemeData( primarySwatch: Colors.blue, ), home: MainPage(), ); } } class MainPage extends StatefulWidget { @override _MainPageState createState() => _MainPageState(); } class _MainPageState extends State<MainPage> { DateTime _selectedDate; @override Widget build(BuildContext context) { return Scaffold( appBar: AppBar( title: Text('Test Application'), ), body: Center( child: Column( mainAxisAlignment: MainAxisAlignment.center, children: <Widget>[ RaisedButton( child: Text('Run'), color: Colors.blue, textColor: Colors.white, onPressed: () { Future<DateTime> future = showDatePicker( context: context, initialDate: DateTime.now(), firstDate: DateTime(2018), lastDate: DateTime(2030), builder: (BuildContext context, Widget child) { return Theme( data: ThemeData.dark(), child: child, ); }, ); future.then((date) { setState(() { _selectedDate = date; }); }); }, ), Text( '결과 : $_selectedDate', ), ], ), ), ); } } |
test_app.zip
■ AlertDialog 클래스를 사용해 알림 대화 상자를 표시하는 방법을 보여준다. ▶ main.dart
1 2 3 4 5 6 7 8 9 10 11 12 13 14 15 16 17 18 19 20 21 22 23 24 25 26 27 28 29 30 31 32 33 34 35 36 37 38 39 40 41 42 43 44 45 46 47 48 49 50 51 52 53 54 55 56 57 58 59 60 61 62 63 64 65 66 67 68 69 70 71 72 73 74 75 76 77 78 79 80 81 82 83 84 85 86 87
|
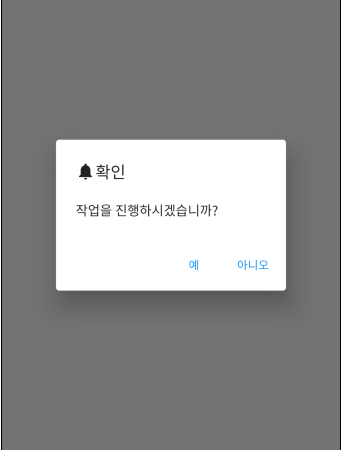
import 'package:flutter/material.dart'; void main() { runApp(TestApplication()); } class TestApplication extends StatelessWidget { @override Widget build(BuildContext context) { return MaterialApp( title: 'Test Application', theme: ThemeData( primarySwatch: Colors.blue, ), home: MainPage(), ); } } class MainPage extends StatefulWidget { @override _MainPageState createState() => _MainPageState(); } class _MainPageState extends State<MainPage> { String _dialogResult = ''; @override Widget build(BuildContext context) { return Scaffold( appBar: AppBar( title: Text('Test Application'), ), body: Center( child: Column( mainAxisAlignment: MainAxisAlignment.center, children: <Widget>[ RaisedButton( child: Text('Run'), color: Colors.blue, textColor: Colors.white, onPressed: () async { String result = await showDialog( context: context, barrierDismissible: false, builder: (BuildContext context) { return AlertDialog( title: Row( children: <Widget>[ Icon(Icons.notifications), Text('확인'), ], ), content: Text('작업을 진행하시겠습니까?'), actions: <Widget>[ FlatButton( child: Text('예'), onPressed: () { Navigator.of(context).pop('YES'); }, ), FlatButton( child: Text('아니오'), onPressed: () { Navigator.of(context).pop('NO'); }, ), ], ); }); setState(() { _dialogResult = result; }); }, ), Text( '결과 : $_dialogResult', ), ], ), ), ); } } |
test_app.zip
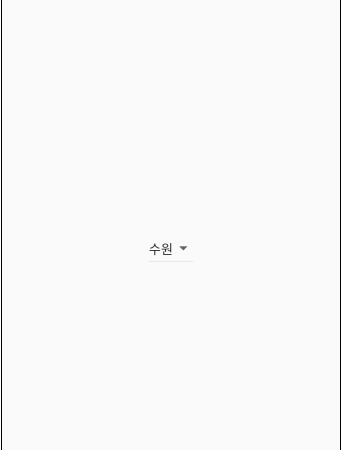
■ DropdownButton 클래스를 사용하는 방법을 보여준다. ▶ main.dart
1 2 3 4 5 6 7 8 9 10 11 12 13 14 15 16 17 18 19 20 21 22 23 24 25 26 27 28 29 30 31 32 33 34 35 36 37 38 39 40 41 42 43 44 45 46 47 48 49 50 51 52 53 54 55 56
|
import 'package:flutter/material.dart'; void main() { runApp(TestApplication()); } class TestApplication extends StatelessWidget { @override Widget build(BuildContext context) { return MaterialApp( title: 'Test Application', theme: ThemeData( primarySwatch: Colors.blue, ), home: MainPage(), ); } } class MainPage extends StatefulWidget { @override _MainPageState createState() => _MainPageState(); } class _MainPageState extends State<MainPage> { final List<String> _valueList = ['서울', '인천', '수원', '대전', '대구', '광주', '부산']; String _selectedValue = '수원'; @override Widget build(BuildContext context) { return Scaffold( appBar: AppBar( title: Text('Test Application'), ), body: Align( alignment: Alignment.center, child: DropdownButton( value: _selectedValue, items: _valueList.map((value) { return DropdownMenuItem( value: value, child: Text(value), ); }).toList(), onChanged: (value) { setState(() { _selectedValue = value; }); }, ), ), ); } } |
test_app.zip
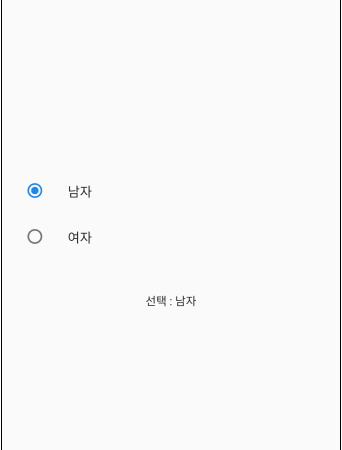
■ RadioListTile 클래스를 사용하는 방법을 보여준다. ▶ main.dart
1 2 3 4 5 6 7 8 9 10 11 12 13 14 15 16 17 18 19 20 21 22 23 24 25 26 27 28 29 30 31 32 33 34 35 36 37 38 39 40 41 42 43 44 45 46 47 48 49 50 51 52 53 54 55 56 57 58 59 60 61 62 63 64 65 66 67 68 69 70 71 72
|
import 'package:flutter/material.dart'; void main() { runApp(TestApplication()); } class TestApplication extends StatelessWidget { @override Widget build(BuildContext context) { return MaterialApp( title: 'Test Application', theme: ThemeData( primarySwatch: Colors.blue, ), home: MainPage(), ); } } class MainPage extends StatefulWidget { @override _MainPageState createState() => _MainPageState(); } class _MainPageState extends State<MainPage> { String _gender = '남자'; @override Widget build(BuildContext context) { return Scaffold( appBar: AppBar( title: Text('Test Application'), ), body: Align( alignment: Alignment.center, child: Column( mainAxisAlignment: MainAxisAlignment.center, children: <Widget>[ RadioListTile( title: Text('남자'), value: '남자', groupValue: _gender, onChanged: (value) { setState(() { _gender = value; }); }, ), RadioListTile( title: Text('여자'), value: '여자', groupValue: _gender, onChanged: (value) { setState(() { _gender = value; }); }, ), SizedBox( height: 40, ), Text( '선택 : $_gender' ) ], ), ), ); } } |
test_app.zip
■ Radio 클래스를 사용하는 방법을 보여준다. ▶ main.dart
1 2 3 4 5 6 7 8 9 10 11 12 13 14 15 16 17 18 19 20 21 22 23 24 25 26 27 28 29 30 31 32 33 34 35 36 37 38 39 40 41 42 43 44 45 46 47 48 49 50 51 52 53 54 55 56 57 58 59 60 61 62 63 64 65 66 67 68 69 70 71 72 73 74 75 76
|
import 'package:flutter/material.dart'; void main() { runApp(TestApplication()); } class TestApplication extends StatelessWidget { @override Widget build(BuildContext context) { return MaterialApp( title: 'Test Application', theme: ThemeData( primarySwatch: Colors.blue, ), home: MainPage(), ); } } class MainPage extends StatefulWidget { @override _MainPageState createState() => _MainPageState(); } class _MainPageState extends State<MainPage> { String _gender = '남자'; @override Widget build(BuildContext context) { return Scaffold( appBar: AppBar( title: Text('Test Application'), ), body: Align( alignment: Alignment.center, child: Column( mainAxisAlignment: MainAxisAlignment.center, children: <Widget>[ ListTile( title: Text('남자'), leading: Radio( value: '남자', groupValue: _gender, onChanged: (value) { setState(() { _gender = value; }); }, ), ), ListTile( title: Text('여자'), leading: Radio( value: '여자', groupValue: _gender, onChanged: (value) { setState(() { _gender = value; }); }, ), ), SizedBox( height: 40, ), Text( '선택 : $_gender' ) ], ), ), ); } } |
test_app.zip
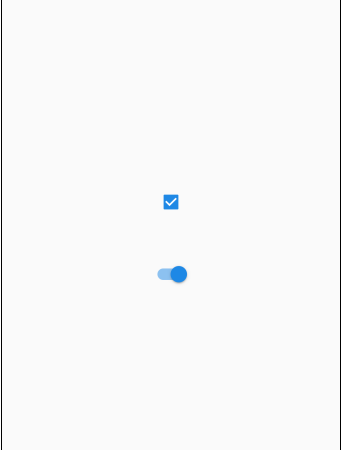
■ Switch 클래스를 사용하는 방법을 보여준다. ▶ main.dart
1 2 3 4 5 6 7 8 9 10 11 12 13 14 15 16 17 18 19 20 21 22 23 24 25 26 27 28 29 30 31 32 33 34 35 36 37 38 39 40 41 42 43 44 45 46 47 48 49 50 51 52 53 54 55 56 57 58 59 60 61 62 63 64 65 66 67 68
|
import 'package:flutter/material.dart'; void main() { runApp(TestApplication()); } class TestApplication extends StatelessWidget { @override Widget build(BuildContext context) { return MaterialApp( title: 'Test Application', theme: ThemeData( primarySwatch: Colors.blue, ), home: MainPage(), ); } } class MainPage extends StatefulWidget { @override _MainPageState createState() => _MainPageState(); } class _MainPageState extends State<MainPage> { bool _isChecked = false; @override Widget build(BuildContext context) { return Scaffold( appBar: AppBar( title: Text('Test Application'), ), body: Align( alignment: Alignment.center, child: Padding( padding: EdgeInsets.all(10.0), child: Column( mainAxisAlignment: MainAxisAlignment.center, children: <Widget>[ Checkbox( value: _isChecked, onChanged: (value) { setState(() { _isChecked = value; }); } ), SizedBox( height: 40, ), Switch( value: _isChecked, onChanged: (value) { setState(() { _isChecked = value; }); }, ) ], ), ), ), ); } } |
test_app.zip
■ Checkbox 클래스를 사용하는 방법을 보여준다. ▶ main.dart
1 2 3 4 5 6 7 8 9 10 11 12 13 14 15 16 17 18 19 20 21 22 23 24 25 26 27 28 29 30 31 32 33 34 35 36 37 38 39 40 41 42 43 44 45 46 47 48 49 50 51 52 53 54 55 56 57 58 59 60 61 62 63 64 65 66 67 68
|
import 'package:flutter/material.dart'; void main() { runApp(TestApplication()); } class TestApplication extends StatelessWidget { @override Widget build(BuildContext context) { return MaterialApp( title: 'Test Application', theme: ThemeData( primarySwatch: Colors.blue, ), home: MainPage(), ); } } class MainPage extends StatefulWidget { @override _MainPageState createState() => _MainPageState(); } class _MainPageState extends State<MainPage> { bool _isChecked = false; @override Widget build(BuildContext context) { return Scaffold( appBar: AppBar( title: Text('Test Application'), ), body: Align( alignment: Alignment.center, child: Padding( padding: EdgeInsets.all(10.0), child: Column( mainAxisAlignment: MainAxisAlignment.center, children: <Widget>[ Checkbox( value: _isChecked, onChanged: (value) { setState(() { _isChecked = value; }); } ), SizedBox( height: 40, ), Switch( value: _isChecked, onChanged: (value) { setState(() { _isChecked = value; }); }, ) ], ), ), ), ); } } |
test_app.zip
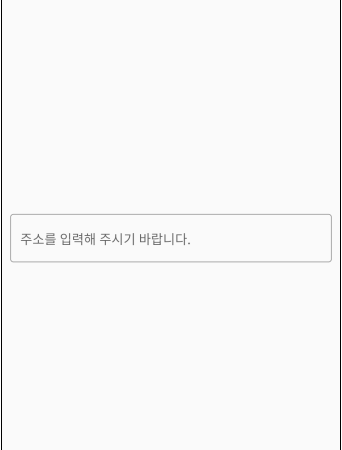
■ TextField 클래스의 decoration 속성을 사용하는 방법을 보여준다. ▶ main.dart
1 2 3 4 5 6 7 8 9 10 11 12 13 14 15 16 17 18 19 20 21 22 23 24 25 26 27 28 29 30 31 32 33 34 35 36 37 38 39 40 41 42 43
|
import 'package:flutter/material.dart'; void main() { runApp(TestApplication()); } class TestApplication extends StatelessWidget { @override Widget build(BuildContext context) { return MaterialApp( title: 'Test Application', theme: ThemeData( primarySwatch: Colors.blue, ), home: MainPage(), ); } } class MainPage extends StatelessWidget { @override Widget build(BuildContext context) { return Scaffold( appBar: AppBar( title: Text('Test Application'), ), body: Align( alignment: Alignment.center, child: Padding( padding: EdgeInsets.all(10.0), child: TextField( decoration: InputDecoration( border: OutlineInputBorder(), labelText: '주소를 입력해 주시기 바랍니다.', ), ), ), ), ); } } |
test_app.zip