■ CheckBoxList 클래스를 사용하는 방법을 보여준다. ▶ MainPage.aspx
1 2 3 4 5 6 7 8 9 10 11 12 13 14 15 16 17 18 19 20 21 22 23 24 25 26 27 28 29 30 |
<%@ Page Language="C#" AutoEventWireup="true" CodeBehind="MainPage.aspx.cs" Inherits="TestProject.MainPage" %> <!DOCTYPE html> <html xmlns="http://www.w3.org/1999/xhtml"> <head runat="server"> <meta http-equiv="Content-Type" content="text/html; charset=utf-8" /> <title>CheckBoxList 클래스 사용하기</title> </head> <body> <form id="form1" runat="server"> <div> <asp:CheckBoxList ID="checkBoxList" runat="server" RepeatDirection="Horizontal" RepeatLayout="Flow" RepeatColumns="2"> <asp:ListItem Selected="True">축구</asp:ListItem> <asp:ListItem>농구</asp:ListItem> <asp:ListItem>배구</asp:ListItem> </asp:CheckBoxList> <hr /> <asp:LinkButton ID="printButton" runat="server" Text="출력" OnClick="printButton_Click" /> <hr /> <asp:Label ID="displayLabel" runat="server" /> </div> </form> </body> </html> |
▶ MainPage.aspx.cs
1 2 3 4 5 6 7 8 9 10 11 12 13 14 15 16 17 18 19 20 21 22 23 24 25 26 27 28 29 30 31 32 33 34 35 36 37 38 39 40 41 42 43 44 45 46 47 48 49 50 51 52 53 54 |
using System; using System.Text; using System.Web.UI; namespace TestProject { /// <summary> /// 메인 페이지 /// </summary> public partial class MainPage : Page { //////////////////////////////////////////////////////////////////////////////////////////////////// Method ////////////////////////////////////////////////////////////////////////////////////////// Protected #region 페이지 로드시 처리하기 - Page_Load(sender, e) /// <summary> /// 페이지 로드시 처리하기 /// </summary> /// <param name="sender">이벤트 발생자</param> /// <param name="e">이벤트 인자</param> protected void Page_Load(object sender, EventArgs e) { } #endregion #region 출력 버튼 클릭시 처리하기 - printButton_Click(sender, e) /// <summary> /// 출력 버튼 클릭시 처리하기 /// </summary> /// <param name="sender">이벤트 발생자</param> /// <param name="e">이벤트 인자</param> protected void printButton_Click(object sender, EventArgs e) { StringBuilder stringBuilder = new StringBuilder(); for(int i = 0; i < this.checkBoxList.Items.Count; i++) { if(this.checkBoxList.Items[i].Selected) { stringBuilder.Append(this.checkBoxList.Items[i].Text); stringBuilder.Append("<br />"); } } this.displayLabel.Text = stringBuilder.ToString(); } #endregion } } |
TestProject.zip
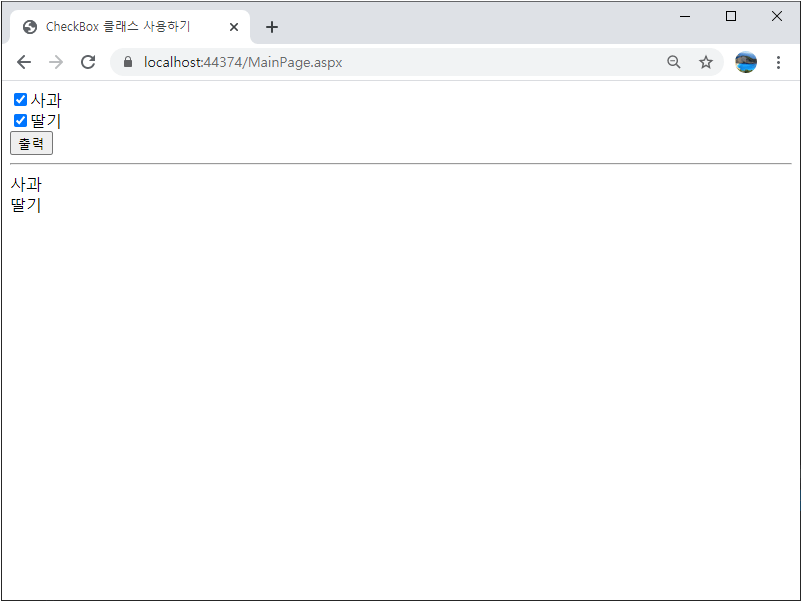
■ CheckBox 클래스를 사용하는 방법을 보여준다. ▶ MainPage.aspx
1 2 3 4 5 6 7 8 9 10 11 12 13 14 15 16 17 18 19 20 21 22 23 |
<%@ Page Language="C#" AutoEventWireup="true" CodeBehind="MainPage.aspx.cs" Inherits="TestProject.MainPage" %> <!DOCTYPE html> <html xmlns="http://www.w3.org/1999/xhtml"> <head runat="server"> <meta http-equiv="Content-Type" content="text/html; charset=utf-8" /> <title>CheckBox 클래스 사용하기</title> </head> <body> <form id="form" runat="server"> <div> <asp:CheckBox ID="checkBox1" Text="사과" runat="server" /><br /> <asp:CheckBox ID="checkBox2" Text="딸기" runat="server" /><br /> <asp:Button ID="printButton" runat="server" Text="출력" OnClick="printButton_Click" /> <hr /> <asp:Label ID="displayLabel" runat="server" /> </div> </form> </body> </html> |
▶ MainPage.aspx.cs
1 2 3 4 5 6 7 8 9 10 11 12 13 14 15 16 17 18 19 20 21 22 23 24 25 26 27 28 29 30 31 32 33 34 35 36 37 38 39 40 41 42 43 44 45 46 47 48 49 50 51 52 53 54 55 |
using System; using System.Text; using System.Web.UI; namespace TestProject { /// <summary> /// 메인 페이지 /// </summary> public partial class MainPage : Page { //////////////////////////////////////////////////////////////////////////////////////////////////// Method ////////////////////////////////////////////////////////////////////////////////////////// Protected #region 페이지 로드시 처리하기 - Page_Load(sender, e) /// <summary> /// 페이지 로드시 처리하기 /// </summary> /// <param name="sender">이벤트 발생자</param> /// <param name="e">이벤트 인자</param> protected void Page_Load(object sender, EventArgs e) { } #endregion #region 출력 버튼 클릭시 처리하기 - printButton_Click(sender, e) /// <summary> /// 출력 버튼 클릭시 처리하기 /// </summary> /// <param name="sender">이벤트 발생자</param> /// <param name="e">이벤트 인자</param> protected void printButton_Click(object sender, EventArgs e) { StringBuilder stringBuilder = new StringBuilder(); if(this.checkBox1.Checked) { stringBuilder.Append(this.checkBox1.Text + "<br />"); } if(this.checkBox2.Checked) { stringBuilder.Append(this.checkBox2.Text + "<br />"); } this.displayLabel.Text = stringBuilder.ToString(); } #endregion } } |
TestProject.zip
■ ListBox 컨트롤을 사용하는 방법을 보여준다. ▶ MainPage.aspx
1 2 3 4 5 6 7 8 9 10 11 12 13 14 15 16 17 18 19 20 21 22 23 24 |
<%@ Page Language="C#" AutoEventWireup="true" CodeBehind="MainPage.aspx.cs" Inherits="TestProject.MainPage" %> <!DOCTYPE html> <html xmlns="http://www.w3.org/1999/xhtml"> <head runat="server"> <meta http-equiv="Content-Type" content="text/html; charset=utf-8" /> <title>ListBox 컨트롤 사용하기</title> </head> <body> <form id="form" runat="server"> <div> <asp:ListBox ID="listBox" runat="server" SelectionMode="Multiple" /> <hr /> <asp:Button ID="printButton" runat="server" Text="출력" OnClick="printButton_Click" /> <hr /> <asp:Label ID="displayLabel" runat="server" /> </div> </form> </body> </html> |
▶ MainPage.aspx.cs
1 2 3 4 5 6 7 8 9 10 11 12 13 14 15 16 17 18 19 20 21 22 23 24 25 26 27 28 29 30 31 32 33 34 35 36 37 38 39 40 41 42 43 44 45 46 47 48 49 50 51 52 53 54 55 56 57 58 59 60 61 62 63 64 65 66 67 68 69 70 71 |
using System; using System.Text; using System.Web.UI; using System.Web.UI.WebControls; namespace TestProject { /// <summary> /// 메인 페이지 /// </summary> public partial class MainPage : Page { //////////////////////////////////////////////////////////////////////////////////////////////////// Method ////////////////////////////////////////////////////////////////////////////////////////// Protected #region 페이지 로드시 처리하기 - Page_Load(sender, e) /// <summary> /// 페이지 로드시 처리하기 /// </summary> /// <param name="sender">이벤트 발생자</param> /// <param name="e">이벤트 인자</param> protected void Page_Load(object sender, EventArgs e) { if(!Page.IsPostBack) { this.listBox.Items.Add("축구"); this.listBox.Items.Add("농구"); ListItem listItem = new ListItem(); listItem.Text = "배구"; listItem.Value = "Volleyball"; this.listBox.Items.Add(listItem); } } #endregion #region 출력 버튼 클릭시 처리하기 - printButton_Click(sender, e) /// <summary> /// 출력 버튼 클릭시 처리하기 /// </summary> /// <param name="sender">이벤트 발생자</param> /// <param name="e">이벤트 인자</param> protected void printButton_Click(object sender, EventArgs e) { StringBuilder stringBuilder = new StringBuilder(); for(int i = 0; i < this.listBox.Items.Count; i++) { if(this.listBox.Items[i].Selected) { stringBuilder.Append(this.listBox.Items[i].Text); if(i != this.listBox.Items.Count - 1) { stringBuilder.Append(","); } } } this.displayLabel.Text = stringBuilder.ToString().TrimEnd(','); } #endregion } } |
TestProject.zip
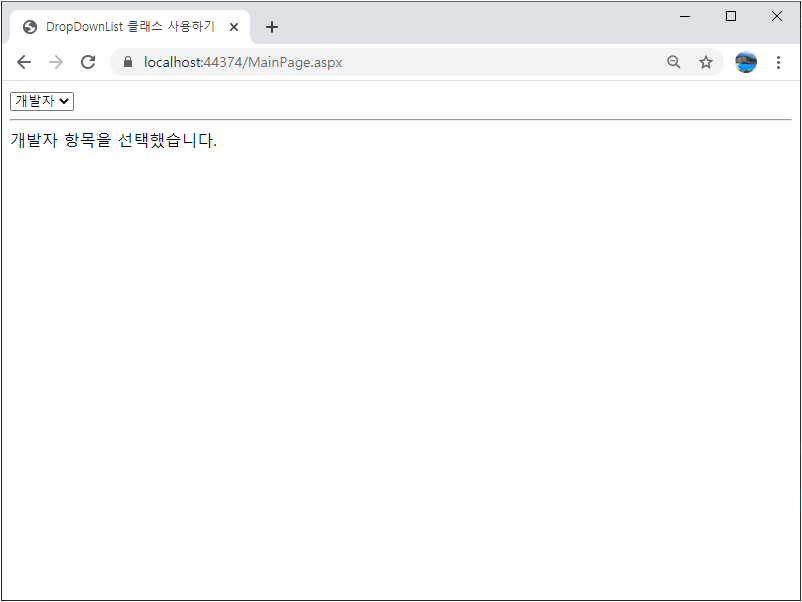
■ DropDownList 클래스를 사용하는 방법을 보여준다. ▶ MainPage.aspx
1 2 3 4 5 6 7 8 9 10 11 12 13 14 15 16 17 18 19 20 21 22 23 24 25 |
<%@ Page Language="C#" AutoEventWireup="true" CodeBehind="MainPage.aspx.cs" Inherits="TestProject.MainPage" %> <!DOCTYPE html> <html xmlns="http://www.w3.org/1999/xhtml"> <head runat="server"> <meta http-equiv="Content-Type" content="text/html; charset=utf-8" /> <title>DropDownList 클래스 사용하기</title> </head> <body> <form id="form" runat="server"> <div> <asp:DropDownList ID="dropDownList" runat="server" AutoPostBack="true" OnSelectedIndexChanged="dropDownList_SelectedIndexChanged"> <asp:ListItem>회사원</asp:ListItem> <asp:ListItem>공무원</asp:ListItem> <asp:ListItem>개발자</asp:ListItem> </asp:DropDownList> <hr /> <asp:Label ID="displayLabel" runat="server" /> </div> </form> </body> </html> |
▶ MainPage.aspx.cs
1 2 3 4 5 6 7 8 9 10 11 12 13 14 15 16 17 18 19 20 21 22 23 24 25 26 27 28 29 30 31 32 33 34 35 36 37 38 39 40 41 42 43 44 45 46 47 48 |
using System; using System.Web.UI; namespace TestProject { /// <summary> /// 메인 페이지 /// </summary> public partial class MainPage : Page { //////////////////////////////////////////////////////////////////////////////////////////////////// Method ////////////////////////////////////////////////////////////////////////////////////////// Protected #region 페이지 로드시 처리하기 - Page_Load(sender, e) /// <summary> /// 페이지 로드시 처리하기 /// </summary> /// <param name="sender">이벤트 발생자</param> /// <param name="e">이벤트 인자</param> protected void Page_Load(object sender, EventArgs e) { if(!Page.IsPostBack && this.dropDownList.Items.Count > 1) { this.dropDownList.SelectedIndex = 1; } } #endregion #region 드롭다운리스트 선택 인덱스 변경시 처리하기 - dropDownList_SelectedIndexChanged(sender, e) /// <summary> /// 드롭다운리스트 선택 인덱스 변경시 처리하기 /// </summary> /// <param name="sender">이벤트 발생자</param> /// <param name="e">이벤트 인자</param> protected void dropDownList_SelectedIndexChanged(object sender, EventArgs e) { string message = $"{this.dropDownList.SelectedItem.Text} 항목을 선택했습니다."; this.displayLabel.Text = message; } #endregion } } |
TestProject.zip
■ BulletedList 클래스를 사용하는 방법을 보여준다. ▶ MainPage.aspx
1 2 3 4 5 6 7 8 9 10 11 12 13 14 15 16 17 18 19 20 21 22 23 24 |
<%@ Page Language="C#" AutoEventWireup="true" CodeBehind="MainPage.aspx.cs" Inherits="TestProject.MainPage" %> <!DOCTYPE html> <html xmlns="http://www.w3.org/1999/xhtml"> <head runat="server"> <meta http-equiv="Content-Type" content="text/html; charset=utf-8" /> <title>BulletedList 클래스 사용하기</title> </head> <body> <form id="form" runat="server"> <div> <asp:BulletedList ID="bulletedList" runat="server" BulletStyle="Numbered" DisplayMode="LinkButton" OnClick="bulletedList_Click"> <asp:ListItem Value="윈도우즈 서버">Windows Server</asp:ListItem> <asp:ListItem Value="SQL 서버">SQL Server</asp:ListItem> <asp:ListItem Value="비주얼스튜디오">Visual Studio</asp:ListItem> </asp:BulletedList> </div> </form> </body> </html> |
▶ MainPage.aspx.cs
1 2 3 4 5 6 7 8 9 10 11 12 13 14 15 16 17 18 19 20 21 22 23 24 25 26 27 28 29 30 31 32 33 34 35 36 37 38 39 40 41 42 43 44 45 46 47 48 49 50 51 |
using System; using System.Text; using System.Web.UI; using System.Web.UI.WebControls; namespace TestProject { /// <summary> /// 메인 페이지 /// </summary> public partial class MainPage : Page { //////////////////////////////////////////////////////////////////////////////////////////////////// Method ////////////////////////////////////////////////////////////////////////////////////////// Protected #region 페이지 로드시 처리하기 - Page_Load(sender, e) /// <summary> /// 페이지 로드시 처리하기 /// </summary> /// <param name="sender">이벤트 발생자</param> /// <param name="e">이벤트 인자</param> protected void Page_Load(object sender, EventArgs e) { } #endregion #region 불릿 리스트 클릭시 처리하기 - bulletedList_Click(sender, e) /// <summary> /// 불릿 리스트 클릭시 처리하기 /// </summary> /// <param name="sender">이벤트 발생자</param> /// <param name="e">이벤트 인자</param> protected void bulletedList_Click(object sender, BulletedListEventArgs e) { StringBuilder stringBuilder = new StringBuilder(); stringBuilder.Append("선택 항목 : <br />"); stringBuilder.Append(this.bulletedList.Items[e.Index].Text); stringBuilder.Append("<br />"); stringBuilder.Append(this.bulletedList.Items[e.Index].Value + "<br />"); Response.Write(stringBuilder.ToString()); } #endregion } } |
TestProject.zip
■ Table 클래스를 사용하는 방법을 보여준다. ▶ MainPage.aspx
1 2 3 4 5 6 7 8 9 10 11 12 13 14 15 16 17 18 |
<%@ Page Language="C#" AutoEventWireup="true" CodeBehind="MainPage.aspx.cs" Inherits="TestProject.MainPage" %> <!DOCTYPE html> <html xmlns="http://www.w3.org/1999/xhtml"> <head runat="server"> <meta http-equiv="Content-Type" content="text/html; charset=utf-8" /> <title>Table 클래스 사용하기</title> </head> <body> <form id="form" runat="server"> <div> <asp:Table ID="table" runat="server" BorderWidth="1px" /> </div> </form> </body> </html> |
▶ MainPage.aspx.cs
1 2 3 4 5 6 7 8 9 10 11 12 13 14 15 16 17 18 19 20 21 22 23 24 25 26 27 28 29 30 31 32 33 34 35 36 37 38 39 40 41 42 43 44 45 46 47 48 49 50 51 |
using System; using System.Web.UI; using System.Web.UI.WebControls; namespace TestProject { /// <summary> /// 메인 페이지 /// </summary> public partial class MainPage : Page { //////////////////////////////////////////////////////////////////////////////////////////////////// Method ////////////////////////////////////////////////////////////////////////////////////////// Protected #region 페이지 로드시 처리하기 - Page_Load(sender, e) /// <summary> /// 페이지 로드시 처리하기 /// </summary> /// <param name="sender">이벤트 발생자</param> /// <param name="e">이벤트 인자</param> protected void Page_Load(object sender, EventArgs e) { for(int i = 0; i < 10; i++) { TableRow tableRow = new TableRow(); for(int j = 0; j < 3; j++) { TableCell tableCell = new TableCell(); tableCell.BorderWidth = 1; LiteralControl literalControl = new LiteralControl(); literalControl.Text = $"({i}, {j})"; tableCell.Controls.Add(literalControl); tableRow.Cells.Add(tableCell); } this.table.Rows.Add(tableRow); } } #endregion } } |
TestProject.zip
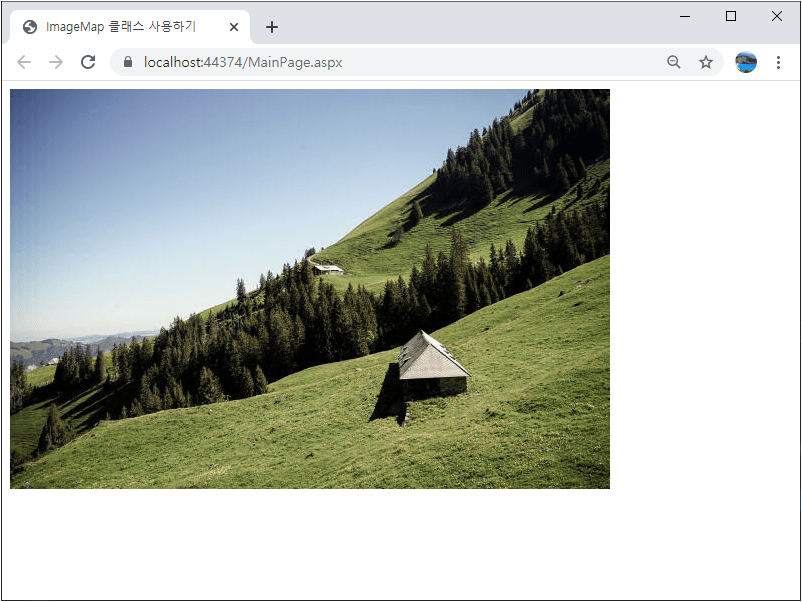
■ ImageMap 클래스를 사용하는 방법을 보여준다. ▶ MainPage.aspx
1 2 3 4 5 6 7 8 9 10 11 12 13 14 15 16 17 18 19 20 21 22 23 24 25 26 27 28 29 30 31 |
<%@ Page Language="C#" AutoEventWireup="true" CodeBehind="MainPage.aspx.cs" Inherits="TestProject.MainPage" %> <!DOCTYPE html> <html xmlns="http://www.w3.org/1999/xhtml"> <head runat="server"> <meta http-equiv="Content-Type" content="text/html; charset=utf-8" /> <title>ImageMap 클래스 사용하기</title> </head> <body> <form id="form" runat="server"> <div> <asp:ImageMap ID="imageMap" runat="server" ImageUrl="~/Images/sample.jpg"> <asp:RectangleHotSpot Left="0" Top="0" Right="100" Bottom="100" NavigateUrl="https://www.daum.net" /> <asp:RectangleHotSpot Left="100" Top="0" Right="200" Bottom="100" NavigateUrl="https://www.naver.com" /> </asp:ImageMap> </div> </form> </body> </html> |
▶ MainPage.aspx.cs
1 2 3 4 5 6 7 8 9 10 11 12 13 14 15 16 17 18 19 20 21 22 23 24 25 26 27 28 29 |
using System; using System.Web.UI; namespace TestProject { /// <summary> /// 메인 페이지 /// </summary> public partial class MainPage : Page { //////////////////////////////////////////////////////////////////////////////////////////////////// Method ////////////////////////////////////////////////////////////////////////////////////////// Protected #region 페이지 로드시 처리하기 - Page_Load(sender, e) /// <summary> /// 페이지 로드시 처리하기 /// </summary> /// <param name="sender">이벤트 발생자</param> /// <param name="e">이벤트 인자</param> protected void Page_Load(object sender, EventArgs e) { } #endregion } } |
TestProject.zip
■ Image 클래스를 사용하는 방법을 보여준다. ▶ MainPage.aspx
1 2 3 4 5 6 7 8 9 10 11 12 13 14 15 16 17 18 19 20 21 22 23 24 25 |
<%@ Page Language="C#" AutoEventWireup="true" CodeBehind="MainPage.aspx.cs" Inherits="TestProject.MainPage" %> <!DOCTYPE html> <html xmlns="http://www.w3.org/1999/xhtml"> <head runat="server"> <meta http-equiv="Content-Type" content="text/html; charset=utf-8" /> <title>Image 클래스 사용하기</title> </head> <body> <form id="form" runat="server"> <div> <asp:Image ID="changeImage" runat="server" Width="32px" Height="32px" AlternateText="대체 텍스트" ImageUrl="~/Images/face1.png" /> <hr /> <asp:Button ID="changeButton" runat="server" Text="변경" OnClick="changeButton_Click" /> </div> </form> </body> </html> |
▶ MainPage.aspx.cs
1 2 3 4 5 6 7 8 9 10 11 12 13 14 15 16 17 18 19 20 21 22 23 24 25 26 27 28 29 30 31 32 33 34 35 36 37 38 39 40 41 42 43 44 45 46 47 48 49 |
using System; using System.Web.UI; namespace TestProject { /// <summary> /// 메인 페이지 /// </summary> public partial class MainPage : Page { //////////////////////////////////////////////////////////////////////////////////////////////////// Method ////////////////////////////////////////////////////////////////////////////////////////// Protected #region 페이지 로드시 처리하기 - Page_Load(sender, e) /// <summary> /// 페이지 로드시 처리하기 /// </summary> /// <param name="sender">이벤트 발생자</param> /// <param name="e">이벤트 인자</param> protected void Page_Load(object sender, EventArgs e) { } #endregion #region 변경 버튼 클릭시 처리하기 - changeButton_Click(sender, e) /// <summary> /// 변경 버튼 클릭시 처리하기 /// </summary> /// <param name="sender">이벤트 발생자</param> /// <param name="e">이벤트 인자</param> protected void changeButton_Click(object sender, EventArgs e) { if(DateTime.Now.Second % 2 == 0) { this.changeImage.ImageUrl = "~/Images/face1.png"; } else { this.changeImage.ImageUrl = "~/Images/face2.png"; } } #endregion } } |
TestProject.zip
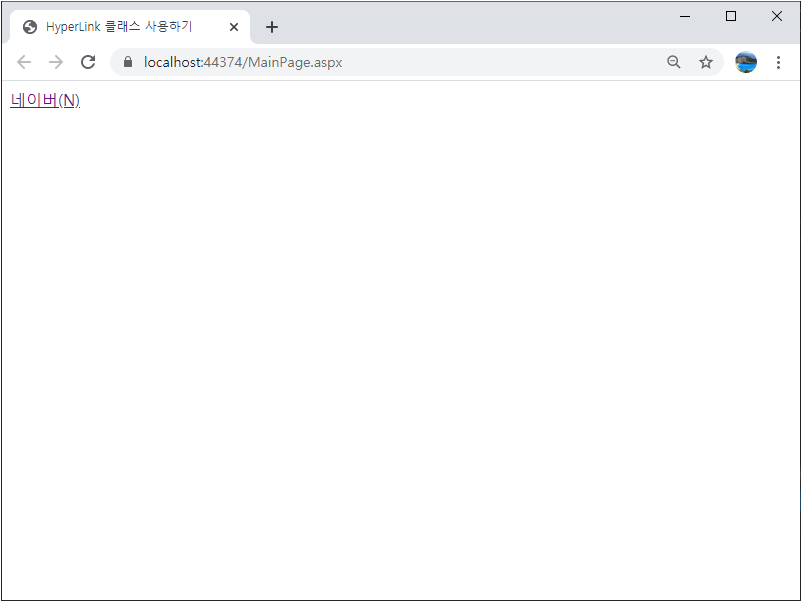
■ HyperLink 클래스의 AccessKey 속성을 사용해 액세스 키를 설정하는 방법을 보여준다. ▶ MainPage.aspx
1 2 3 4 5 6 7 8 9 10 11 12 13 14 15 16 17 18 19 20 21 |
<%@ Page Language="C#" AutoEventWireup="true" CodeBehind="MainPage.aspx.cs" Inherits="TestProject.MainPage" %> <!DOCTYPE html> <html xmlns="http://www.w3.org/1999/xhtml"> <head runat="server"> <meta http-equiv="Content-Type" content="text/html; charset=utf-8" /> <title>HyperLink 클래스 사용하기</title> </head> <body> <form id="form" runat="server"> <div> <asp:HyperLink ID="hyperLink" runat="server" Target="_blank" NavigateUrl="http://www.naver.com"> 네이버(N) </asp:HyperLink> </div> </form> </body> </html> |
▶ MainPage.aspx.cs
1 2 3 4 5 6 7 8 9 10 11 12 13 14 15 16 17 18 19 20 21 22 23 24 25 26 27 28 29 30 |
using System; using System.Web.UI; namespace TestProject { /// <summary> /// 메인 페이지 /// </summary> public partial class MainPage : Page { //////////////////////////////////////////////////////////////////////////////////////////////////// Method ////////////////////////////////////////////////////////////////////////////////////////// Protected #region 페이지 로드시 처리하기 - Page_Load(sender, e) /// <summary> /// 페이지 로드시 처리하기 /// </summary> /// <param name="sender">이벤트 발생자</param> /// <param name="e">이벤트 인자</param> protected void Page_Load(object sender, EventArgs e) { this.hyperLink.AccessKey = "N"; } #endregion } } |
TestProject.zip
■ ClientScriptManager 클래스의 RegisterClientScriptBlock 메소드를 사용해 자바 스크립트 코드를 추가하는 방법을 보여준다. ▶ MainPage.aspx
1 2 3 4 5 6 7 8 9 10 11 12 13 14 15 16 17 18 19 |
<%@ Page Language="C#" AutoEventWireup="true" CodeBehind="MainPage.aspx.cs" Inherits="TestProject.MainPage" %> <!DOCTYPE html> <html xmlns="http://www.w3.org/1999/xhtml"> <head runat="server"> <meta http-equiv="Content-Type" content="text/html; charset=utf-8" /> <title>ClientScriptManager 클래스 : RegisterClientScriptBlock 메소드를 사용해 자바 스크립트 코드 추가하기</title> </head> <body> <form id="form" runat="server"> <div> <asp:Button ID="postbackButton" runat="server" Text="Postback" OnClick="postbackButton_Click" /> </div> </form> </body> </html> |
▶ MainPage.aspx.cs
1 2 3 4 5 6 7 8 9 10 11 12 13 14 15 16 17 18 19 20 21 22 23 24 25 26 27 28 29 30 31 32 33 34 35 36 37 38 39 40 41 42 43 44 |
using System; using System.Web.UI; namespace TestProject { /// <summary> /// 메인 페이지 /// </summary> public partial class MainPage : Page { //////////////////////////////////////////////////////////////////////////////////////////////////// Method ////////////////////////////////////////////////////////////////////////////////////////// Protected #region 페이지 로드시 처리하기 - Page_Load(sender, e) /// <summary> /// 페이지 로드시 처리하기 /// </summary> /// <param name="sender">이벤트 발생자</param> /// <param name="e">이벤트 인자</param> protected void Page_Load(object sender, EventArgs e) { } #endregion #region Postback 버튼 클릭시 처리하기 - postbackButton_Click(sender, e) /// <summary> /// Postback 버튼 클릭시 처리하기 /// </summary> /// <param name="sender">이벤트 발생자</param> /// <param name="e">이벤트 인자</param> protected void postbackButton_Click(object sender, EventArgs e) { string code = @"<script> window.alert('postback completed'); </script>"; ClientScript.RegisterClientScriptBlock(GetType(), "TestScript", code); } #endregion } } |
TestProject.zip
■ Style 클래스를 사용해 스타일을 설정하는 방법을 보여준다. ▶ MainPage.aspx
1 2 3 4 5 6 7 8 9 10 11 12 13 14 15 16 17 18 19 20 21 22 23 24 |
<%@ Page Language="C#" AutoEventWireup="true" CodeBehind="MainPage.aspx.cs" Inherits="TestProject.MainPage" %> <!DOCTYPE html> <html xmlns="http://www.w3.org/1999/xhtml"> <head runat="server"> <meta http-equiv="Content-Type" content="text/html; charset=utf-8" /> <title>Style 클래스 : 스타일 설정하기</title> </head> <body> <form id="form" runat="server"> <div> <br /> 테스트 문자열 입니다. <br /> <br /> <asp:Button ID="button1" runat="server" Text="버튼 1" /> <asp:Button ID="button2" runat="server" Text="버튼 2" /> </div> </form> </body> </html> |
▶ MainPage.aspx.cs
1 2 3 4 5 6 7 8 9 10 11 12 13 14 15 16 17 18 19 20 21 22 23 24 25 26 27 28 29 30 31 32 33 34 35 36 37 38 39 40 41 42 43 44 45 46 47 48 49 50 |
using System; using System.Drawing; using System.Web.UI; using System.Web.UI.WebControls; namespace TestProject { /// <summary> /// 메인 페이지 /// </summary> public partial class MainPage : Page { //////////////////////////////////////////////////////////////////////////////////////////////////// Method ////////////////////////////////////////////////////////////////////////////////////////// Protected #region 페이지 로드시 처리하기 - Page_Load(sender, e) /// <summary> /// 페이지 로드시 처리하기 /// </summary> /// <param name="sender">이벤트 발생자</param> /// <param name="e">이벤트 인자</param> protected void Page_Load(object sender, EventArgs e) { Style divStyle = new Style(); divStyle.ForeColor = Color.Blue; divStyle.Font.Name = "나눔고딕코딩"; divStyle.Font.Size = 10; divStyle.Font.Italic = true; Page.Header.StyleSheet.CreateStyleRule(divStyle, null, "body, div"); Style buttonStyle = new Style(); buttonStyle.ForeColor = Color.Navy; buttonStyle.Font.Name = "나눔고딕코딩"; buttonStyle.Font.Size = 12; Page.Header.StyleSheet.RegisterStyle(buttonStyle, null); this.button1.CssClass = buttonStyle.RegisteredCssClass; this.button2.CssClass = buttonStyle.RegisteredCssClass; } #endregion } } |
TestProject.zip
■ HtmlLink 클래스를 사용해 스타일 시트 파일을 설정하는 방법을 보여준다. ▶ Test.css
|
|
body, div, td { background-color : Yellow; } |
▶ MainPage.aspx
|
|
<%@ Page Language="C#" AutoEventWireup="true" CodeBehind="MainPage.aspx.cs" Inherits="TestProject.MainPage" %> <!DOCTYPE html> <html xmlns="http://www.w3.org/1999/xhtml"> <head runat="server"> <meta http-equiv="Content-Type" content="text/html; charset=utf-8" /> <title>HtmlLink 클래스 : 스타일 시트 파일 설정하기</title> </head> <body> <form id="form" runat="server"> <div> </div> </form> </body> </html> |
▶ MainPage.aspx.cs
1 2 3 4 5 6 7 8 9 10 11 12 13 14 15 16 17 18 19 20 21 22 23 24 25 26 27 28 29 30 31 32 33 34 35 36 37 38 |
using System; using System.Web.UI; using System.Web.UI.HtmlControls; namespace TestProject { /// <summary> /// 메인 페이지 /// </summary> public partial class MainPage : Page { //////////////////////////////////////////////////////////////////////////////////////////////////// Method ////////////////////////////////////////////////////////////////////////////////////////// Protected #region 페이지 로드시 처리하기 - Page_Load(sender, e) /// <summary> /// 페이지 로드시 처리하기 /// </summary> /// <param name="sender">이벤트 발생자</param> /// <param name="e">이벤트 인자</param> protected void Page_Load(object sender, EventArgs e) { HtmlLink htmlLink = new HtmlLink(); htmlLink.Href = "~/CSS/Test.css"; htmlLink.Attributes.Add("rel" , "stylesheet"); htmlLink.Attributes.Add("type", "text/css" ); Page.Header.Controls.Add(htmlLink); } #endregion } } |
TestProject.zip
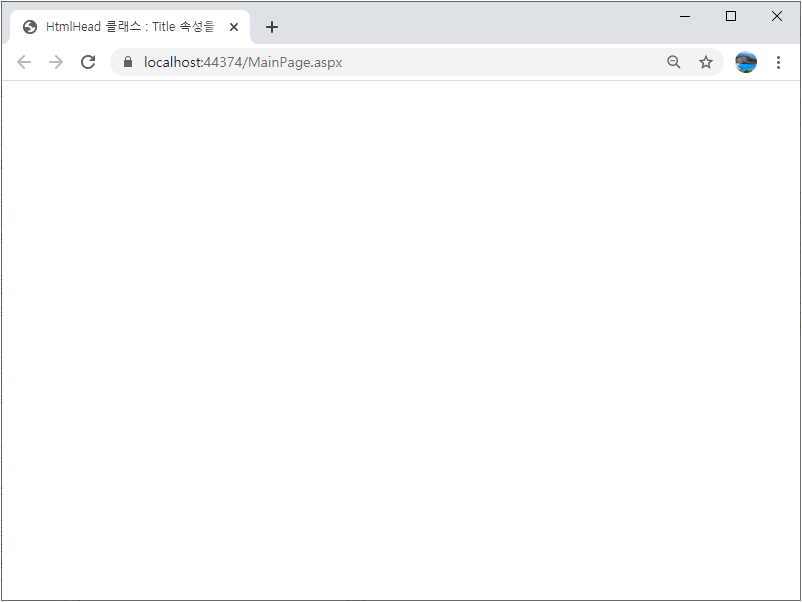
■ HtmlHead 클래스의 Title 속성을 사용해 페이지 제목을 설정하는 방법을 보여준다. ▶ MainPage.aspx
|
|
<%@ Page Language="C#" AutoEventWireup="true" CodeBehind="MainPage.aspx.cs" Inherits="TestProject.MainPage" %> <!DOCTYPE html> <html xmlns="http://www.w3.org/1999/xhtml"> <head runat="server"> <meta http-equiv="Content-Type" content="text/html; charset=utf-8" /> </head> <body> <form id="form" runat="server"> <div> </div> </form> </body> </html> |
▶ MainPage.aspx.cs
1 2 3 4 5 6 7 8 9 10 11 12 13 14 15 16 17 18 19 20 21 22 23 24 25 26 27 28 29 30 |
using System; using System.Web.UI; namespace TestProject { /// <summary> /// 메인 페이지 /// </summary> public partial class MainPage : Page { //////////////////////////////////////////////////////////////////////////////////////////////////// Method ////////////////////////////////////////////////////////////////////////////////////////// Protected #region 페이지 로드시 처리하기 - Page_Load(sender, e) /// <summary> /// 페이지 로드시 처리하기 /// </summary> /// <param name="sender">이벤트 발생자</param> /// <param name="e">이벤트 인자</param> protected void Page_Load(object sender, EventArgs e) { Page.Header.Title = "HtmlHead 클래스 : Title 속성을 사용해 페이지 제목 설정하기"; } #endregion } } |
TestProject.zip
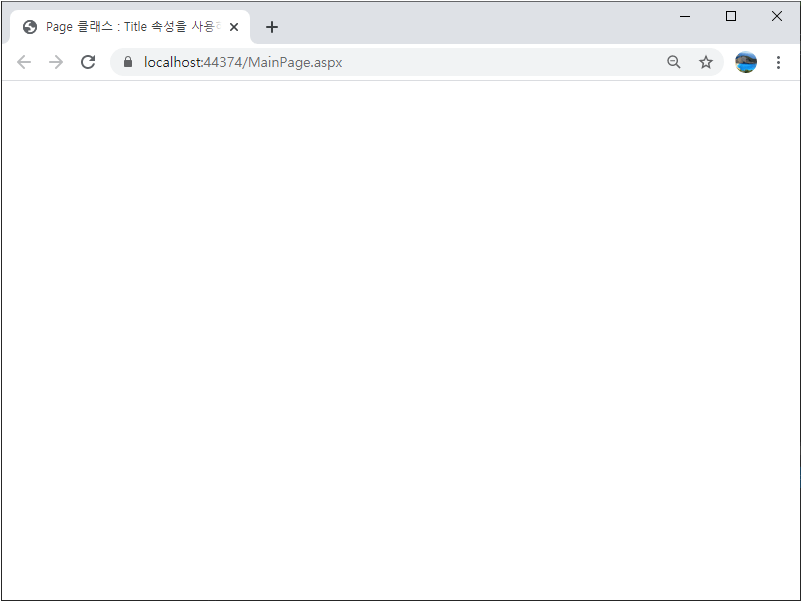
■ Page 클래스의 Title 속성을 사용해 페이지 제목을 설정하는 방법을 보여준다. ▶ MainPage.aspx
|
|
<%@ Page Language="C#" AutoEventWireup="true" CodeBehind="MainPage.aspx.cs" Inherits="TestProject.MainPage" %> <!DOCTYPE html> <html xmlns="http://www.w3.org/1999/xhtml"> <head runat="server"> <meta http-equiv="Content-Type" content="text/html; charset=utf-8" /> </head> <body> <form id="form" runat="server"> <div> </div> </form> </body> </html> |
▶ MainPage.aspx.cs
1 2 3 4 5 6 7 8 9 10 11 12 13 14 15 16 17 18 19 20 21 22 23 24 25 26 27 28 29 30 |
using System; using System.Web.UI; namespace TestProject { /// <summary> /// 메인 페이지 /// </summary> public partial class MainPage : Page { //////////////////////////////////////////////////////////////////////////////////////////////////// Method ////////////////////////////////////////////////////////////////////////////////////////// Protected #region 페이지 로드시 처리하기 - Page_Load(sender, e) /// <summary> /// 페이지 로드시 처리하기 /// </summary> /// <param name="sender">이벤트 발생자</param> /// <param name="e">이벤트 인자</param> protected void Page_Load(object sender, EventArgs e) { Title = "Page 클래스 : Title 속성을 사용해 페이지 제목 설정하기"; } #endregion } } |
TestProject.zip
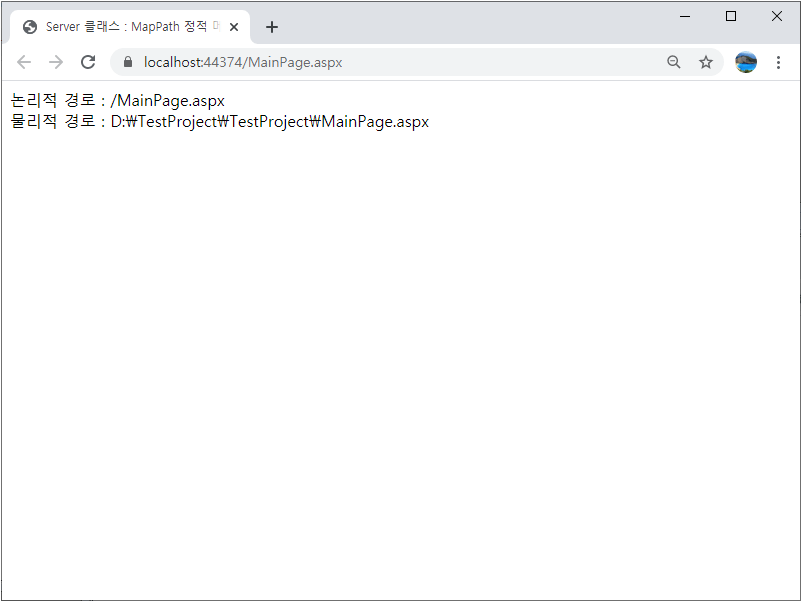
■ HttpServerUtility 클래스의 MapPath 메소드를 사용해 물리적 경로를 구하는 방법을 보여준다. ▶ MainPage.aspx
1 2 3 4 5 6 7 8 9 10 11 12 13 14 15 16 17 18 19 20 |
<%@ Page Language="C#" AutoEventWireup="true" CodeBehind="MainPage.aspx.cs" Inherits="TestProject.MainPage" %> <!DOCTYPE html> <html xmlns="http://www.w3.org/1999/xhtml"> <head runat="server"> <meta http-equiv="Content-Type" content="text/html; charset=utf-8" /> <title>HttpServerUtility 클래스 : MapPath 메소드를 사용해 물리적 경로 구하기</title> </head> <body> <form id="form" runat="server"> <div> 논리적 경로 : <asp:Label ID="logicalPathLabel" runat="server" /><br /> 물리적 경로 : <asp:Label ID="physicalPathLabel" runat="server" /><br /> </div> </form> </body> </html> |
▶ MainPage.aspx.cs
1 2 3 4 5 6 7 8 9 10 11 12 13 14 15 16 17 18 19 20 21 22 23 24 25 26 27 28 29 30 31 32 33 34 |
using System; using System.Web.UI; namespace TestProject { /// <summary> /// 메인 페이지 /// </summary> public partial class MainPage : Page { //////////////////////////////////////////////////////////////////////////////////////////////////// Method ////////////////////////////////////////////////////////////////////////////////////////// Protected #region 페이지 로드시 처리하기 - Page_Load(sender, e) /// <summary> /// 페이지 로드시 처리하기 /// </summary> /// <param name="sender">이벤트 발생자</param> /// <param name="e">이벤트 인자</param> protected void Page_Load(object sender, EventArgs e) { string logicalPath = Request.ServerVariables["SCRIPT_NAME"]; string physicalPath = Server.MapPath(logicalPath); this.logicalPathLabel.Text = logicalPath; this.physicalPathLabel.Text = physicalPath; } #endregion } } |
TestProject.zip
■ HttpRequest 클래스를 사용해 클라이언트 IP 주소를 구하는 방법을 보여준다. ▶ MainPage.aspx
1 2 3 4 5 6 7 8 9 10 11 12 13 14 15 16 17 18 19 |
<%@ Page Language="C#" AutoEventWireup="true" CodeBehind="MainPage.aspx.cs" Inherits="TestProject.MainPage" %> <!DOCTYPE html> <html xmlns="http://www.w3.org/1999/xhtml"> <head runat="server"> <meta http-equiv="Content-Type" content="text/html; charset=utf-8" /> <title>HttpRequest 클래스 : 클라이언트 IP 주소 구하기</title> </head> <body> <form id="form" runat="server"> <div> <asp:Label ID="ipAddressLabel1" runat="server" /><br /> <asp:Label ID="ipAddressLabel2" runat="server" /><br /> <asp:Label ID="ipAddressLabel3" runat="server" /> </div> </form> </body> </html> |
▶ MainPage.aspx.cs
1 2 3 4 5 6 7 8 9 10 11 12 13 14 15 16 17 18 19 20 21 22 23 24 25 26 27 28 29 30 31 32 33 34 |
using System; using System.Web.UI; namespace TestProject { /// <summary> /// 메인 페이지 /// </summary> public partial class MainPage : Page { //////////////////////////////////////////////////////////////////////////////////////////////////// Method ////////////////////////////////////////////////////////////////////////////////////////// Protected #region 페이지 로드시 처리하기 - Page_Load(sender, e) /// <summary> /// 페이지 로드시 처리하기 /// </summary> /// <param name="sender">이벤트 발생자</param> /// <param name="e">이벤트 인자</param> protected void Page_Load(object sender, EventArgs e) { this.ipAddressLabel1.Text = Request.UserHostAddress; this.ipAddressLabel2.Text = Request.ServerVariables["REMOTE_HOST"]; this.ipAddressLabel3.Text = Request.ServerVariables["REMOTE_ADDR"]; } #endregion } } |
TestProject.zip
■ HttpRequest 클래스의 Form 속성을 사용해 전송 데이터를 구하는 방법을 보여준다. ▶ MainPage.aspx
1 2 3 4 5 6 7 8 9 10 11 12 13 14 15 16 17 18 19 20 21 22 23 24 25 26 27 28 29 30 31 32 33 34 |
<%@ Page Language="C#" AutoEventWireup="true" CodeBehind="MainPage.aspx.cs" Inherits="TestProject.MainPage" %> <!DOCTYPE html> <html xmlns="http://www.w3.org/1999/xhtml"> <head runat="server"> <meta http-equiv="Content-Type" content="text/html; charset=utf-8" /> <title>HttpRequest 클래스 : Form 속성을 사용해 전송 데이터 구하기</title> </head> <body> <form id="form" runat="server"> <div> 사용자 ID : <asp:TextBox ID="userIDTextBox" runat="server" /> <br /> 패스워드 : <asp:TextBox ID="passwordTextBox" runat="server" /> <br /> 이름 : <asp:TextBox ID="nameTextBox" runat="server" /> <br /> 나이 : <asp:TextBox ID="ageTextBox" runat="server" /> <br /> <br /> <asp:Button ID="submitButton" runat="server" Text="제출" OnClick="submitButton_Click" /> </div> </form> </body> </html> |
▶ MainPage.aspx.cs
1 2 3 4 5 6 7 8 9 10 11 12 13 14 15 16 17 18 19 20 21 22 23 24 25 26 27 28 29 30 31 32 33 34 35 36 37 38 39 40 41 42 43 44 45 46 47 48 49 50 51 52 53 54 55 56 57 58 59 |
using System; using System.Web.UI; namespace TestProject { /// <summary> /// 메인 페이지 /// </summary> public partial class MainPage : Page { //////////////////////////////////////////////////////////////////////////////////////////////////// Method ////////////////////////////////////////////////////////////////////////////////////////// Protected #region 페이지 로드시 처리하기 - Page_Load(sender, e) /// <summary> /// 페이지 로드시 처리하기 /// </summary> /// <param name="sender">이벤트 발생자</param> /// <param name="e">이벤트 인자</param> protected void Page_Load(object sender, EventArgs e) { if(Request.Form != null && Request.Form.Count > 0) { string userID = Request.Form["userIDTextBox" ]; string password = Request.Form["passwordTextBox"]; string name = Request.Form["nameTextBox" ]; string age = Request.Form["ageTextBox" ]; string message = string.Format ( "사용자 ID : {0}<br />패스워드 : {1}<br />이름 : {2}<br />나이 : {3}<br /><br />", userID, password, name, age ); Response.Write(message); } } #endregion #region 제출 버튼 클릭시 처리하기 - submitButton_Click(object sender, EventArgs e) /// <summary> /// 제출 버튼 클릭시 처리하기 /// </summary> /// <param name="sender">이벤트 발생자</param> /// <param name="e">이벤트 인자</param> protected void submitButton_Click(object sender, EventArgs e) { } #endregion } } |
TestProject.zip
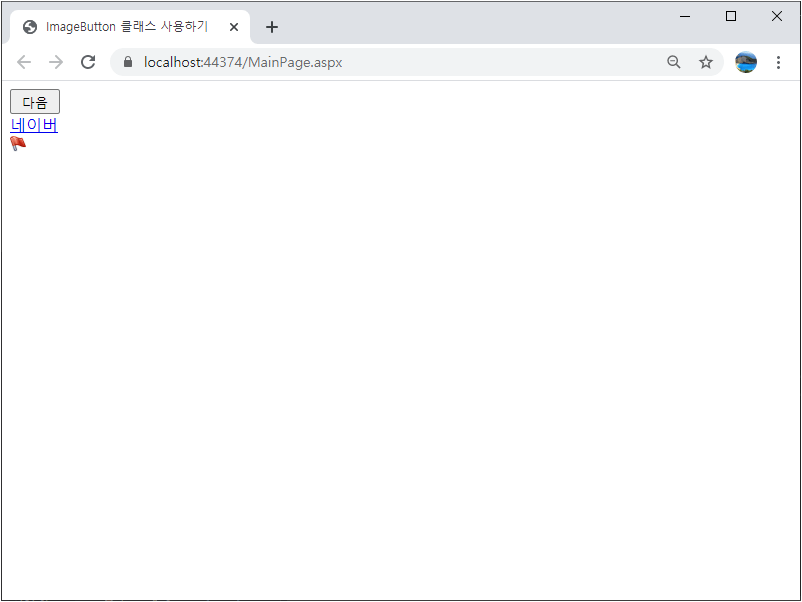
■ ImageButton 클래스를 사용하는 방법을 보여준다. ▶ MainPage.aspx
1 2 3 4 5 6 7 8 9 10 11 12 13 14 15 16 17 18 19 20 21 22 23 24 25 26 27 28 29 30 31 32 |
<%@ Page Language="C#" AutoEventWireup="true" CodeBehind="MainPage.aspx.cs" Inherits="TestProject.MainPage" %> <!DOCTYPE html> <html xmlns="http://www.w3.org/1999/xhtml"> <head runat="server"> <meta http-equiv="Content-Type" content="text/html; charset=utf-8" /> <title>ImageButton 클래스 사용하기</title> </head> <body> <form id="form" runat="server"> <div> <asp:Button ID="daumButton" runat="server" Style="width:50px;height:25px" Text="다음" OnClick="daumButton_Click" /> <br /> <asp:LinkButton ID="naverLinkButton" runat="server" Text="네이버" OnClick="naverLinkButton_Click" /> <br /> <asp:ImageButton ID="googleImageButton" runat="server" Style="height:16px" ImageUrl="~/Images/flag.png" AlternateText="구글" ToolTip="Google" OnClick="googleImageButton_Click" /> <br /> </div> </form> </body> </html> |
▶ MainPage.aspx.cs
1 2 3 4 5 6 7 8 9 10 11 12 13 14 15 16 17 18 19 20 21 22 23 24 25 26 27 28 29 30 31 32 33 34 35 36 37 38 39 40 41 42 43 44 45 46 47 48 49 50 51 52 53 54 55 56 57 58 59 60 61 62 63 64 65 66 67 68 69 70 71 72 |
using System; using System.Web.UI; namespace TestProject { /// <summary> /// 메인 페이지 /// </summary> public partial class MainPage : Page { //////////////////////////////////////////////////////////////////////////////////////////////////// Method ////////////////////////////////////////////////////////////////////////////////////////// Protected #region 페이지 로드시 처리하기 - Page_Load(sender, e) /// <summary> /// 페이지 로드시 처리하기 /// </summary> /// <param name="sender">이벤트 발생자</param> /// <param name="e">이벤트 인자</param> protected void Page_Load(object sender, EventArgs e) { } #endregion #region 다음 버튼 클릭시 처리하기 - daumButton_Click(sender, e) /// <summary> /// 다음 버튼 클릭시 처리하기 /// </summary> /// <param name="sender">이벤트 발생자</param> /// <param name="e">이벤트 인자</param> protected void daumButton_Click(object sender, EventArgs e) { Response.Redirect("https://www.daum.net"); } #endregion #region 네이버 링크 버튼 클릭시 처리하기 - naverLinkButton_Click(sender, e) /// <summary> /// 네이버 링크 버튼 클릭시 처리하기 /// </summary> /// <param name="sender">이벤트 발생자</param> /// <param name="e">이벤트 인자</param> protected void naverLinkButton_Click(object sender, EventArgs e) { string url = "https://www.naver.com"; Response.Redirect(url); } #endregion #region 구글 이미지 버튼 클릭시 처리하기 - googleImageButton_Click(sender, e) /// <summary> /// 구글 이미지 버튼 클릭시 처리하기 /// </summary> /// <param name="sender">이벤트 발생자</param> /// <param name="e">이벤트 인자</param> protected void googleImageButton_Click(object sender, ImageClickEventArgs e) { string url = "http://www.google.com"; Response.Redirect(url); } #endregion } } |
TestProject.zip
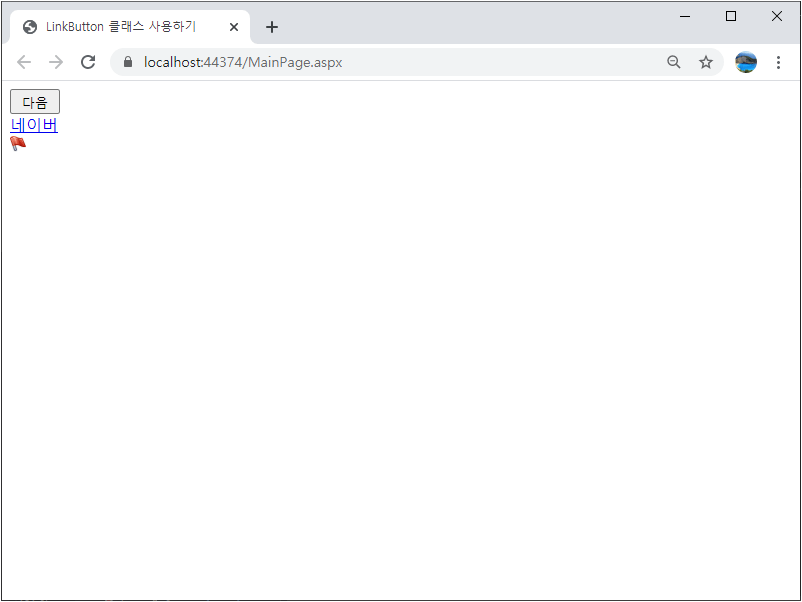
■ LinkButton 클래스를 사용하는 방법을 보여준다. ▶ MainPage.aspx
1 2 3 4 5 6 7 8 9 10 11 12 13 14 15 16 17 18 19 20 21 22 23 24 25 26 27 28 29 30 31 32 |
<%@ Page Language="C#" AutoEventWireup="true" CodeBehind="MainPage.aspx.cs" Inherits="TestProject.MainPage" %> <!DOCTYPE html> <html xmlns="http://www.w3.org/1999/xhtml"> <head runat="server"> <meta http-equiv="Content-Type" content="text/html; charset=utf-8" /> <title>LinkButton 클래스 사용하기</title> </head> <body> <form id="form" runat="server"> <div> <asp:Button ID="daumButton" runat="server" Style="width:50px;height:25px" Text="다음" OnClick="daumButton_Click" /> <br /> <asp:LinkButton ID="naverLinkButton" runat="server" Text="네이버" OnClick="naverLinkButton_Click" /> <br /> <asp:ImageButton ID="googleImageButton" runat="server" Style="height:16px" ImageUrl="~/Images/flag.png" AlternateText="구글" ToolTip="Google" OnClick="googleImageButton_Click" /> <br /> </div> </form> </body> </html> |
▶ MainPage.aspx.cs
1 2 3 4 5 6 7 8 9 10 11 12 13 14 15 16 17 18 19 20 21 22 23 24 25 26 27 28 29 30 31 32 33 34 35 36 37 38 39 40 41 42 43 44 45 46 47 48 49 50 51 52 53 54 55 56 57 58 59 60 61 62 63 64 65 66 67 68 69 70 71 72 |
using System; using System.Web.UI; namespace TestProject { /// <summary> /// 메인 페이지 /// </summary> public partial class MainPage : Page { //////////////////////////////////////////////////////////////////////////////////////////////////// Method ////////////////////////////////////////////////////////////////////////////////////////// Protected #region 페이지 로드시 처리하기 - Page_Load(sender, e) /// <summary> /// 페이지 로드시 처리하기 /// </summary> /// <param name="sender">이벤트 발생자</param> /// <param name="e">이벤트 인자</param> protected void Page_Load(object sender, EventArgs e) { } #endregion #region 다음 버튼 클릭시 처리하기 - daumButton_Click(sender, e) /// <summary> /// 다음 버튼 클릭시 처리하기 /// </summary> /// <param name="sender">이벤트 발생자</param> /// <param name="e">이벤트 인자</param> protected void daumButton_Click(object sender, EventArgs e) { Response.Redirect("https://www.daum.net"); } #endregion #region 네이버 링크 버튼 클릭시 처리하기 - naverLinkButton_Click(sender, e) /// <summary> /// 네이버 링크 버튼 클릭시 처리하기 /// </summary> /// <param name="sender">이벤트 발생자</param> /// <param name="e">이벤트 인자</param> protected void naverLinkButton_Click(object sender, EventArgs e) { string url = "https://www.naver.com"; Response.Redirect(url); } #endregion #region 구글 이미지 버튼 클릭시 처리하기 - googleImageButton_Click(sender, e) /// <summary> /// 구글 이미지 버튼 클릭시 처리하기 /// </summary> /// <param name="sender">이벤트 발생자</param> /// <param name="e">이벤트 인자</param> protected void googleImageButton_Click(object sender, ImageClickEventArgs e) { string url = "http://www.google.com"; Response.Redirect(url); } #endregion } } |
TestProject.zip
■ HttpResponse 클래스의 Redirect 메소드를 사용해 페이지를 리다이렉트하는 방법을 보여준다. ▶ MainPage.aspx
1 2 3 4 5 6 7 8 9 10 11 12 13 14 15 16 17 18 19 |
<%@ Page Language="C#" AutoEventWireup="true" CodeBehind="MainPage.aspx.cs" Inherits="TestProject.MainPage" %> <!DOCTYPE html> <html xmlns="http://www.w3.org/1999/xhtml"> <head runat="server"> <meta http-equiv="Content-Type" content="text/html; charset=utf-8" /> <title>HttpResponse 클래스 : Redirect 메소드를 사용해 페이지 리다이렉트하기</title> </head> <body> <form id="form" runat="server"> <div> <asp:Button ID="redirectButton" runat="server" Text="페이지 리다이렉트" OnClick="redirectButton_Click" /> </div> </form> </body> </html> |
▶ MainPage.aspx.cs
1 2 3 4 5 6 7 8 9 10 11 12 13 14 15 16 17 18 19 20 21 22 23 24 25 26 27 28 29 30 31 32 33 34 35 36 37 38 39 40 41 42 |
using System; using System.Web.UI; namespace TestProject { /// <summary> /// 메인 페이지 /// </summary> public partial class MainPage : Page { //////////////////////////////////////////////////////////////////////////////////////////////////// Method ////////////////////////////////////////////////////////////////////////////////////////// Protected #region 페이지 로드시 처리하기 - Page_Load(sender, e) /// <summary> /// 페이지 로드시 처리하기 /// </summary> /// <param name="sender">이벤트 발생자</param> /// <param name="e">이벤트 인자</param> protected void Page_Load(object sender, EventArgs e) { } #endregion #region 페이지 리다이렉트 버튼 클릭시 처리하기 - redirectButton_Click(sender, e) /// <summary> /// 페이지 리다이렉트 버튼 클릭시 처리하기 /// </summary> /// <param name="sender">이벤트 발생자</param> /// <param name="e">이벤트 인자</param> protected void redirectButton_Click(object sender, EventArgs e) { Response.Redirect("http://www.daum.net/"); } #endregion } } |
TestProject.zip
■ HttpResponse 클래스의 Buffer 속성을 사용해 버퍼링을 처리하는 방법을 보여준다. ▶ MainPage.aspx
|
|
<%@ Page Language="C#" AutoEventWireup="true" CodeBehind="MainPage.aspx.cs" Inherits="TestProject.MainPage" %> <!DOCTYPE html> <html xmlns="http://www.w3.org/1999/xhtml"> <head runat="server"> <meta http-equiv="Content-Type" content="text/html; charset=utf-8"/> <title>HttpResponse 클래스 : Buffer 속성을 사용해 버퍼링 처리하기</title> </head> <body> <form id="form" runat="server"> <div> </div> </form> </body> </html> |
▶ MainPage.aspx.cs
1 2 3 4 5 6 7 8 9 10 11 12 13 14 15 16 17 18 19 20 21 22 23 24 25 26 27 28 29 30 31 32 33 34 35 36 37 38 39 40 41 42 43 44 45 46 |
using System; using System.Web.UI; namespace TestProject { /// <summary> /// 메인 페이지 /// </summary> public partial class MainPage : Page { //////////////////////////////////////////////////////////////////////////////////////////////////// Method ////////////////////////////////////////////////////////////////////////////////////////// Protected #region 페이지 로드시 처리하기 - Page_Load(sender, e) /// <summary> /// 페이지 로드시 처리하기 /// </summary> /// <param name="sender">이벤트 발생자</param> /// <param name="e">이벤트 인자</param> protected void Page_Load(object sender, EventArgs e) { Response.Expires = -1; // 현재 페이지를 매번 새로 읽는다. Response.Buffer = true; // 버퍼링을 사용한다. Response.Write($"[1] {DateTime.Now.ToString("HH:mm:ss")}<br />"); Response.Flush(); // 버퍼의 내용을 출력한다. Response.Write($"[2] {DateTime.Now.ToString("HH:mm:ss")}<br />"); Response.Clear(); // 버퍼의 내용을 지운다. Response.Write($"[3] {DateTime.Now.ToString("HH:mm:ss")}<br />"); Response.End(); // 출력을 종료한다. Response.Write($"[4] {DateTime.Now.ToString("HH:mm:ss")}<br />"); } #endregion } } |
TestProject.zip
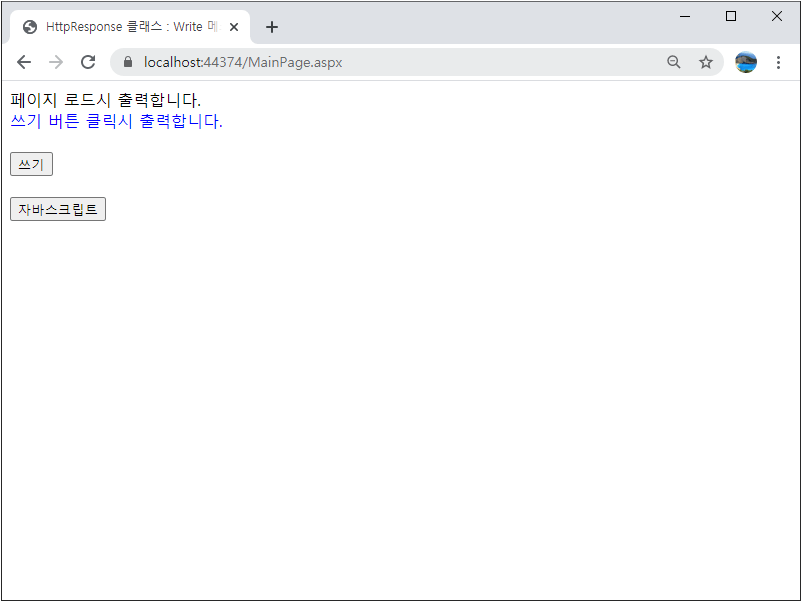
■ HttpResponse 클래스의 Write 메소드를 사용해 문자열을 출력하는 방법을 보여준다. ▶ MainPage.aspx
1 2 3 4 5 6 7 8 9 10 11 12 13 14 15 16 17 18 19 20 21 22 23 24 25 |
<%@ Page Language="C#" AutoEventWireup="true" CodeBehind="MainPage.aspx.cs" Inherits="TestProject.MainPage" %> <!DOCTYPE html> <html xmlns="http://www.w3.org/1999/xhtml"> <head runat="server"> <meta http-equiv="Content-Type" content="text/html; charset=utf-8" /> <title>HttpResponse 클래스 : Write 메소드를 사용해 문자열 출력하기</title> </head> <body> <form id="form" runat="server"> <div> <br /> <asp:Button ID="writeButton" runat="server" Text="쓰기" OnClick="writeButton_Click" /> <br /> <br /> <asp:Button ID="javaScriptButton" runat="server" Text="자바스크립트" OnClick="javaScriptButton_Click" /> </div> </form> </body> </html> |
▶ MainPage.aspx.cs
1 2 3 4 5 6 7 8 9 10 11 12 13 14 15 16 17 18 19 20 21 22 23 24 25 26 27 28 29 30 31 32 33 34 35 36 37 38 39 40 41 42 43 44 45 46 47 48 49 50 51 52 53 54 55 56 57 58 59 60 61 62 |
using System; using System.Web.UI; namespace TestProject { /// <summary> /// 메인 페이지 /// </summary> public partial class MainPage : Page { //////////////////////////////////////////////////////////////////////////////////////////////////// Method ////////////////////////////////////////////////////////////////////////////////////////// Protected #region 페이지 로드시 처리하기 - Page_Load(sender, e) /// <summary> /// 페이지 로드시 처리하기 /// </summary> /// <param name="sender">이벤트 발생자</param> /// <param name="e">이벤트 인자</param> protected void Page_Load(object sender, EventArgs e) { Response.Write("페이지 로드시 출력합니다.<br />"); } #endregion #region 쓰기 버튼 클릭시 처리하기 - writeButton_Click(sender, e) /// <summary> /// 쓰기 버튼 클릭시 처리하기 /// </summary> /// <param name="sender">이벤트 발생자</param> /// <param name="e">이벤트 인자</param> protected void writeButton_Click(object sender, EventArgs e) { Response.Write("<span style='color:blue;'>쓰기 버튼 클릭시 출력합니다.</span><br />"); } #endregion #region 자바스크립트 버튼 클릭시 처리하기 - javaScriptButton_Click(sender, e) /// <summary> /// 자바스크립트 버튼 클릭시 처리하기 /// </summary> /// <param name="sender">이벤트 발생자</param> /// <param name="e">이벤트 인자</param> protected void javaScriptButton_Click(object sender, EventArgs e) { string code = @" <script language='JavaScript'> window.alert('자바스크립트 버튼 클릭시 출력됩니다.'); </script> "; Response.Write(code); } #endregion } } |
TestProject.zip
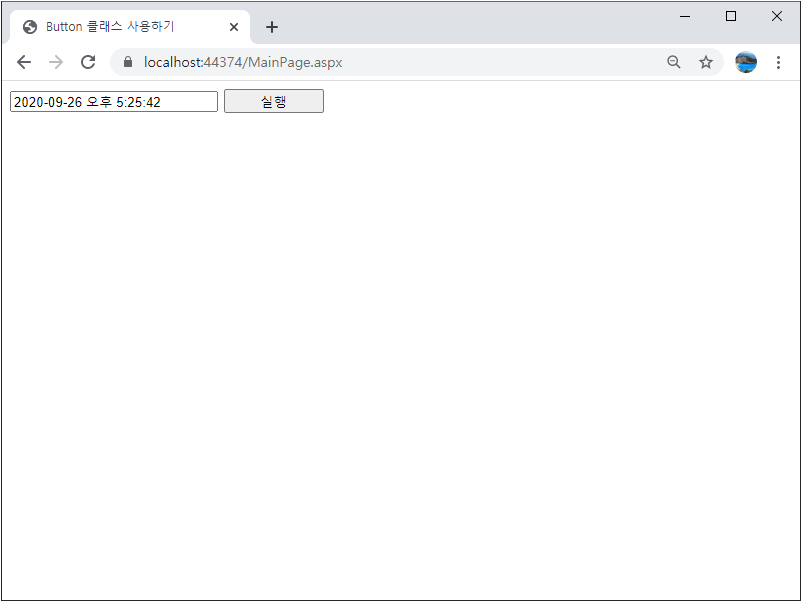
■ Page 클래스를 사용하는 방법을 보여준다. ▶ MainPage.aspx
1 2 3 4 5 6 7 8 9 10 11 12 13 14 15 16 17 18 19 20 21 22 |
<%@ Page Language="C#" AutoEventWireup="true" CodeBehind="MainPage.aspx.cs" Inherits="TestProject.MainPage" %> <!DOCTYPE html> <html xmlns="http://www.w3.org/1999/xhtml"> <head runat="server"> <meta http-equiv="Content-Type" content="text/html; charset=utf-8" /> <title>Page 클래스 사용하기</title> </head> <body> <form id="form" runat="server"> <div> <asp:TextBox ID="displayTextBox" runat="server" Width="200" /> <asp:Button ID="runButton" runat="server" Width="100" Text="실행" OnClick="runButton_Click" /> </div> </form> </body> </html> |
▶ MainPage.aspx.cs
1 2 3 4 5 6 7 8 9 10 11 12 13 14 15 16 17 18 19 20 21 22 23 24 25 26 27 28 29 30 31 32 33 34 35 36 37 38 39 40 41 42 |
using System; using System.Web.UI; namespace TestProject { /// <summary> /// 메인 페이지 /// </summary> public partial class MainPage : Page { //////////////////////////////////////////////////////////////////////////////////////////////////// Method ////////////////////////////////////////////////////////////////////////////////////////// Protected #region 페이지 로드시 처리하기 - Page_Load(sender, e) /// <summary> /// 페이지 로드시 처리하기 /// </summary> /// <param name="sender">이벤트 발생자</param> /// <param name="e">이벤트 인자</param> protected void Page_Load(object sender, EventArgs e) { } #endregion #region 실행 버튼 클릭시 처리하기 - runButton_Click(sender, e) /// <summary> /// 실행 버튼 클릭시 처리하기 /// </summary> /// <param name="sender">이벤트 발생자</param> /// <param name="e">이벤트 인자</param> protected void runButton_Click(object sender, EventArgs e) { this.displayTextBox.Text = DateTime.Now.ToString(); } #endregion } } |
TestProject.zip
■ Button 클래스를 사용하는 방법을 보여준다. ▶ MainPage.aspx
1 2 3 4 5 6 7 8 9 10 11 12 13 14 15 16 17 18 19 20 21 22 |
<%@ Page Language="C#" AutoEventWireup="true" CodeBehind="MainPage.aspx.cs" Inherits="TestProject.MainPage" %> <!DOCTYPE html> <html xmlns="http://www.w3.org/1999/xhtml"> <head runat="server"> <meta http-equiv="Content-Type" content="text/html; charset=utf-8" /> <title>Button 클래스 사용하기</title> </head> <body> <form id="form" runat="server"> <div> <asp:TextBox ID="displayTextBox" runat="server" Width="200" /> <asp:Button ID="runButton" runat="server" Width="100" Text="실행" OnClick="runButton_Click" /> </div> </form> </body> </html> |
▶ MainPage.aspx.cs
1 2 3 4 5 6 7 8 9 10 11 12 13 14 15 16 17 18 19 20 21 22 23 24 25 26 27 28 29 30 31 32 33 34 35 36 37 38 39 40 41 42 |
using System; using System.Web.UI; namespace TestProject { /// <summary> /// 메인 페이지 /// </summary> public partial class MainPage : Page { //////////////////////////////////////////////////////////////////////////////////////////////////// Method ////////////////////////////////////////////////////////////////////////////////////////// Protected #region 페이지 로드시 처리하기 - Page_Load(sender, e) /// <summary> /// 페이지 로드시 처리하기 /// </summary> /// <param name="sender">이벤트 발생자</param> /// <param name="e">이벤트 인자</param> protected void Page_Load(object sender, EventArgs e) { } #endregion #region 실행 버튼 클릭시 처리하기 - runButton_Click(sender, e) /// <summary> /// 실행 버튼 클릭시 처리하기 /// </summary> /// <param name="sender">이벤트 발생자</param> /// <param name="e">이벤트 인자</param> protected void runButton_Click(object sender, EventArgs e) { this.displayTextBox.Text = DateTime.Now.ToString(); } #endregion } } |
TestProject.zip
■ TextBox 클래스를 사용하는 방법을 보여준다. ▶ MainPage.aspx
1 2 3 4 5 6 7 8 9 10 11 12 13 14 15 16 17 18 19 20 21 22 23 24 |
<%@ Page Language="C#" AutoEventWireup="true" CodeBehind="MainPage.aspx.cs" Inherits="TestProject.MainPage" %> <!DOCTYPE html> <html xmlns="http://www.w3.org/1999/xhtml"> <head runat="server"> <meta http-equiv="Content-Type" content="text/html; charset=utf-8" /> <title>TextBox 클래스 사용하기</title> </head> <body> <form id="form" runat="server"> <div> <asp:TextBox ID="displayTextBox" Width="200" runat="server" /> <asp:Button ID="runButton" Width="100" Text="실행" OnClick="runButton_Click" runat="server" /> </div> </form> </body> </html> |
▶ MainPage.aspx.cs
1 2 3 4 5 6 7 8 9 10 11 12 13 14 15 16 17 18 19 20 21 22 23 24 25 26 27 28 29 30 31 32 33 34 35 36 37 38 39 40 41 42 |
using System; using System.Web.UI; namespace TestProject { /// <summary> /// 메인 페이지 /// </summary> public partial class MainPage : Page { //////////////////////////////////////////////////////////////////////////////////////////////////// Method ////////////////////////////////////////////////////////////////////////////////////////// Protected #region 페이지 로드시 처리하기 - Page_Load(sender, e) /// <summary> /// 페이지 로드시 처리하기 /// </summary> /// <param name="sender">이벤트 발생자</param> /// <param name="e">이벤트 인자</param> protected void Page_Load(object sender, EventArgs e) { } #endregion #region 실행 버튼 클릭시 처리하기 - runButton_Click(sender, e) /// <summary> /// 실행 버튼 클릭시 처리하기 /// </summary> /// <param name="sender">이벤트 발생자</param> /// <param name="e">이벤트 인자</param> protected void runButton_Click(object sender, EventArgs e) { this.displayTextBox.Text = DateTime.Now.ToString(); } #endregion } } |
TestProject.zip

