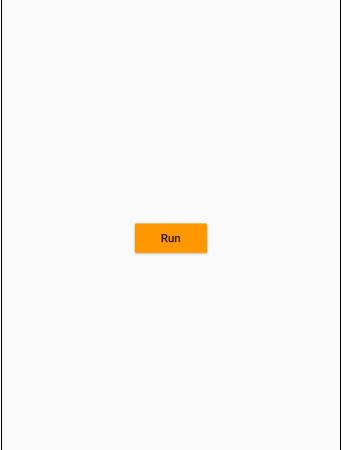
■ RaisedButton 클래스를 사용하는 방법을 보여준다. ▶ main.dart
1 2 3 4 5 6 7 8 9 10 11 12 13 14 15 16 17 18 19 20 21 22 23 24 25 26 27 28 29 30 31 32 33 34 35 36 37 38 39 |
import 'package:flutter/material.dart'; void main() { runApp(TestApplication()); } class TestApplication extends StatelessWidget { @override Widget build(BuildContext context) { return MaterialApp( title: 'Test Application', theme: ThemeData( primarySwatch: Colors.blue, ), home: MainPage(), ); } } class MainPage extends StatelessWidget { @override Widget build(BuildContext context) { return Scaffold( appBar: AppBar( title: Text('Test Application'), ), body: Align( alignment: Alignment.center, child: RaisedButton( child: Text('Run'), color: Colors.orange, onPressed: () { }, ), ), ); } } |
test_app.zip
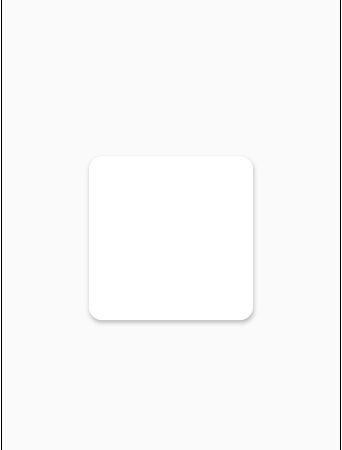
■ Card 클래스를 사용하는 방법을 보여준다. ▶ main.dart
1 2 3 4 5 6 7 8 9 10 11 12 13 14 15 16 17 18 19 20 21 22 23 24 25 26 27 28 29 30 31 32 33 34 35 36 37 38 39 40 41 42 43 44 |
import 'package:flutter/material.dart'; void main() { runApp(TestApplication()); } class TestApplication extends StatelessWidget { @override Widget build(BuildContext context) { return MaterialApp( title: 'Test Application', theme: ThemeData( primarySwatch: Colors.blue, ), home: MainPage(), ); } } class MainPage extends StatelessWidget { @override Widget build(BuildContext context) { return Scaffold( appBar: AppBar( title: Text('Test Application'), ), body: Align( alignment: Alignment.center, child: Card( shape: RoundedRectangleBorder( borderRadius: BorderRadius.circular(16.0), ), elevation: 4.0, child: Container( width: 200, height: 200, ), ), ), ); } } |
test_app.zip
■ SizedBox 클래스를 사용하는 방법을 보여준다. ▶ main.dart
1 2 3 4 5 6 7 8 9 10 11 12 13 14 15 16 17 18 19 20 21 22 23 24 25 26 27 28 29 30 31 32 33 34 35 36 37 38 |
import 'package:flutter/material.dart'; void main() { runApp(TestApplication()); } class TestApplication extends StatelessWidget { @override Widget build(BuildContext context) { return MaterialApp( title: 'Test Application', theme: ThemeData( primarySwatch: Colors.blue, ), home: MainPage(), ); } } class MainPage extends StatelessWidget { @override Widget build(BuildContext context) { return Scaffold( appBar: AppBar( title: Text('Test Application'), ), body: SizedBox( width: 100, height: 100, child: Container( color: Colors.red, ), ), ); } } |
test_app.zip
■ Expanded 클래스를 사용하는 방법을 보여준다. ▶ main.dart
1 2 3 4 5 6 7 8 9 10 11 12 13 14 15 16 17 18 19 20 21 22 23 24 25 26 27 28 29 30 31 32 33 34 35 36 37 38 39 40 41 42 43 44 45 46 47 48 49 50 51 |
import 'package:flutter/material.dart'; void main() { runApp(TestApplication()); } class TestApplication extends StatelessWidget { @override Widget build(BuildContext context) { return MaterialApp( title: 'Test Application', theme: ThemeData( primarySwatch: Colors.blue, ), home: MainPage(), ); } } class MainPage extends StatelessWidget { @override Widget build(BuildContext context) { return Scaffold( appBar: AppBar( title: Text('Test Application'), ), body: Column( children: <Widget>[ Expanded( flex: 2, child: Container( color: Colors.red, ), ), Expanded( child: Container( color: Colors.green, ), ), Expanded( child: Container( color: Colors.blue, ), ), ], ), ); } } |
test_app.zip
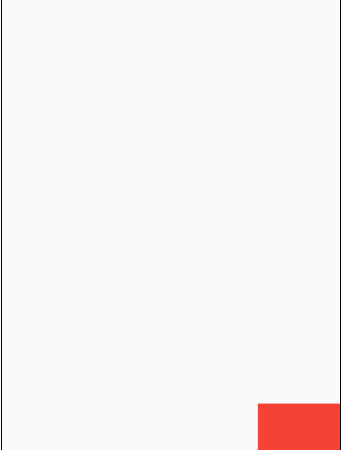
■ Align 클래스를 사용하는 방법을 보여준다. ▶ main.dart
1 2 3 4 5 6 7 8 9 10 11 12 13 14 15 16 17 18 19 20 21 22 23 24 25 26 27 28 29 30 31 32 33 34 35 36 37 38 39 |
import 'package:flutter/material.dart'; void main() { runApp(TestApplication()); } class TestApplication extends StatelessWidget { @override Widget build(BuildContext context) { return MaterialApp( title: 'Test Application', theme: ThemeData( primarySwatch: Colors.blue, ), home: MainPage(), ); } } class MainPage extends StatelessWidget { @override Widget build(BuildContext context) { return Scaffold( appBar: AppBar( title: Text('Test Application'), ), body: Align( alignment: Alignment.bottomRight, child: Container( color: Colors.red, width: 100, height: 100, ), ), ); } } |
test_app.zip
■ Padding 클래스를 사용하는 방법을 보여준다. ▶ main.dart
1 2 3 4 5 6 7 8 9 10 11 12 13 14 15 16 17 18 19 20 21 22 23 24 25 26 27 28 29 30 31 32 33 34 35 36 37 |
import 'package:flutter/material.dart'; void main() { runApp(TestApplication()); } class TestApplication extends StatelessWidget { @override Widget build(BuildContext context) { return MaterialApp( title: 'Test Application', theme: ThemeData( primarySwatch: Colors.blue, ), home: MainPage(), ); } } class MainPage extends StatelessWidget { @override Widget build(BuildContext context) { return Scaffold( appBar: AppBar( title: Text('Test Application'), ), body: Padding( padding: const EdgeInsets.all(40.0), child: Container( color: Colors.red, ), ), ); } } |
test_app.zip
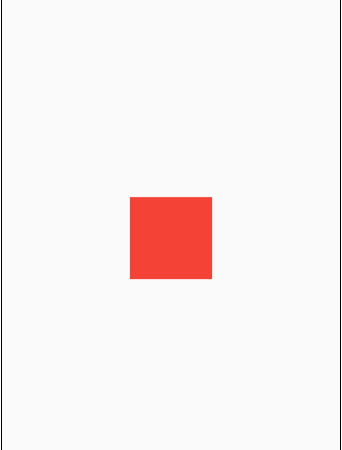
■ Center 클래스를 사용하는 방법을 보여준다. ▶ main.dart
1 2 3 4 5 6 7 8 9 10 11 12 13 14 15 16 17 18 19 20 21 22 23 24 25 26 27 28 29 30 31 32 33 34 35 36 37 38 |
import 'package:flutter/material.dart'; void main() { runApp(TestApplication()); } class TestApplication extends StatelessWidget { @override Widget build(BuildContext context) { return MaterialApp( title: 'Test Application', theme: ThemeData( primarySwatch: Colors.blue, ), home: MainPage(), ); } } class MainPage extends StatelessWidget { @override Widget build(BuildContext context) { return Scaffold( appBar: AppBar( title: Text('Test Application'), ), body: Center( child: Container( color: Colors.red, width: 100, height: 100, ), ), ); } } |
test_app.zip
■ BottomNavigationBar 클래스를 사용하는 방법을 보여준다. ▶ main.dart
1 2 3 4 5 6 7 8 9 10 11 12 13 14 15 16 17 18 19 20 21 22 23 24 25 26 27 28 29 30 31 32 33 34 35 36 37 38 39 40 41 42 43 44 45 46 47 |
import 'package:flutter/material.dart'; void main() { runApp(TestApplication()); } class TestApplication extends StatelessWidget { @override Widget build(BuildContext context) { return MaterialApp( title: 'Test Application', theme: ThemeData( primarySwatch: Colors.blue, ), home: MainPage(), ); } } class MainPage extends StatelessWidget { @override Widget build(BuildContext context) { return Scaffold( appBar: AppBar( title: Text('Test Application'), ), bottomNavigationBar: BottomNavigationBar( items: [ BottomNavigationBarItem( icon: Icon(Icons.home), label:'Home', ), BottomNavigationBarItem( icon: Icon(Icons.person), label: 'Profile', ), BottomNavigationBarItem( icon: Icon(Icons.notifications), label: 'Notification', ), ] ), ); } } |
test_app.zip
■ TabBarView 클래스를 사용하는 방법을 보여준다. ▶ 예제 코드 (DART)
|
|
TabBarView( children: <Widget>[ Container(color: Colors.yellow,), Container(color: Colors.orange,), Container(color: Colors.red,), ] ) |
■ TabBar 클래스를 사용하는 방법을 보여준다. ▶ 예제 코드 (DART)
|
|
TabBar( tabs: <Widget>[ Tab(icon: Icon(Icons.tag_faces),text: '메뉴1'), Tab(icon: Icon(Icons.add_circle_sharp),text: '메뉴2'), Tab(icon: Icon(Icons.info), text: '메뉴3'), ], ) |
■ DefaultTabController 클래스를 사용하는 방법을 보여준다. ▶ main.dart
1 2 3 4 5 6 7 8 9 10 11 12 13 14 15 16 17 18 19 20 21 22 23 24 25 26 27 28 29 30 31 32 33 34 35 36 37 38 39 40 41 42 43 44 45 46 47 48 |
import 'package:flutter/material.dart'; void main() { runApp(TestApplication()); } class TestApplication extends StatelessWidget { @override Widget build(BuildContext context) { return MaterialApp( title: 'Test Application', theme: ThemeData( primarySwatch: Colors.blue, ), home: MainPage(), ); } } class MainPage extends StatelessWidget { @override Widget build(BuildContext context) { return DefaultTabController( length: 3, child: Scaffold( appBar: AppBar( title: Text('Tab'), bottom: TabBar( tabs: <Widget>[ Tab(icon: Icon(Icons.tag_faces),text: '메뉴1'), Tab(icon: Icon(Icons.add_circle_sharp),text: '메뉴2'), Tab(icon: Icon(Icons.info), text: '메뉴3'), ], ), ), body: TabBarView( children: <Widget>[ Container(color: Colors.yellow,), Container(color: Colors.orange,), Container(color: Colors.red,), ] ), ), ); } } |
test_app.zip
■ PageView 클래스를 사용하는 방법을 보여준다. ▶ main.dart
1 2 3 4 5 6 7 8 9 10 11 12 13 14 15 16 17 18 19 20 21 22 23 24 25 26 27 28 29 30 31 32 33 34 35 36 37 38 39 40 41 42 43 44 |
import 'package:flutter/material.dart'; void main() { runApp(TestApplication()); } class TestApplication extends StatelessWidget { @override Widget build(BuildContext context) { return MaterialApp( title: 'Test Application', theme: ThemeData( primarySwatch: Colors.blue, ), home: MainPage(), ); } } class MainPage extends StatelessWidget { @override Widget build(BuildContext context) { return Scaffold( appBar: AppBar( title: Text('Test Application'), ), body: PageView( children: <Widget>[ Container( color: Colors.red, ), Container( color: Colors.green, ), Container( color: Colors.blue, ), ], ), ); } } |
test_app.zip
■ GridView 클래스에서 count 생성자를 사용하는 방법을 보여준다. ▶ main.dart
1 2 3 4 5 6 7 8 9 10 11 12 13 14 15 16 17 18 19 20 21 22 23 24 25 26 27 28 29 30 31 32 33 34 35 36 37 38 39 40 41 42 43 44 45 46 47 48 49 50 51 52 53 54 55 56 57 |
import 'package:flutter/material.dart'; void main() { runApp(TestApplication()); } class TestApplication extends StatelessWidget { @override Widget build(BuildContext context) { return MaterialApp( title: 'Test Application', theme: ThemeData( primarySwatch: Colors.blue, ), home: MainPage(), ); } } class MainPage extends StatelessWidget { @override Widget build(BuildContext context) { return Scaffold( appBar: AppBar( title: Text('Test Application'), ), body: GridView.count( crossAxisCount: 2, children: <Widget>[ Container( color: Colors.red, width: 100, height: 100, padding: const EdgeInsets.all(8.0), margin: const EdgeInsets.all(8.0), ), Container( color: Colors.green, width: 100, height: 100, padding: const EdgeInsets.all(8.0), margin: const EdgeInsets.all(8.0), ), Container( color: Colors.blue, width: 100, height: 100, padding: const EdgeInsets.all(8.0), margin: const EdgeInsets.all(8.0), ), ], ), ); } } |
test_app.zip
■ ListTile 클래스를 사용하는 방법을 보여준다. ▶ 예제 코드 (DART)
|
|
ListTile( leading: Icon(Icons.home), title: Text('Home'), trailing: Icon(Icons.navigate_next), onTap: () {}, ) |
■ ListView 클래스를 사용하는 방법을 보여준다. ▶ main.dart
1 2 3 4 5 6 7 8 9 10 11 12 13 14 15 16 17 18 19 20 21 22 23 24 25 26 27 28 29 30 31 32 33 34 35 36 37 38 39 40 41 42 43 44 45 46 47 48 49 50 51 52 53 54 |
import 'package:flutter/material.dart'; void main() { runApp(TestApplication()); } class TestApplication extends StatelessWidget { @override Widget build(BuildContext context) { return MaterialApp( title: 'Test Application', theme: ThemeData( primarySwatch: Colors.blue, ), home: MainPage(), ); } } class MainPage extends StatelessWidget { @override Widget build(BuildContext context) { return Scaffold( appBar: AppBar( title: Text('Test Application'), ), body: ListView( scrollDirection: Axis.vertical, children: <Widget>[ ListTile( leading: Icon(Icons.home), title: Text('Home'), trailing: Icon(Icons.navigate_next), onTap: () {}, ), ListTile( leading: Icon(Icons.event), title: Text('Event'), trailing: Icon(Icons.navigate_next), onTap: () {}, ), ListTile( leading: Icon(Icons.camera), title: Text('Camera'), trailing: Icon(Icons.navigate_next), onTap: () {}, ), ], ), ); } } |
test_app.zip
■ ListBody 클래스를 사용하는 방법을 보여준다. ▶ 예제 코드 (DART)
|
|
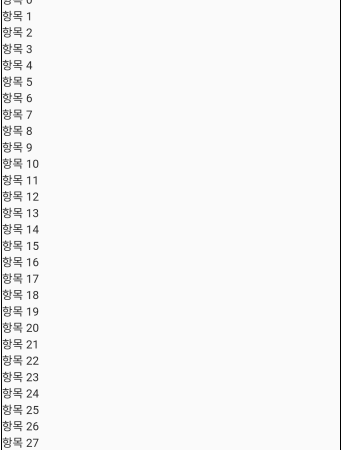
final itemList = List.generate(100, (i) => i).toList(); ... ListBody( children: itemList.map((i) => Text('항목 $i')).toList(), ) |
■ SingleChildScrollView 클래스를 사용하는 방법을 보여준다. ▶ main.dart
1 2 3 4 5 6 7 8 9 10 11 12 13 14 15 16 17 18 19 20 21 22 23 24 25 26 27 28 29 30 31 32 33 34 35 36 37 38 |
import 'package:flutter/material.dart'; void main() { runApp(TestApplication()); } class TestApplication extends StatelessWidget { @override Widget build(BuildContext context) { return MaterialApp( title: 'Test Application', theme: ThemeData( primarySwatch: Colors.blue, ), home: MainPage(), ); } } class MainPage extends StatelessWidget { final itemList = List.generate(100, (i) => i).toList(); @override Widget build(BuildContext context) { return Scaffold( appBar: AppBar( title: Text('Test Application'), ), body: SingleChildScrollView( child: ListBody( children: itemList.map((i) => Text('항목 $i')).toList(), ), ), ); } } |
test_app.zip
■ Stack 클래스를 사용하는 방법을 보여준다. ▶ main.dart
1 2 3 4 5 6 7 8 9 10 11 12 13 14 15 16 17 18 19 20 21 22 23 24 25 26 27 28 29 30 31 32 33 34 35 36 37 38 39 40 41 42 43 44 45 46 47 48 49 50 51 52 53 54 55 56 |
import 'package:flutter/material.dart'; void main() { runApp(TestApplication()); } class TestApplication extends StatelessWidget { @override Widget build(BuildContext context) { return MaterialApp( title: 'Test Application', theme: ThemeData( primarySwatch: Colors.blue, ), home: MainPage(), ); } } class MainPage extends StatelessWidget { @override Widget build(BuildContext context) { return Scaffold( appBar: AppBar( title: Text('Test Application'), ), body: Stack( children: <Widget>[ Container( color: Colors.red, width: 100, height: 100, padding: const EdgeInsets.all(8.0), margin: const EdgeInsets.all(8.0), ), Container( color: Colors.green, width: 80, height: 80, padding: const EdgeInsets.all(8.0), margin: const EdgeInsets.all(8.0), ), Container( color: Colors.blue, width: 60, height: 60, padding: const EdgeInsets.all(8.0), margin: const EdgeInsets.all(8.0), ), ], ), ); } } |
test_app.zip
■ Row 클래스를 사용하는 방법을 보여준다. ▶ main.dart
1 2 3 4 5 6 7 8 9 10 11 12 13 14 15 16 17 18 19 20 21 22 23 24 25 26 27 28 29 30 31 32 33 34 35 36 37 38 39 40 41 42 43 44 45 46 47 48 49 50 51 52 53 54 55 56 57 58 59 |
import 'package:flutter/material.dart'; void main() { runApp(TestApplication()); } class TestApplication extends StatelessWidget { @override Widget build(BuildContext context) { return MaterialApp( title: 'Test Application', theme: ThemeData( primarySwatch: Colors.blue, ), home: MainPage(), ); } } class MainPage extends StatelessWidget { @override Widget build(BuildContext context) { return Scaffold( appBar: AppBar( title: Text('Test Application'), ), body: Row( mainAxisSize: MainAxisSize.max, mainAxisAlignment: MainAxisAlignment.center, crossAxisAlignment: CrossAxisAlignment.center, children: <Widget>[ Container( color: Colors.red, width: 100, height: 100, padding: const EdgeInsets.all(8.0), margin: const EdgeInsets.all(8.0), ), Container( color: Colors.green, width: 100, height: 100, padding: const EdgeInsets.all(8.0), margin: const EdgeInsets.all(8.0), ), Container( color: Colors.blue, width: 100, height: 100, padding: const EdgeInsets.all(8.0), margin: const EdgeInsets.all(8.0), ), ], ), ); } } |
test_app.zip
■ Column 클래스를 사용하는 방법을 보여준다. ▶ main.dart
1 2 3 4 5 6 7 8 9 10 11 12 13 14 15 16 17 18 19 20 21 22 23 24 25 26 27 28 29 30 31 32 33 34 35 36 37 38 39 40 41 42 43 44 45 46 47 48 49 50 51 52 53 54 55 56 |
import 'package:flutter/material.dart'; void main() { runApp(TestApplication()); } class TestApplication extends StatelessWidget { @override Widget build(BuildContext context) { return MaterialApp( title: 'Test Application', theme: ThemeData( primarySwatch: Colors.blue, ), home: MainPage(), ); } } class MainPage extends StatelessWidget { @override Widget build(BuildContext context) { return Scaffold( appBar: AppBar( title: Text('Test Application'), ), body: Column( children: <Widget>[ Container( color: Colors.red, width: 100, height: 100, padding: const EdgeInsets.all(8.0), margin: const EdgeInsets.all(8.0), ), Container( color: Colors.green, width: 100, height: 100, padding: const EdgeInsets.all(8.0), margin: const EdgeInsets.all(8.0), ), Container( color: Colors.blue, width: 100, height: 100, padding: const EdgeInsets.all(8.0), margin: const EdgeInsets.all(8.0), ), ], ), ); } } |
test_app.zip
■ Container 클래스를 사용하는 방법을 보여준다. ▶ main.dart
1 2 3 4 5 6 7 8 9 10 11 12 13 14 15 16 17 18 19 20 21 22 23 24 25 26 27 28 29 30 31 32 33 34 35 36 37 38 |
import 'package:flutter/material.dart'; void main() { runApp(TestApplication()); } class TestApplication extends StatelessWidget { @override Widget build(BuildContext context) { return MaterialApp( title: 'Test Application', theme: ThemeData( primarySwatch: Colors.blue, ), home: MainPage(), ); } } class MainPage extends StatelessWidget { @override Widget build(BuildContext context) { return Scaffold( appBar: AppBar( title: Text('Test Application'), ), body: Container( color: Colors.red, width: 100, height: 100, padding: const EdgeInsets.all(8.0), margin: const EdgeInsets.all(8.0), ), ); } } |
test_app.zip
■ Scaffold 클래스를 사용하는 방법을 보여준다. ▶ 예제 코드 (DART)
1 2 3 4 5 6 7 8 9 10 11 12 13 14 15 16 17 18 19 20 21 22 23 24 25 26 |
Scaffold( appBar: AppBar( title: Text(widget.title), ), body: Center( child: Column( mainAxisAlignment: MainAxisAlignment.center, children: <Widget>[ Text( 'You have pushed the button this many times:', ), Text( '$_counter', style: Theme.of(context).textTheme.headline4, ), ], ), ), floatingActionButton: FloatingActionButton( onPressed: _incrementCounter, tooltip: 'Increment', child: Icon(Icons.add), ), ) |
■ FloatingActionButton 클래스를 사용하는 방법을 보여준다. ▶ 예제 코드 (DART)
|
|
FloatingActionButton( onPressed: _incrementCounter, tooltip: 'Increment', child: Icon(Icons.add), ) |
■ State<T> 클래스를 사용하는 방법을 보여준다. ▶ 예제 코드 (DART)
1 2 3 4 5 6 7 8 9 10 11 12 13 14 15 16 17 18 19 20 21 22 23 24 25 26 27 28 29 30 31 32 33 34 35 36 37 38 39 |
class _MainPageState extends State<MainPage> { int _counter = 0; void _incrementCounter() { setState(() { _counter++; }); } @override Widget build(BuildContext context) { return Scaffold( appBar: AppBar( title: Text(widget.title), ), body: Center( child: Column( mainAxisAlignment: MainAxisAlignment.center, children: <Widget>[ Text( 'You have pushed the button this many times:', ), Text( '$_counter', style: Theme.of(context).textTheme.headline4, ), ], ), ), floatingActionButton: FloatingActionButton( onPressed: _incrementCounter, tooltip: 'Increment', child: Icon(Icons.add), ), ); } } |
■ StatefulWidget 클래스를 사용하는 방법을 보여준다. ▶ 예제 코드 (DART)
1 2 3 4 5 6 7 8 9 10 11 12 13 14 15 16 17 18 19 20 21 22 23 24 25 26 27 28 29 30 31 32 33 34 35 36 37 38 39 40 41 42 43 44 45 46 47 48 |
class MainPage extends StatefulWidget { final String title; MainPage({Key key, this.title}) : super(key: key); @override _MainPageState createState() => _MainPageState(); } class _MainPageState extends State<MainPage> { int _counter = 0; void _incrementCounter() { setState(() { _counter++; }); } @override Widget build(BuildContext context) { return Scaffold( appBar: AppBar( title: Text(widget.title), ), body: Center( child: Column( mainAxisAlignment: MainAxisAlignment.center, children: <Widget>[ Text( 'You have pushed the button this many times:', ), Text( '$_counter', style: Theme.of(context).textTheme.headline4, ), ], ), ), floatingActionButton: FloatingActionButton( onPressed: _incrementCounter, tooltip: 'Increment', child: Icon(Icons.add), ), ); } } |
