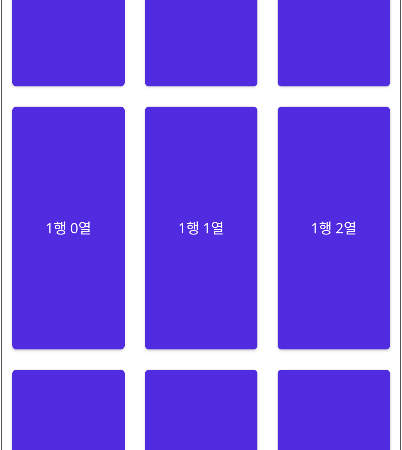
■ Grid 엘리먼트를 사용하는 방법을 보여준다. ▶ MainPage.xaml
1 2 3 4 5 6 7 8 9 10 11 12 13 14 15 16 17 18 19 20 21 22 23 24 25 26 27 28 29 30 31 32 33 34 35 36 37 38 |
<?xml version="1.0" encoding="utf-8" ?> <ContentPage x:Class="TestProject.MainPage" xmlns="http://schemas.microsoft.com/dotnet/2021/maui" xmlns:x="http://schemas.microsoft.com/winfx/2009/xaml" BackgroundColor="White"> <Grid> <Grid.RowDefinitions> <RowDefinition Height="*" /> <RowDefinition Height="*" /> <RowDefinition Height="*" /> </Grid.RowDefinitions> <Grid.ColumnDefinitions> <ColumnDefinition Width="*" /> <ColumnDefinition Width="*" /> <ColumnDefinition Width="*" /> </Grid.ColumnDefinitions> <Button Grid.Row="0" Grid.Column="0" Text="0행 0열" /> <Button Grid.Row="0" Grid.Column="1" Text="0행 1열" /> <Button Grid.Row="0" Grid.Column="2" Text="0행 2열" /> <Button Grid.Row="1" Grid.Column="0" Text="1행 0열" /> <Button Grid.Row="1" Grid.Column="1" Text="1행 1열" /> <Button Grid.Row="1" Grid.Column="2" Text="1행 2열" /> <Button Grid.Row="2" Grid.Column="0" Text="2행 0열" /> <Button Grid.Row="2" Grid.Column="1" Text="2행 1열" /> <Button Grid.Row="2" Grid.Column="2" Text="2행 2열" /> </Grid> </ContentPage> |
TestProject.zip
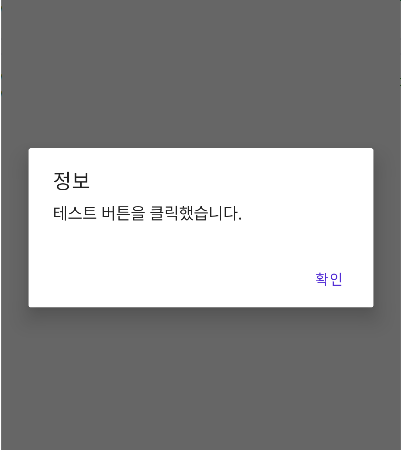
■ Page 클래스의 DisplayAlert 메소드를 사용해 메시지 박스를 표시하는 방법을 보여준다. ▶ MainPage.xaml
|
|
<?xml version="1.0" encoding="utf-8" ?> <ContentPage x:Class="TestProject.MainPage" xmlns="http://schemas.microsoft.com/dotnet/2021/maui" xmlns:x="http://schemas.microsoft.com/winfx/2009/xaml" BackgroundColor="White"> <StackLayout HorizontalOptions="Center" VerticalOptions="Center"> <Button x:Name="button" Text="테스트" /> </StackLayout> </ContentPage> |
▶ MainPage.xaml.cs
1 2 3 4 5 6 7 8 9 10 11 12 13 14 15 16 17 18 19 20 21 22 23 24 25 26 27 28 29 30 31 32 33 34 35 36 37 38 39 40 41 42 43 44 45 |
namespace TestProject; /// <summary> /// 메인 페이지 /// </summary> public partial class MainPage : ContentPage { //////////////////////////////////////////////////////////////////////////////////////////////////// Constructor ////////////////////////////////////////////////////////////////////////////////////////// Public #region 생성자 - MainPage() /// <summary> /// 생성자 /// </summary> public MainPage() { InitializeComponent(); this.button.Clicked += button_Clicked; } #endregion //////////////////////////////////////////////////////////////////////////////////////////////////// Method ////////////////////////////////////////////////////////////////////////////////////////// Private #region 버튼 클릭시 처리하기 - button_Clicked(sender, e) /// <summary> /// 버튼 클릭시 처리하기 /// </summary> /// <param name="sender">이벤트 발생자</param> /// <param name="e">이벤트 인자</param> private async void button_Clicked(object sender, EventArgs e) { Button button = sender as Button; await DisplayAlert("정보", $"{button.Text} 버튼을 클릭했습니다.", "확인"); } #endregion } |
TestProject.zip
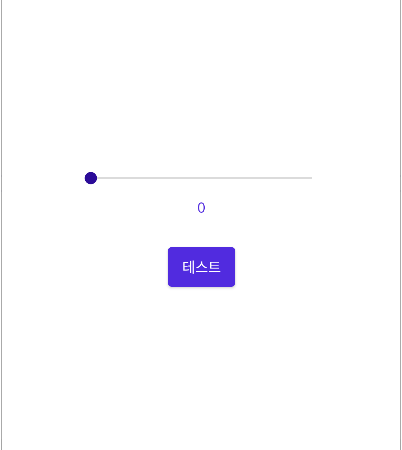
■ Slider 클래스의 ValueChanged 이벤트를 사용하는 방법을 보여준다. ▶ MainPage.xaml
1 2 3 4 5 6 7 8 9 10 11 12 13 14 15 16 17 18 19 20 21 22 |
<?xml version="1.0" encoding="utf-8" ?> <ContentPage x:Class="TestProject.MainPage" xmlns="http://schemas.microsoft.com/dotnet/2021/maui" xmlns:x="http://schemas.microsoft.com/winfx/2009/xaml" BackgroundColor="White"> <StackLayout HorizontalOptions="Center" VerticalOptions="Center"> <Slider x:Name="slider" WidthRequest="250" /> <Label x:Name="valueLabel" Margin="0,10,0,0" HorizontalOptions="Center" Text="0" /> <Button x:Name="button" Margin="0,30,0,0" HorizontalOptions="Center" Text="테스트" /> </StackLayout> </ContentPage> |
▶ MainPage.xaml.cs
1 2 3 4 5 6 7 8 9 10 11 12 13 14 15 16 17 18 19 20 21 22 23 24 25 26 27 28 29 30 31 32 33 34 35 36 37 38 39 40 41 42 43 44 45 46 47 48 49 50 51 52 53 54 55 56 57 58 59 |
namespace TestProject; /// <summary> /// 메인 페이지 /// </summary> public partial class MainPage : ContentPage { //////////////////////////////////////////////////////////////////////////////////////////////////// Constructor ////////////////////////////////////////////////////////////////////////////////////////// Public #region 생성자 - MainPage() /// <summary> /// 생성자 /// </summary> public MainPage() { InitializeComponent(); this.slider.ValueChanged += slider_ValueChanged; this.button.Clicked += button_Clicked; } #endregion //////////////////////////////////////////////////////////////////////////////////////////////////// Method ////////////////////////////////////////////////////////////////////////////////////////// Private #region 슬라이더 값 변경시 처리하기 - slider_ValueChanged(sender, e) /// <summary> /// 슬라이더 값 변경시 처리하기 /// </summary> /// <param name="sender">이벤트 발생자</param> /// <param name="e">이벤트 인자</param> private void slider_ValueChanged(object sender, ValueChangedEventArgs e) { this.valueLabel.Text = e.NewValue.ToString("F3"); } #endregion #region 버튼 클릭시 처리하기 - button_Clicked(sender, e) /// <summary> /// 버튼 클릭시 처리하기 /// </summary> /// <param name="sender">이벤트 발생자</param> /// <param name="e">이벤트 인자</param> private async void button_Clicked(object sender, EventArgs e) { Button button = sender as Button; await DisplayAlert("정보", $"{button.Text} 버튼을 클릭했습니다.", "확인"); } #endregion } |
TestProject.zip
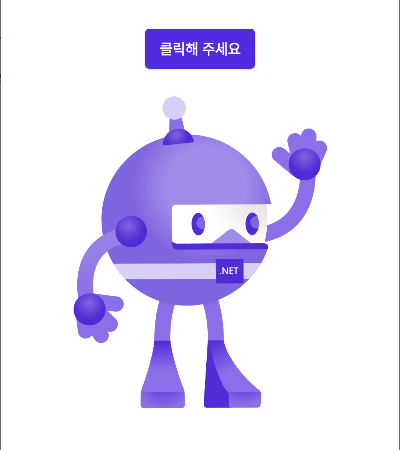
■ Image 엘리먼트를 사용하는 방법을 보여준다. ▶ 예제 코드 (XAML)
|
|
<Image HorizontalOptions="Center" WidthRequest="250" HeightRequest="310" SemanticProperties.Description="Cute dot net bot waving hi to you!" Source="dotnet_bot.png" /> |
■ Button 엘리먼트를 사용하는 방법을 보여준다. ▶ 예제 코드 (XAML)
|
|
<Button HorizontalOptions="Center" SemanticProperties.Hint="Counts the number of times you click" FontAttributes="Bold" Text="Click me" Clicked="countButton_Clicked" /> |
■ Label 엘리먼트를 사용하는 방법을 보여준다. ▶ 예제 코드 (XAML)
1 2 3 4 5 6 7 8 9 10 11 12 13 14 15 16 17 18 19 20 |
<Label HorizontalOptions="Center" SemanticProperties.HeadingLevel="Level1" FontSize="32" Text="Hello, World!" /> <Label HorizontalOptions="Center" SemanticProperties.HeadingLevel="Level1" SemanticProperties.Description="Welcome to dot net Multi platform App UI" FontSize="18" Text="Welcome to .NET Multi-platform App UI" /> <Label HorizontalOptions="Center" FontSize="18" FontAttributes="Bold" Text="Current count : 0" /> |
■ Grid 엘리먼트를 사용하는 방법을 보여준다. ▶ 예제 코드 (XAML)
1 2 3 4 5 6 7 8 9 10 11 12 13 14 15 16 17 18 19 20 21 22 23 24 25 26 27 28 29 30 31 32 33 34 35 |
<Grid RowSpacing="25" RowDefinitions="Auto,Auto,Auto,Auto,*" Padding="{OnPlatform iOS='30,60,30,30', Default='30'}"> <Label Grid.Row="0" HorizontalOptions="Center" SemanticProperties.HeadingLevel="Level1" FontSize="32" Text="Hello, World!" /> <Label Grid.Row="1" HorizontalOptions="Center" SemanticProperties.HeadingLevel="Level1" SemanticProperties.Description="Welcome to dot net Multi platform App U I" FontSize="18" Text="Welcome to .NET Multi-platform App UI" /> <Label x:Name="counterLabel" Grid.Row="2" HorizontalOptions="Center" FontSize="18" FontAttributes="Bold" Text="Current count : 0" /> <Button Grid.Row="3" HorizontalOptions="Center" SemanticProperties.Hint="Counts the number of times you click" FontAttributes="Bold" Text="Click me" Clicked="countButton_Clicked" /> <Image Grid.Row="4" HorizontalOptions="Center" WidthRequest="250" HeightRequest="310" SemanticProperties.Description="Cute dot net bot waving hi to you!" Source="dotnet_bot.png" /> </Grid> |
■ ScrollView 엘리먼트를 사용하는 방법을 보여준다. ▶ 예제 코드 (XAML)
1 2 3 4 5 6 7 8 9 10 11 12 13 14 15 16 17 18 19 20 21 22 23 24 25 26 27 28 29 30 31 32 33 34 35 36 37 |
<ScrollView> <Grid RowSpacing="25" RowDefinitions="Auto,Auto,Auto,Auto,*" Padding="{OnPlatform iOS='30,60,30,30', Default='30'}"> <Label Grid.Row="0" HorizontalOptions="Center" SemanticProperties.HeadingLevel="Level1" FontSize="32" Text="Hello, World!" /> <Label Grid.Row="1" HorizontalOptions="Center" SemanticProperties.HeadingLevel="Level1" SemanticProperties.Description="Welcome to dot net Multi platform App U I" FontSize="18" Text="Welcome to .NET Multi-platform App UI" /> <Label x:Name="counterLabel" Grid.Row="2" HorizontalOptions="Center" FontSize="18" FontAttributes="Bold" Text="Current count : 0" /> <Button Grid.Row="3" HorizontalOptions="Center" SemanticProperties.Hint="Counts the number of times you click" FontAttributes="Bold" Text="Click me" Clicked="countButton_Clicked" /> <Image Grid.Row="4" HorizontalOptions="Center" WidthRequest="250" HeightRequest="310" SemanticProperties.Description="Cute dot net bot waving hi to you!" Source="dotnet_bot.png" /> </Grid> </ScrollView> |
■ Style 엘리먼트의 TargetType 속성을 사용해 Button 엘리먼트 스타일을 설정하는 방법을 보여준다. ▶ 예제 코드 (XAML)
|
|
<ResourceDictionary> <Color x:Key="PrimaryColorKey">#512bdf</Color> <Color x:Key="SecondaryColorKey">White</Color> <Style TargetType="Button"> <Setter Property="TextColor" Value="{DynamicResource SecondaryColorKey}" /> <Setter Property="FontFamily" Value="OpenSansRegular" /> <Setter Property="BackgroundColor" Value="{DynamicResource PrimaryColorKey}" /> <Setter Property="Padding" Value="14,10" /> </Style> </ResourceDictionary> |
■ Color 엘리먼트를 사용하는 방법을 보여준다. ▶ 예제 코드 (XAML)
|
|
<Color>#512bdf</Color> <Color>White</Color> |
■ Style 엘리먼트의 TargetType 속성을 사용해 Label 엘리먼트 스타일을 설정하는 방법을 보여준다. ▶ 예제 코드 (XAML)
|
|
<ResourceDictionary> <Color x:Key="PrimaryColorKey">#512bdf</Color> <Style TargetType="Label"> <Setter Property="TextColor" Value="{DynamicResource PrimaryColorKey}" /> <Setter Property="FontFamily" Value="OpenSansRegular" /> </Style> </ResourceDictionary> |
■ MAUI 테스트 예제를 만드는 방법을 보여준다. ▶ MauiProgram.cs
1 2 3 4 5 6 7 8 9 10 11 12 13 14 15 16 17 18 19 20 21 22 23 24 25 26 27 28 29 30 31 32 33 34 35 36 37 |
namespace TestProject; /// <summary> /// MAUI 프로그램 /// </summary> public static class MauiProgram { //////////////////////////////////////////////////////////////////////////////////////////////////// Method ////////////////////////////////////////////////////////////////////////////////////////// Static //////////////////////////////////////////////////////////////////////////////// Public #region MAUI 앱 생성하기 - CreateMauiApp() /// <summary> /// MAUI 앱 생성하기 /// </summary> /// <returns>MAUI 앱</returns> public static MauiApp CreateMauiApp() { MauiAppBuilder builder = MauiApp.CreateBuilder(); builder.UseMauiApp<App>() .ConfigureFonts ( fontCollection => { fontCollection.AddFont("OpenSans-Regular.ttf", "OpenSansRegular"); } ); return builder.Build(); } #endregion } |
▶ App.xaml
1 2 3 4 5 6 7 8 9 10 11 12 13 14 15 16 17 18 19 20 21 22 23 |
<Application x:Class="TestProject.App" xmlns="http://schemas.microsoft.com/dotnet/2021/maui" xmlns:x="http://schemas.microsoft.com/winfx/2009/xaml" xmlns:local="clr-namespace:TestProject"> <Application.Resources> <ResourceDictionary> <Color x:Key="PrimaryColor">#512bdf</Color> <Color x:Key="SecondaryColor">White</Color> <Style TargetType="Label"> <Setter Property="FontFamily" Value="OpenSansRegular" /> <Setter Property="TextColor" Value="{DynamicResource PrimaryColor}" /> </Style> <Style TargetType="Button"> <Setter Property="Padding" Value="14,10" /> <Setter Property="BackgroundColor" Value="{DynamicResource PrimaryColor}" /> <Setter Property="FontFamily" Value="OpenSansRegular" /> <Setter Property="TextColor" Value="{DynamicResource SecondaryColor}" /> </Style> </ResourceDictionary> </Application.Resources> </Application> |
▶ App.xaml.cs
1 2 3 4 5 6 7 8 9 10 11 12 13 14 15 16 17 18 19 20 21 22 23 24 25 26 |
namespace TestProject; /// <summary> /// 앱 /// </summary> public partial class App : Application { //////////////////////////////////////////////////////////////////////////////////////////////////// Constructor ////////////////////////////////////////////////////////////////////////////////////////// Public #region 생성자 - App() /// <summary> /// 생성자 /// </summary> public App() { InitializeComponent(); MainPage = new MainPage(); } #endregion } |
▶ MainPage.xaml
1 2 3 4 5 6 7 8 9 10 11 12 13 14 15 16 17 18 19 20 21 22 23 24 25 26 27 28 29 30 31 32 33 34 35 36 37 38 39 40 41 42 43 |
<?xml version="1.0" encoding="utf-8" ?> <ContentPage x:Class="TestProject.MainPage" xmlns="http://schemas.microsoft.com/dotnet/2021/maui" xmlns:x="http://schemas.microsoft.com/winfx/2009/xaml" BackgroundColor="{DynamicResource SecondaryColor}"> <ScrollView> <Grid RowSpacing="25" RowDefinitions="Auto,Auto,Auto,Auto,*" Padding="{OnPlatform iOS='30,60,30,30', Default='30'}"> <Label Grid.Row="0" HorizontalOptions="Center" SemanticProperties.HeadingLevel="Level1" FontSize="32" Text="헬로우, 월드!" /> <Label Grid.Row="1" HorizontalOptions="Center" SemanticProperties.HeadingLevel="Level1" SemanticProperties.Description="Welcome to dot net Multi platform App U I" FontSize="16" Text=".NET 다중 플랫폼 앱 UI에 오신 것을 환영합니다." /> <Label x:Name="counterLabel" Grid.Row="2" HorizontalOptions="Center" FontSize="18" FontAttributes="Bold" Text="현재 카운트 : 0" /> <Button Grid.Row="3" HorizontalOptions="Center" SemanticProperties.Hint="클릭 횟수를 계산합니다." FontAttributes="Bold" Text="클릭해 주세요" Clicked="countButton_Clicked" /> <Image Grid.Row="4" HorizontalOptions="Center" WidthRequest="250" HeightRequest="310" SemanticProperties.Description="손을 흔드는 귀여운 닷넷봇!" Source="dotnet_bot.png" /> </Grid> </ScrollView> </ContentPage> |
▶ MainPage.xaml.cs
1 2 3 4 5 6 7 8 9 10 11 12 13 14 15 16 17 18 19 20 21 22 23 24 25 26 27 28 29 30 31 32 33 34 35 36 37 38 39 40 41 42 43 44 45 46 47 48 49 50 51 52 53 54 55 56 57 |
namespace TestProject; /// <summary> /// 메인 페이지 /// </summary> public partial class MainPage : ContentPage { //////////////////////////////////////////////////////////////////////////////////////////////////// Field ////////////////////////////////////////////////////////////////////////////////////////// Private #region Field /// <summary> /// 카운트 /// </summary> private int count = 0; #endregion //////////////////////////////////////////////////////////////////////////////////////////////////// Constructor ////////////////////////////////////////////////////////////////////////////////////////// Public #region 생성자 - MainPage() /// <summary> /// 생성자 /// </summary> public MainPage() { InitializeComponent(); } #endregion //////////////////////////////////////////////////////////////////////////////////////////////////// Method ////////////////////////////////////////////////////////////////////////////////////////// Private #region 카운트 버튼 클릭시 처리하기 - countButton_Clicked(sender, e) /// <summary> /// 카운트 버튼 클릭시 처리하기 /// </summary> /// <param name="sender">이벤트 발생자</param> /// <param name="e">이벤트 인자</param> private void countButton_Clicked(object sender, EventArgs e) { this.count++; this.counterLabel.Text = $"현재 카운트 : {count}"; SemanticScreenReader.Announce(counterLabel.Text); } #endregion } |
더 읽기
■ adb usb 명령을 사용해 ADB를 USB 모드로 재설정하는 방법을 보여준다. 1. [ADB 명령 프롬프트]를 실행한다. 2. [ADB 명령 프롬프트]에서 아래 명령을
더 읽기
■ adb connect 명령을 사용해 지정 포트를 사용해 장치의 IP 주소에 연결하는 방법을 보여준다. 1. [ADB 명령 프롬프트]를 실행한다. 2. [ADB 명령
더 읽기
■ adb tcpip 명령을 사용해 지정 포트에서 TCP/IP 연결을 수신 대기하도록 장치에 지시하는 방법을 보여준다. 1. [ADB 명령 프롬프트]를 실행한다. 2. [ADB
더 읽기
■ 명령줄에서 에뮬레이터를 실행하는 방법을 보여준다. 1. [명령 프롬프트]를 실행한다. 2. [명령 프롬프트]에서 아래 명령을 실행한다. ▶ 실행 명령
|
|
"C:\Program Files (x86)\Android\android-sdk\emulator\emulator.exe" -partition-size 2000 -no-boot-anim -verbose -feature WindowsHypervisorPlatform -avd pixel_5_-_api_30 -prop monodroid.avdname=pixel_5_-_api_30 |
■ emulator-check 명령을 사용해 하드웨어 가속기의 활성화 여부를 구하는 방법을 보여준다. 1. [명령 프롬프트]를 실행한다. 2. [명령 프롬프트]에서 아래 명령을 실행한다. ▶
더 읽기
■ adb devices 명령을 사용해 Android 장치를 조회하는 방법을 보여준다. 1. [ADB 명령 프롬프트]를 실행한다. 2. [ADB 명령 프롬프트]에서 아래 명령을 실행한다.
더 읽기
■ dotnet build 명령을 사용해 MAUI 앱을 빌드하는 방법을 보여준다. 1. [명령 프롬프트]를 실행한다. 2. [명령 프롬프트]에서 아래 명령을 실행한다. ▶ 실행
더 읽기
■ dotnet new maui 명령을 사용해 MAUI 앱을 만드는 방법을 보여준다. 1. [명령 프롬프트]를 실행한다. 2. [명령 프롬프트]에서 아래 명령을 실행한다. ▶
더 읽기


