■ Shell 엘리먼트를 사용해 태양 일출/일몰 및 달 위상 정보를 조회하는 방법을 보여준다. ▶ Platforms/Android/AndroidManifest.xml
|
|
<?xml version="1.0" encoding="utf-8"?> <manifest xmlns:android="http://schemas.android.com/apk/res/android"> <application android:allowBackup="true" android:icon="@android:mipmap/sym_def_app_icon" android:roundIcon="@mipmap/appicon_round" android:supportsRtl="true" /> <uses-permission android:name="android.permission.ACCESS_NETWORK_STATE" /> <uses-permission android:name="android.permission.INTERNET" /> <uses-permission android:name="android.permission.ACCESS_COARSE_LOCATION" /> <uses-permission android:name="android.permission.ACCESS_FINE_LOCATION" /> </manifest> |
▶ Platforms/iOS/info.plist
1 2 3 4 5 6 7 8 9 10 11 12 13 14 15 16 17 18 19 20 21 22 23 24 25 26 27 28 29 30 31 32 33 34 35 36 |
<?xml version="1.0" encoding="UTF-8"?> <!DOCTYPE plist PUBLIC "-//Apple//DTD PLIST 1.0//EN" "http://www.apple.com/DTDs/PropertyList-1.0.dtd"> <plist version="1.0"> <dict> <key>LSRequiresIPhoneOS</key> <true/> <key>UIDeviceFamily</key> <array> <integer>1</integer> <integer>2</integer> </array> <key>UIRequiredDeviceCapabilities</key> <array> <string>arm64</string> </array> <key>UISupportedInterfaceOrientations</key> <array> <string>UIInterfaceOrientationPortrait</string> <string>UIInterfaceOrientationLandscapeLeft</string> <string>UIInterfaceOrientationLandscapeRight</string> </array> <key>UISupportedInterfaceOrientations~ipad</key> <array> <string>UIInterfaceOrientationPortrait</string> <string>UIInterfaceOrientationPortraitUpsideDown</string> <string>UIInterfaceOrientationLandscapeLeft</string> <string>UIInterfaceOrientationLandscapeRight</string> </array> <key>XSAppIconAssets</key> <string>Assets.xcassets/appicon.appiconset</string> <key>NSLocationAlwaysAndWhenInUseUsageDescription</key> <string>Need the location to display sunrise and sunset times</string> </dict> </plist> |
▶ Platforms/MacCatalyst/info.plist
1 2 3 4 5 6 7 8 9 10 11 12 13 14 15 16 17 18 19 20 21 22 23 24 25 26 27 28 29 30 31 32 33 34 |
<?xml version="1.0" encoding="UTF-8"?> <!DOCTYPE plist PUBLIC "-//Apple//DTD PLIST 1.0//EN" "http://www.apple.com/DTDs/PropertyList-1.0.dtd"> <plist version="1.0"> <dict> <key>UIDeviceFamily</key> <array> <integer>1</integer> <integer>2</integer> </array> <key>UIRequiredDeviceCapabilities</key> <array> <string>arm64</string> </array> <key>UISupportedInterfaceOrientations</key> <array> <string>UIInterfaceOrientationPortrait</string> <string>UIInterfaceOrientationLandscapeLeft</string> <string>UIInterfaceOrientationLandscapeRight</string> </array> <key>UISupportedInterfaceOrientations~ipad</key> <array> <string>UIInterfaceOrientationPortrait</string> <string>UIInterfaceOrientationPortraitUpsideDown</string> <string>UIInterfaceOrientationLandscapeLeft</string> <string>UIInterfaceOrientationLandscapeRight</string> </array> <key>XSAppIconAssets</key> <string>Assets.xcassets/appicon.appiconset</string> <key>NSLocationUsageDescription</key> <string>Need location to display sunrise and sunset info</string> </dict> </plist> |
더 읽기
■ ContentPage 클래스의 Navigation 속성을 사용해 모달 페이지로 이동하는 방법을 보여준다. ▶ MainPage.xaml
|
|
<?xml version="1.0" encoding="utf-8" ?> <ContentPage x:Class="TestProject.MainPage" xmlns="http://schemas.microsoft.com/dotnet/2021/maui" xmlns:x="http://schemas.microsoft.com/winfx/2009/xaml" Title="메인 페이지" BackgroundColor="White"> <Button x:Name="navigateButton" HorizontalOptions="Center" VerticalOptions="Center" Text="모달 페이지 이동" /> </ContentPage> |
▶ MainPage.xaml.cs
1 2 3 4 5 6 7 8 9 10 11 12 13 14 15 16 17 18 19 20 21 22 23 24 25 26 27 28 29 30 31 32 33 34 35 36 37 38 39 40 41 42 43 |
namespace TestProject; /// <summary> /// 메인 페이지 /// </summary> public partial class MainPage : ContentPage { //////////////////////////////////////////////////////////////////////////////////////////////////// Constructor ////////////////////////////////////////////////////////////////////////////////////////// Public #region 생성자 - MainPage() /// <summary> /// 생성자 /// </summary> public MainPage() { InitializeComponent(); this.navigateButton.Clicked += navigateButton_Clicked; } #endregion //////////////////////////////////////////////////////////////////////////////////////////////////// Method ////////////////////////////////////////////////////////////////////////////////////////// Private #region 두번째 페이지 이동 버튼 클릭시 처리하기 - navigateButton_Clicked(sender, e) /// <summary> /// 두번째 페이지 이동 버튼 클릭시 처리하기 /// </summary> /// <param name="sender">이벤트 발생자</param> /// <param name="e">이벤트 인자</param> private async void navigateButton_Clicked(object sender, EventArgs e) { await Navigation.PushModalAsync(new ModalPage()); } #endregion } |
▶ ModalPage.xaml
|
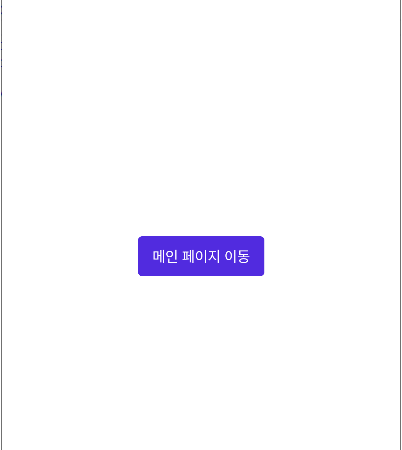
|
<?xml version="1.0" encoding="utf-8" ?> <ContentPage x:Class="TestProject.ModalPage" xmlns="http://schemas.microsoft.com/dotnet/2021/maui" xmlns:x="http://schemas.microsoft.com/winfx/2009/xaml" Title="모달 페이지" BackgroundColor="White"> <Button x:Name="navigateButton" HorizontalOptions="Center" VerticalOptions="Center" Text="메인 페이지 이동" /> </ContentPage> |
▶ ModalPage.xaml.cs
더 읽기
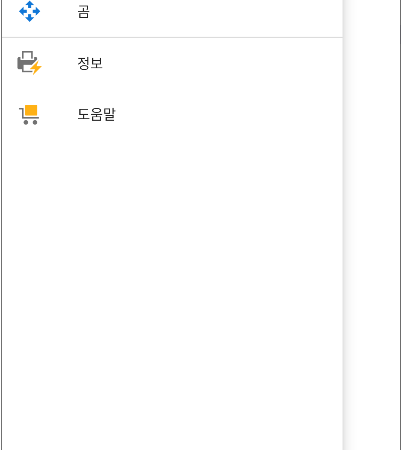
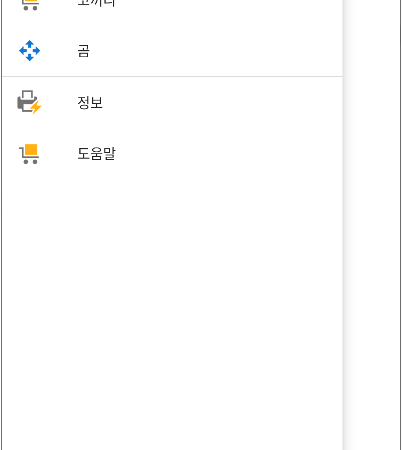
■ Shell 엘리먼트의 FlyoutFooterTemplate 속성을 사용해 플라이아웃 바닥글을 설정하는 방법을 보여준다. ▶ AppShell.xaml
1 2 3 4 5 6 7 8 9 10 11 12 13 14 15 16 17 18 19 20 21 22 23 24 25 26 27 28 29 30 31 32 33 34 35 36 37 38 39 40 41 42 43 44 45 46 47 48 49 50 51 52 53 54 55 56 57 58 59 60 61 |
<?xml version="1.0" encoding="utf-8" ?> <Shell x:Class="TestProject.AppShell" xmlns="http://schemas.microsoft.com/dotnet/2021/maui" xmlns:x="http://schemas.microsoft.com/winfx/2009/xaml" xmlns:sys="clr-namespace:System;assembly=netstandard" xmlns:local="clr-namespace:TestProject"> <Shell.FlyoutFooterTemplate> <DataTemplate> <Grid BackgroundColor="Black"> <Grid.RowDefinitions> <RowDefinition Height="Auto" /> <RowDefinition Height="Auto" /> </Grid.RowDefinitions> <Label Grid.Row="0" HorizontalOptions="Center" FontAttributes="Bold" TextColor="White" Text="TestProject" /> <Label Grid.Row="1" HorizontalOptions="Center" TextColor="White" Text="{Binding Source={x:Static sys:DateTime.Now}, StringFormat='{0:yyyy-MM-dd HH:mm:ss}'}" /> </Grid> </DataTemplate> </Shell.FlyoutFooterTemplate> <FlyoutItem FlyoutDisplayOptions="AsMultipleItems"> <Tab Icon="sample1.png" Title="고양이/개"> <ShellContent Icon="sample2.png" Title="고양이" ContentTemplate="{DataTemplate local:CatPage}" /> <ShellContent Icon="sample3.png" Title="개" ContentTemplate="{DataTemplate local:DogPage}" /> </Tab> <ShellContent Icon="sample1.png" Title="원숭이" ContentTemplate="{DataTemplate local:MonkeyPage}" /> <ShellContent Icon="sample2.png" Title="코끼리" ContentTemplate="{DataTemplate local:ElephantPage}" /> <ShellContent Icon="sample3.png" Title="곰" ContentTemplate="{DataTemplate local:BearPage}" /> </FlyoutItem> <ShellContent Icon="sample1.png" Title="정보" ContentTemplate="{DataTemplate local:AboutPage}" /> <MenuItem x:Name="helpMenuItem" Text="도움말" IconImageSource="sample2.png" /> </Shell> |
TestProject.zip
■ Shell 엘리먼트의 FlyoutHeaderTemplate 속성을 사용해 플라이아웃 헤더를 설정하는 방법을 보여준다. ▶ AppShell.xaml
1 2 3 4 5 6 7 8 9 10 11 12 13 14 15 16 17 18 19 20 21 22 23 24 25 26 27 28 29 30 31 32 33 34 35 36 37 38 39 40 41 42 43 44 45 46 47 48 49 50 51 52 53 54 55 56 57 58 |
<?xml version="1.0" encoding="utf-8" ?> <Shell x:Class="TestProject.AppShell" xmlns="http://schemas.microsoft.com/dotnet/2021/maui" xmlns:x="http://schemas.microsoft.com/winfx/2009/xaml" xmlns:local="clr-namespace:TestProject"> <Shell.FlyoutHeaderTemplate> <DataTemplate> <Grid BackgroundColor="Black"> <Image Aspect="AspectFill" Opacity="0.6" Source="sample1.png" /> <Label Margin="10" HorizontalTextAlignment="Center" VerticalTextAlignment="Center" FontAttributes="Bold" TextColor="White" Text="Animals" /> </Grid> </DataTemplate> </Shell.FlyoutHeaderTemplate> <FlyoutItem FlyoutDisplayOptions="AsMultipleItems"> <Tab Icon="sample1.png" Title="고양이/개"> <ShellContent Icon="sample2.png" Title="고양이" ContentTemplate="{DataTemplate local:CatPage}" /> <ShellContent Icon="sample3.png" Title="개" ContentTemplate="{DataTemplate local:DogPage}" /> </Tab> <ShellContent Icon="sample1.png" Title="원숭이" ContentTemplate="{DataTemplate local:MonkeyPage}" /> <ShellContent Icon="sample2.png" Title="코끼리" ContentTemplate="{DataTemplate local:ElephantPage}" /> <ShellContent Icon="sample3.png" Title="곰" ContentTemplate="{DataTemplate local:BearPage}" /> </FlyoutItem> <ShellContent Icon="sample1.png" Title="정보" ContentTemplate="{DataTemplate local:AboutPage}" /> <MenuItem x:Name="helpMenuItem" Text="도움말" IconImageSource="sample2.png" /> </Shell> |
TestProject.zip
■ Shell 엘리먼트의 FlyoutContentTemplate 속성을 사용하는 방법을 보여준다. ▶ AppShell.xaml
1 2 3 4 5 6 7 8 9 10 11 12 13 14 15 16 17 18 19 20 21 22 23 24 25 26 27 28 29 30 31 32 33 34 35 36 37 38 39 40 41 42 43 44 45 46 47 48 49 50 51 52 53 54 55 56 57 58 |
<?xml version="1.0" encoding="utf-8" ?> <Shell x:Class="TestProject.AppShell" x:Name="shell" xmlns="http://schemas.microsoft.com/dotnet/2021/maui" xmlns:x="http://schemas.microsoft.com/winfx/2009/xaml" xmlns:local="clr-namespace:TestProject"> <Shell.FlyoutContentTemplate> <DataTemplate> <CollectionView BindingContext="{x:Reference shell}" IsGrouped="True" ItemsSource="{Binding FlyoutItems}"> <CollectionView.ItemTemplate> <DataTemplate> <Label FontSize="18" TextColor="Black" Text="{Binding Title}" /> </DataTemplate> </CollectionView.ItemTemplate> </CollectionView> </DataTemplate> </Shell.FlyoutContentTemplate> <FlyoutItem FlyoutDisplayOptions="AsMultipleItems"> <Tab Icon="sample1.png" Title="고양이/개"> <ShellContent Icon="sample2.png" Title="고양이" ContentTemplate="{DataTemplate local:CatPage}" /> <ShellContent Icon="sample3.png" Title="개" ContentTemplate="{DataTemplate local:DogPage}" /> </Tab> <ShellContent Icon="sample1.png" Title="원숭이" ContentTemplate="{DataTemplate local:MonkeyPage}" /> <ShellContent Icon="sample2.png" Title="코끼리" ContentTemplate="{DataTemplate local:ElephantPage}" /> <ShellContent Icon="sample3.png" Title="곰" ContentTemplate="{DataTemplate local:BearPage}" /> </FlyoutItem> <ShellContent Icon="sample1.png" Title="정보" ContentTemplate="{DataTemplate local:AboutPage}" /> <MenuItem x:Name="helpMenuItem" Text="도움말" IconImageSource="sample2.png" /> </Shell> |
TestProject.zip
■ VisualStateManager 엘리먼트의 VisualStateGroups 첨부 속성을 Shell.ItemTemplate 속성에서 사용하는 방법을 보여준다. ▶ AppShell.xaml
1 2 3 4 5 6 7 8 9 10 11 12 13 14 15 16 17 18 19 20 21 22 23 24 25 26 27 28 29 30 31 32 33 34 35 36 37 38 39 40 41 42 43 44 45 46 47 48 49 50 51 52 53 54 55 56 57 58 59 60 61 62 63 64 65 66 67 68 69 70 |
<?xml version="1.0" encoding="utf-8" ?> <Shell x:Class="TestProject.AppShell" x:Name="shell" xmlns="http://schemas.microsoft.com/dotnet/2021/maui" xmlns:x="http://schemas.microsoft.com/winfx/2009/xaml" xmlns:local="clr-namespace:TestProject"> <Shell.ItemTemplate> <DataTemplate> <Grid HeightRequest="50"> <Grid.ColumnDefinitions> <ColumnDefinition Width="50" /> <ColumnDefinition Width="*" /> </Grid.ColumnDefinitions> <VisualStateManager.VisualStateGroups> <VisualStateGroupList> <VisualStateGroup x:Name="CommonStates"> <VisualState x:Name="Normal"> <VisualState.Setters> <Setter Property="BackgroundColor" Value="Transparent" /> <Setter TargetName="label" Property="Label.TextColor" Value="Black" /> </VisualState.Setters> </VisualState> <VisualState x:Name="Selected"> <VisualState.Setters> <Setter Property="BackgroundColor" Value="RoyalBlue" /> <Setter TargetName="label" Property="Label.TextColor" Value="White" /> </VisualState.Setters> </VisualState> </VisualStateGroup> </VisualStateGroupList> </VisualStateManager.VisualStateGroups> <Image Grid.Column="0" HorizontalOptions="Center" VerticalOptions="Center" WidthRequest="32" HeightRequest="32" Source="{Binding FlyoutIcon}" /> <Label x:Name="label" Grid.Column="1" VerticalTextAlignment="Center" FontSize="14" Text="{Binding Title}" /> </Grid> </DataTemplate> </Shell.ItemTemplate> <FlyoutItem Icon="sample1.png" Title="고양이" FlyoutDisplayOptions="AsSingleItem"> <ShellContent ContentTemplate="{DataTemplate local:CatPage}" /> </FlyoutItem> <FlyoutItem Icon="sample2.png" Title="개" FlyoutDisplayOptions="AsSingleItem"> <ShellContent ContentTemplate="{DataTemplate local:DogPage}" /> </FlyoutItem> <FlyoutItem Icon="sample3.png" Title="원숭이" FlyoutDisplayOptions="AsSingleItem"> <ShellContent ContentTemplate="{DataTemplate local:MonkeyPage}" /> </FlyoutItem> </Shell> |
TestProject.zip
■ FlyoutItem 엘리먼트의 FlyoutDisplayOptions 속성을 AsSingleItem으로 설정하는 방법을 보여준다. ▶ AppShell.xaml
1 2 3 4 5 6 7 8 9 10 11 12 13 14 15 16 17 18 19 20 21 22 23 24 25 26 |
<?xml version="1.0" encoding="utf-8" ?> <Shell x:Class="TestProject.AppShell" x:Name="shell" xmlns="http://schemas.microsoft.com/dotnet/2021/maui" xmlns:x="http://schemas.microsoft.com/winfx/2009/xaml" xmlns:local="clr-namespace:TestProject"> <FlyoutItem Icon="sample1.png" Title="고양이" FlyoutDisplayOptions="AsSingleItem"> <ShellContent ContentTemplate="{DataTemplate local:CatPage}" /> </FlyoutItem> <FlyoutItem Icon="sample2.png" Title="개" FlyoutDisplayOptions="AsSingleItem"> <ShellContent ContentTemplate="{DataTemplate local:DogPage}" /> </FlyoutItem> <FlyoutItem Icon="sample3.png" Title="원숭이" FlyoutDisplayOptions="AsSingleItem"> <ShellContent ContentTemplate="{DataTemplate local:MonkeyPage}" /> </FlyoutItem> </Shell> |
TestProject.zip
■ FlyoutItem 엘리먼트의 FlyoutDisplayOptions 속성을 AsMultipleItems으로 설정하는 방법을 보여준다. ▶ AppShell.xaml
1 2 3 4 5 6 7 8 9 10 11 12 13 14 15 16 17 18 19 20 21 22 23 24 25 26 |
<?xml version="1.0" encoding="utf-8" ?> <Shell x:Class="TestProject.AppShell" x:Name="shell" xmlns="http://schemas.microsoft.com/dotnet/2021/maui" xmlns:x="http://schemas.microsoft.com/winfx/2009/xaml" xmlns:local="clr-namespace:TestProject"> <FlyoutItem FlyoutDisplayOptions="AsMultipleItems"> <ShellContent Icon="sample1.png" Title="고양이" ContentTemplate="{DataTemplate local:CatPage}" /> </FlyoutItem> <FlyoutItem FlyoutDisplayOptions="AsMultipleItems"> <ShellContent Icon="sample2.png" Title="개" ContentTemplate="{DataTemplate local:DogPage}" /> </FlyoutItem> <FlyoutItem FlyoutDisplayOptions="AsMultipleItems"> <ShellContent Icon="sample3.png" Title="원숭이" ContentTemplate="{DataTemplate local:MonkeyPage}" /> </FlyoutItem> </Shell> |
TestProject.zip
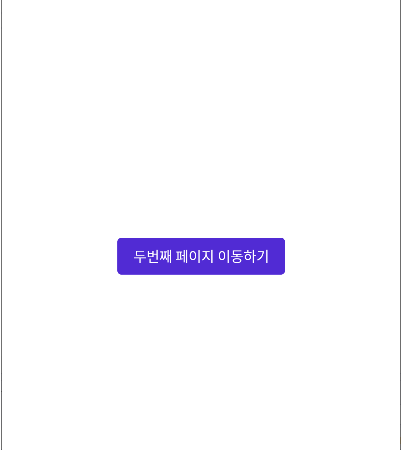
■ ContentPage 클래스의 Navigation 속성을 사용해 페이지를 이동하는 방법을 보여준다. ▶ MainPage.xaml
|
|
<?xml version="1.0" encoding="utf-8" ?> <ContentPage x:Class="TestProject.MainPage" xmlns="http://schemas.microsoft.com/dotnet/2021/maui" xmlns:x="http://schemas.microsoft.com/winfx/2009/xaml" Title="메인 페이지"> <Button x:Name="moveButton" HorizontalOptions="Center" VerticalOptions="Center" Text="두번째 페이지 이동하기" /> </ContentPage> |
▶ MainPage.xaml.cs
1 2 3 4 5 6 7 8 9 10 11 12 13 14 15 16 17 18 19 20 21 22 23 24 25 26 27 28 29 30 31 32 33 34 35 36 37 38 39 40 41 42 43 |
namespace TestProject; /// <summary> /// 메인 페이지 /// </summary> public partial class MainPage : ContentPage { //////////////////////////////////////////////////////////////////////////////////////////////////// Constructor ////////////////////////////////////////////////////////////////////////////////////////// Public #region 생성자 - MainPage() /// <summary> /// 생성자 /// </summary> public MainPage() { InitializeComponent(); this.moveButton.Clicked += moveButton_Clicked; } #endregion //////////////////////////////////////////////////////////////////////////////////////////////////// Method ////////////////////////////////////////////////////////////////////////////////////////// Private #region 두번째 페이지 이동하기 - moveButton_Clicked(sender, e) /// <summary> /// 두번째 페이지 이동하기 /// </summary> /// <param name="sender">이벤트 발생자</param> /// <param name="e">이벤트 인자</param> private async void moveButton_Clicked(object sender, EventArgs e) { await Navigation.PushAsync(new SecondPage()); } #endregion } |
▶ SecondPage.xaml
|
|
<?xml version="1.0" encoding="utf-8" ?> <ContentPage x:Class="TestProject.SecondPage" xmlns="http://schemas.microsoft.com/dotnet/2021/maui" xmlns:x="http://schemas.microsoft.com/winfx/2009/xaml" Title="두번째 페이지"> <Label HorizontalOptions="Center" VerticalOptions="Center" Text="두번쨰 페이지" /> </ContentPage> |
▶ SecondPage.xaml.cs
1 2 3 4 5 6 7 8 9 10 11 12 13 14 15 16 17 18 19 20 21 22 23 24 |
namespace TestProject; /// <summary> /// 두번째 페이지 /// </summary> public partial class SecondPage : ContentPage { //////////////////////////////////////////////////////////////////////////////////////////////////// Constructor ////////////////////////////////////////////////////////////////////////////////////////// Public #region 생성자 - SecondPage() /// <summary> /// 생성자 /// </summary> public SecondPage() { InitializeComponent(); } #endregion } |
더 읽기
■ TabbedPage 클래스의 On<T> 메소드를 사용해 탭바 위치를 설정하는 방법을 보여준다. (ANDROID) ▶ MainPage.xaml
|
|
<?xml version="1.0" encoding="utf-8" ?> <TabbedPage x:Class="TestProject.MainPage" xmlns="http://schemas.microsoft.com/dotnet/2021/maui" xmlns:x="http://schemas.microsoft.com/winfx/2009/xaml" xmlns:local="clr-namespace:TestProject"> <local:ContactPage /> <local:TodoListPage /> <local:ReminderPage /> </TabbedPage> |
▶ MainPage.xaml.cs
1 2 3 4 5 6 7 8 9 10 11 12 13 14 15 16 17 18 19 20 21 22 23 24 25 26 27 28 |
using Microsoft.Maui.Controls.PlatformConfiguration.AndroidSpecific; namespace TestProject; /// <summary> /// 메인 페이지 /// </summary> public partial class MainPage : Microsoft.Maui.Controls.TabbedPage { //////////////////////////////////////////////////////////////////////////////////////////////////// Constructor ////////////////////////////////////////////////////////////////////////////////////////// Public #region 생성자 - MainPage() /// <summary> /// 생성자 /// </summary> public MainPage() { InitializeComponent(); On<Microsoft.Maui.Controls.PlatformConfiguration.Android>().SetToolbarPlacement(ToolbarPlacement.Bottom); } #endregion } |
TestProject.zip
■ TabbedPage 엘리먼트의 ToolbarPlacement 첨부 속성을 사용해 탭바 위치를 설정하는 방법을 보여준다. (ANDROID) ▶ MainPage.xaml
|
|
<?xml version="1.0" encoding="utf-8" ?> <TabbedPage x:Class="TestProject.MainPage" xmlns="http://schemas.microsoft.com/dotnet/2021/maui" xmlns:x="http://schemas.microsoft.com/winfx/2009/xaml" xmlns:android="clr-namespace:Microsoft.Maui.Controls.PlatformConfiguration.AndroidSpecific;assembly=Microsoft.Maui.Controls" xmlns:local="clr-namespace:TestProject" android:TabbedPage.ToolbarPlacement="Bottom"> <local:ContactPage /> <local:TodoListPage /> <local:ReminderPage /> </TabbedPage> |
TestProject.zip
■ TabbedPage 클래스의 On<T> 메소드를 사용해 부드러운 스크롤을 비활성화하는 방법을 보여준다. (ANDROID) ▶ MainPage.xaml
|
|
<?xml version="1.0" encoding="utf-8" ?> <TabbedPage x:Class="TestProject.MainPage" xmlns="http://schemas.microsoft.com/dotnet/2021/maui" xmlns:x="http://schemas.microsoft.com/winfx/2009/xaml" xmlns:local="clr-namespace:TestProject"> <local:ContactPage /> <local:TodoListPage /> <local:ReminderPage /> </TabbedPage> |
▶ MainPage.xaml.cs
1 2 3 4 5 6 7 8 9 10 11 12 13 14 15 16 17 18 19 20 21 22 23 24 25 26 27 28 |
using Microsoft.Maui.Controls.PlatformConfiguration.AndroidSpecific; namespace TestProject; /// <summary> /// 메인 페이지 /// </summary> public partial class MainPage : Microsoft.Maui.Controls.TabbedPage { //////////////////////////////////////////////////////////////////////////////////////////////////// Constructor ////////////////////////////////////////////////////////////////////////////////////////// Public #region 생성자 - MainPage() /// <summary> /// 생성자 /// </summary> public MainPage() { InitializeComponent(); On<Microsoft.Maui.Controls.PlatformConfiguration.Android>().SetIsSmoothScrollEnabled(false); } #endregion } |
TestProject.zip
■ TabbedPage 엘리먼트의 IsSmoothScrollEnabled 첨부 속성을 사용해 부드러운 스크롤을 비활성화하는 방법을 보여준다. (ANDROID) ▶ MainPage.xaml
|
|
<?xml version="1.0" encoding="utf-8" ?> <TabbedPage x:Class="TestProject.MainPage" xmlns="http://schemas.microsoft.com/dotnet/2021/maui" xmlns:x="http://schemas.microsoft.com/winfx/2009/xaml" xmlns:android="clr-namespace:Microsoft.Maui.Controls.PlatformConfiguration.AndroidSpecific;assembly=Microsoft.Maui.Controls" xmlns:local="clr-namespace:TestProject" android:TabbedPage.IsSmoothScrollEnabled="false"> <local:ContactPage /> <local:TodoListPage /> <local:ReminderPage /> </TabbedPage> |
TestProject.zip
■ TabbedPage 클래스의 On<T> 메소드를 사용해 페이지 사이 손가락 제스처 스와이프를 활성화하는 방법을 보여준다. (ANDROID) ▶ MainPage.xaml
|
|
<?xml version="1.0" encoding="utf-8" ?> <TabbedPage x:Class="TestProject.MainPage" xmlns="http://schemas.microsoft.com/dotnet/2021/maui" xmlns:x="http://schemas.microsoft.com/winfx/2009/xaml" xmlns:local="clr-namespace:TestProject"> <local:ContactPage /> <local:TodoListPage /> <local:ReminderPage /> </TabbedPage> |
▶ MainPage.xaml.cs
1 2 3 4 5 6 7 8 9 10 11 12 13 14 15 16 17 18 19 20 21 22 23 24 25 26 27 28 29 30 |
using Microsoft.Maui.Controls.PlatformConfiguration.AndroidSpecific; namespace TestProject; /// <summary> /// 메인 페이지 /// </summary> public partial class MainPage : Microsoft.Maui.Controls.TabbedPage { //////////////////////////////////////////////////////////////////////////////////////////////////// Constructor ////////////////////////////////////////////////////////////////////////////////////////// Public #region 생성자 - MainPage() /// <summary> /// 생성자 /// </summary> public MainPage() { InitializeComponent(); On<Microsoft.Maui.Controls.PlatformConfiguration.Android>() .SetOffscreenPageLimit(2) .SetIsSwipePagingEnabled(true); } #endregion } |
※
더 읽기
■ TabbedPage 엘리먼트의 IsSwipePagingEnabled/OffscreenPageLimit 첨부 속성을 사용해 페이지 사이 손가락 제스처 스와이프를 활성화하는 방법을 보여준다. (ANDROID) ▶ MainPage.xaml
|
|
<?xml version="1.0" encoding="utf-8" ?> <TabbedPage x:Class="TestProject.MainPage" xmlns="http://schemas.microsoft.com/dotnet/2021/maui" xmlns:x="http://schemas.microsoft.com/winfx/2009/xaml" xmlns:android="clr-namespace:Microsoft.Maui.Controls.PlatformConfiguration.AndroidSpecific;assembly=Microsoft.Maui.Controls" xmlns:local="clr-namespace:TestProject" android:TabbedPage.IsSwipePagingEnabled="True" android:TabbedPage.OffscreenPageLimit="2"> <local:ContactPage /> <local:TodoListPage /> <local:ReminderPage /> </TabbedPage> |
※ 페이지 사이
더 읽기
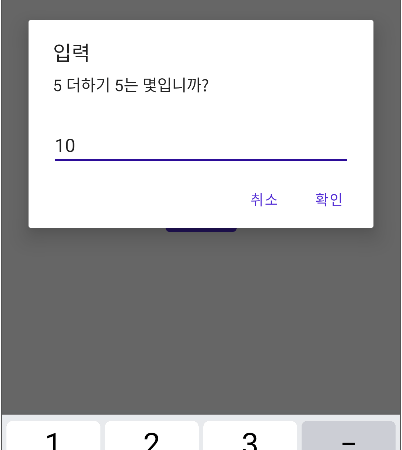
■ Page 클래스의 DisplayPromptAsync 메소드를 사용해 메시지 박스에서 입력받는 방법을 보여준다. ▶ MainPage.xaml
1 2 3 4 5 6 7 8 9 10 11 12 13 14 15 16 17 18 |
<?xml version="1.0" encoding="utf-8" ?> <ContentPage x:Class="TestProject.MainPage" xmlns="http://schemas.microsoft.com/dotnet/2021/maui" xmlns:x="http://schemas.microsoft.com/winfx/2009/xaml"> <StackLayout HorizontalOptions="Center" VerticalOptions="Center" Spacing="10"> <Button x:Name="testButton" HorizontalOptions="Center" Text="테스트" /> <Label x:Name="messageLabel" HorizontalOptions="Center" Text="" /> </StackLayout> </ContentPage> |
▶ MainPage.xaml.cs
1 2 3 4 5 6 7 8 9 10 11 12 13 14 15 16 17 18 19 20 21 22 23 24 25 26 27 28 29 30 31 32 33 34 35 36 37 38 39 40 41 42 43 44 45 46 47 48 49 50 51 52 53 54 55 |
namespace TestProject; /// <summary> /// 메인 페이지 /// </summary> public partial class MainPage : ContentPage { //////////////////////////////////////////////////////////////////////////////////////////////////// Constructor ////////////////////////////////////////////////////////////////////////////////////////// Public #region 생성자 - MainPage() /// <summary> /// 생성자 /// </summary> public MainPage() { InitializeComponent(); this.testButton.Clicked += testButton_Clicked; } #endregion //////////////////////////////////////////////////////////////////////////////////////////////////// Method ////////////////////////////////////////////////////////////////////////////////////////// Private #region 테스트 버튼 클릭시 처리하기 - testButton_Clicked(sender, e) /// <summary> /// 테스트 버튼 클릭시 처리하기 /// </summary> /// <param name="sender">이벤트 발생자</param> /// <param name="e">이벤트 인자</param> private async void testButton_Clicked(object sender, EventArgs e) { string result = await DisplayPromptAsync ( "입력", "5 더하기 5는 몇입니까?", "확인", "취소", null, 2, Keyboard.Numeric, "10" ); this.messageLabel.Text = $"입력 결과 : {result}"; } #endregion } |
TestProject.zip
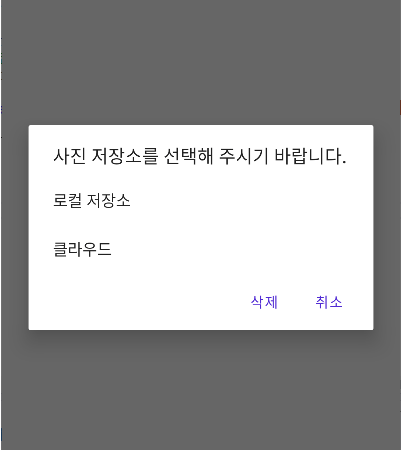
■ Page 클래스의 DisplayActionSheet 메소드를 사용해 메시지 박스를 표시하는 방법을 보여준다. ▶ MainPage.xaml
1 2 3 4 5 6 7 8 9 10 11 12 13 14 15 16 17 18 |
<?xml version="1.0" encoding="utf-8" ?> <ContentPage x:Class="TestProject.MainPage" xmlns="http://schemas.microsoft.com/dotnet/2021/maui" xmlns:x="http://schemas.microsoft.com/winfx/2009/xaml"> <StackLayout HorizontalOptions="Center" VerticalOptions="Center" Spacing="10"> <Button x:Name="testButton" HorizontalOptions="Center" Text="테스트" /> <Label x:Name="messageLabel" HorizontalOptions="Center" Text="" /> </StackLayout> </ContentPage> |
▶ MainPage.xaml.cs
1 2 3 4 5 6 7 8 9 10 11 12 13 14 15 16 17 18 19 20 21 22 23 24 25 26 27 28 29 30 31 32 33 34 35 36 37 38 39 40 41 42 43 44 45 46 47 48 49 50 51 52 |
namespace TestProject; /// <summary> /// 메인 페이지 /// </summary> public partial class MainPage : ContentPage { //////////////////////////////////////////////////////////////////////////////////////////////////// Constructor ////////////////////////////////////////////////////////////////////////////////////////// Public #region 생성자 - MainPage() /// <summary> /// 생성자 /// </summary> public MainPage() { InitializeComponent(); this.testButton.Clicked += testButton_Clicked; } #endregion //////////////////////////////////////////////////////////////////////////////////////////////////// Method ////////////////////////////////////////////////////////////////////////////////////////// Private #region 테스트 버튼 클릭시 처리하기 - testButton_Clicked(sender, e) /// <summary> /// 테스트 버튼 클릭시 처리하기 /// </summary> /// <param name="sender">이벤트 발생자</param> /// <param name="e">이벤트 인자</param> private async void testButton_Clicked(object sender, EventArgs e) { string action = await DisplayActionSheet ( "사진 저장소를 선택해 주시기 바랍니다.", "취소", "삭제", "로컬 저장소", "클라우드" ); this.messageLabel.Text = $"작업 : {action}"; } #endregion } |
TestProject.zip
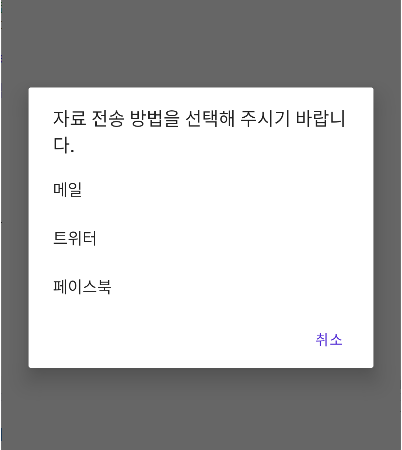
■ Page 클래스의 DisplayActionSheet 메소드를 사용해 메시지 박스를 표시하는 방법을 보여준다. ▶ MainPage.xaml
1 2 3 4 5 6 7 8 9 10 11 12 13 14 15 16 17 18 |
<?xml version="1.0" encoding="utf-8" ?> <ContentPage x:Class="TestProject.MainPage" xmlns="http://schemas.microsoft.com/dotnet/2021/maui" xmlns:x="http://schemas.microsoft.com/winfx/2009/xaml"> <StackLayout HorizontalOptions="Center" VerticalOptions="Center" Spacing="10"> <Button x:Name="testButton" HorizontalOptions="Center" Text="테스트" /> <Label x:Name="messageLabel" HorizontalOptions="Center" Text="" /> </StackLayout> </ContentPage> |
▶ MainPage.xaml.cs
1 2 3 4 5 6 7 8 9 10 11 12 13 14 15 16 17 18 19 20 21 22 23 24 25 26 27 28 29 30 31 32 33 34 35 36 37 38 39 40 41 42 43 44 45 46 47 48 49 50 51 52 53 |
namespace TestProject; /// <summary> /// 메인 페이지 /// </summary> public partial class MainPage : ContentPage { //////////////////////////////////////////////////////////////////////////////////////////////////// Constructor ////////////////////////////////////////////////////////////////////////////////////////// Public #region 생성자 - MainPage() /// <summary> /// 생성자 /// </summary> public MainPage() { InitializeComponent(); this.testButton.Clicked += testButton_Clicked; } #endregion //////////////////////////////////////////////////////////////////////////////////////////////////// Method ////////////////////////////////////////////////////////////////////////////////////////// Private #region 테스트 버튼 클릭시 처리하기 - testButton_Clicked(sender, e) /// <summary> /// 테스트 버튼 클릭시 처리하기 /// </summary> /// <param name="sender">이벤트 발생자</param> /// <param name="e">이벤트 인자</param> private async void testButton_Clicked(object sender, EventArgs e) { string action = await DisplayActionSheet ( "자료 전송 방법을 선택해 주시기 바랍니다.", "취소", null, "메일", "트위터", "페이스북" ); this.messageLabel.Text = $"작업 : {action}"; } #endregion } |
TestProject.zip
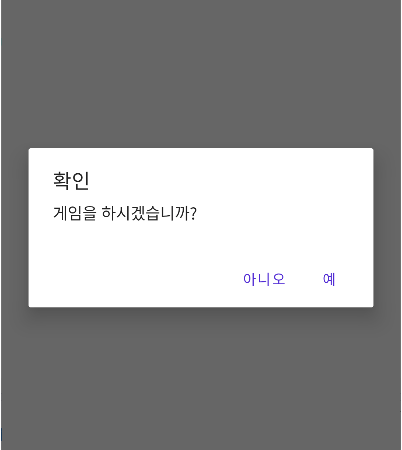
■ Page 클래스의 DisplayAlert 메소드를 사용해 메시지 박스를 표시하는 방법을 보여준다. ▶ MainPage.xaml
1 2 3 4 5 6 7 8 9 10 11 12 13 14 15 16 17 18 |
<?xml version="1.0" encoding="utf-8" ?> <ContentPage x:Class="TestProject.MainPage" xmlns="http://schemas.microsoft.com/dotnet/2021/maui" xmlns:x="http://schemas.microsoft.com/winfx/2009/xaml"> <StackLayout HorizontalOptions="Center" VerticalOptions="Center" Spacing="10"> <Button x:Name="testButton" HorizontalOptions="Center" Text="테스트" /> <Label x:Name="messageLabel" HorizontalOptions="Center" Text="" /> </StackLayout> </ContentPage> |
▶ MainPage.xaml.cs
1 2 3 4 5 6 7 8 9 10 11 12 13 14 15 16 17 18 19 20 21 22 23 24 25 26 27 28 29 30 31 32 33 34 35 36 37 38 39 40 41 42 43 44 45 |
namespace TestProject; /// <summary> /// 메인 페이지 /// </summary> public partial class MainPage : ContentPage { //////////////////////////////////////////////////////////////////////////////////////////////////// Constructor ////////////////////////////////////////////////////////////////////////////////////////// Public #region 생성자 - MainPage() /// <summary> /// 생성자 /// </summary> public MainPage() { InitializeComponent(); this.testButton.Clicked += testButton_Clicked; } #endregion //////////////////////////////////////////////////////////////////////////////////////////////////// Method ////////////////////////////////////////////////////////////////////////////////////////// Private #region 테스트 버튼 클릭시 처리하기 - testButton_Clicked(sender, e) /// <summary> /// 테스트 버튼 클릭시 처리하기 /// </summary> /// <param name="sender">이벤트 발생자</param> /// <param name="e">이벤트 인자</param> private async void testButton_Clicked(object sender, EventArgs e) { bool answer = await DisplayAlert("확인", "게임을 하시겠습니까?", "예", "아니오"); this.messageLabel.Text = answer ? "예" : "아니오"; } #endregion } |
TestProject.zip
■ TabbedPage 엘리먼트를 사용해 탭 내에서 탐색하는 방법을 보여준다. ▶ TodoListPage.xaml
|
|
<?xml version="1.0" encoding="utf-8" ?> <ContentPage x:Class="TestProject.TodoListPage" xmlns="http://schemas.microsoft.com/dotnet/2021/maui" xmlns:x="http://schemas.microsoft.com/winfx/2009/xaml" xmlns:local="clr-namespace:TestProject" IconImageSource="sample2.png" Title="할일" BackgroundColor="White"> <Button x:Name="navigateButton" HorizontalOptions="Center" VerticalOptions="Center" Text="리마인더 이동" /> </ContentPage> |
▶ TodoListPage.xaml.cs
1 2 3 4 5 6 7 8 9 10 11 12 13 14 15 16 17 18 19 20 21 22 23 24 25 26 27 28 29 30 31 32 33 34 35 36 37 38 39 40 41 42 43 |
namespace TestProject; /// <summary> /// 할일 페이지 /// </summary> public partial class TodoListPage : ContentPage { //////////////////////////////////////////////////////////////////////////////////////////////////// Constructor ////////////////////////////////////////////////////////////////////////////////////////// Public #region 생성자 - TodoListPage() /// <summary> /// 생성자 /// </summary> public TodoListPage() { InitializeComponent(); this.navigateButton.Clicked += navigateButton_Clicked; } #endregion //////////////////////////////////////////////////////////////////////////////////////////////////// Method ////////////////////////////////////////////////////////////////////////////////////////// Private #region 리마인더 이동 버튼 클릭시 처리하기 - navigateButton_Clicked(sender, e) /// <summary> /// 리마인더 이동 버튼 클릭시 처리하기 /// </summary> /// <param name="sender">이벤트 발생자</param> /// <param name="e">이벤트 인자</param> private async void navigateButton_Clicked(object sender, EventArgs e) { await Navigation.PushAsync(new ReminderPage()); } #endregion } |
▶ MainPage.xaml
|
|
<?xml version="1.0" encoding="utf-8" ?> <TabbedPage x:Class="TestProject.MainPage" xmlns="http://schemas.microsoft.com/dotnet/2021/maui" xmlns:x="http://schemas.microsoft.com/winfx/2009/xaml" xmlns:local="clr-namespace:TestProject"> <local:ContactPage /> <NavigationPage Title="할일" IconImageSource="sample2.png"> <x:Arguments> <local:TodoListPage /> </x:Arguments> </NavigationPage> </TabbedPage> |
TestProject.zip
■ TabbedPage 엘리먼트의 ItemsSource/ItemTemplate 속성을 사용해 탭 페이지를 채우는 방법을 보여준다. ▶ PageItem.cs
1 2 3 4 5 6 7 8 9 10 11 12 13 14 15 16 17 18 19 20 21 22 23 24 25 26 27 28 29 30 31 32 33 34 35 36 37 |
namespace TestProject; /// <summary> /// 페이지 항목 /// </summary> public class PageItem { //////////////////////////////////////////////////////////////////////////////////////////////////// Property ////////////////////////////////////////////////////////////////////////////////////////// Public #region 아이콘 이미지 소스 - IconImageSource /// <summary> /// 아이콘 이미지 소스 /// </summary> public ImageSource IconImageSource { get; set; } #endregion #region 제목 - Title /// <summary> /// 제목 /// </summary> public string Title { get; set; } #endregion #region 메시지 - Message /// <summary> /// 메시지 /// </summary> public string Message { get; set; } #endregion } |
▶ MainPage.xaml
1 2 3 4 5 6 7 8 9 10 11 12 13 14 15 16 17 18 19 20 21 22 23 24 25 26 27 28 29 |
<?xml version="1.0" encoding="utf-8" ?> <TabbedPage x:Class="TestProject.MainPage" xmlns="http://schemas.microsoft.com/dotnet/2021/maui" xmlns:x="http://schemas.microsoft.com/winfx/2009/xaml" xmlns:local="clr-namespace:TestProject"> <TabbedPage.ItemsSource> <x:Array Type="{x:Type local:PageItem}"> <local:PageItem IconImageSource="sample1.png" Title="연락처" Message="연락처 페이지" /> <local:PageItem IconImageSource="sample2.png" Title="할일" Message="할일 페이지" /> <local:PageItem IconImageSource="sample3.png" Title="리마인더" Message="리마인더 페이지" /> </x:Array> </TabbedPage.ItemsSource> <TabbedPage.ItemTemplate> <DataTemplate> <ContentPage IconImageSource="{Binding IconImageSource}" Title="{Binding Title}" BackgroundColor="White"> <StackLayout> <Label Text="{Binding Message}" VerticalOptions="CenterAndExpand" HorizontalOptions="CenterAndExpand" /> </StackLayout> </ContentPage> </DataTemplate> </TabbedPage.ItemTemplate> </TabbedPage> |
TestProject.zip
■ NavigationPage 엘리먼트의 TitleView 첨부 속성을 사용하는 방법을 보여준다. ▶ SecondPage.xaml
1 2 3 4 5 6 7 8 9 10 11 12 13 14 15 16 17 18 |
<?xml version="1.0" encoding="utf-8" ?> <ContentPage x:Class="TestProject.SecondPage" xmlns="http://schemas.microsoft.com/dotnet/2021/maui" xmlns:x="http://schemas.microsoft.com/winfx/2009/xaml" Title="두번째 페이지" BackgroundColor="White"> <NavigationPage.TitleView> <Slider WidthRequest="300" HeightRequest="44" /> </NavigationPage.TitleView> <Button x:Name="navigateButton" HorizontalOptions="Center" VerticalOptions="Center" Text="메인 페이지 이동" /> </ContentPage> |
TestProject.zip
■ TabbedPage 엘리먼트의 Children 속성을 사용해 Page 컬렉션으로 탭 페이지를 채우는 방법을 보여준다. ▶ ContactPage.xaml
|
|
<?xml version="1.0" encoding="utf-8" ?> <ContentPage x:Class="TestProject.ContactPage" xmlns="http://schemas.microsoft.com/dotnet/2021/maui" xmlns:x="http://schemas.microsoft.com/winfx/2009/xaml" xmlns:local="clr-namespace:TestProject" IconImageSource="sample1.png" Title="연락처" BackgroundColor="White"> <StackLayout> <Label Text="연락처 페이지" VerticalOptions="CenterAndExpand" HorizontalOptions="CenterAndExpand" /> </StackLayout> </ContentPage> |
▶ TodoListPage.xaml
|
|
<?xml version="1.0" encoding="utf-8" ?> <ContentPage x:Class="TestProject.TodoListPage" xmlns="http://schemas.microsoft.com/dotnet/2021/maui" xmlns:x="http://schemas.microsoft.com/winfx/2009/xaml" xmlns:local="clr-namespace:TestProject" IconImageSource="sample2.png" Title="할일" BackgroundColor="White"> <StackLayout> <Label Text="할일 페이지" VerticalOptions="CenterAndExpand" HorizontalOptions="CenterAndExpand" /> </StackLayout> </ContentPage> |
▶ ReminderPage.xaml
|
|
<?xml version="1.0" encoding="utf-8" ?> <ContentPage x:Class="TestProject.ReminderPage" xmlns="http://schemas.microsoft.com/dotnet/2021/maui" xmlns:x="http://schemas.microsoft.com/winfx/2009/xaml" xmlns:local="clr-namespace:TestProject" IconImageSource="sample3.png" Title="리마인더" BackgroundColor="White"> <StackLayout> <Label Text="리마인더 페이지" VerticalOptions="CenterAndExpand" HorizontalOptions="CenterAndExpand" /> </StackLayout> </ContentPage> |
더 읽기
■ FlyoutPage 엘리먼트를 사용하는 방법을 보여준다. ▶ PageItem.cs
1 2 3 4 5 6 7 8 9 10 11 12 13 14 15 16 17 18 19 20 21 22 23 24 25 26 27 28 29 30 31 32 33 34 35 36 37 |
namespace TestProject; /// <summary> /// 페이지 항목 /// </summary> public class PageItem { //////////////////////////////////////////////////////////////////////////////////////////////////// Property ////////////////////////////////////////////////////////////////////////////////////////// Public #region 제목 - Title /// <summary> /// 제목 /// </summary> public string Title { get; set; } #endregion #region 아이콘 소스 - IconSource /// <summary> /// 아이콘 소스 /// </summary> public string IconSource { get; set; } #endregion #region 타겟 타입 - TargetType /// <summary> /// 타겟 타입 /// </summary> public Type TargetType { get; set; } #endregion } |
▶ MenuPage.xaml
1 2 3 4 5 6 7 8 9 10 11 12 13 14 15 16 17 18 19 20 21 22 23 24 25 26 27 28 29 30 31 32 33 34 35 36 37 38 39 40 41 42 43 44 45 |
<ContentPage x:Class="TestProject.MenuPage" xmlns="http://schemas.microsoft.com/dotnet/2021/maui" xmlns:x="http://schemas.microsoft.com/winfx/2009/xaml" xmlns:local="clr-namespace:TestProject" Title="메뉴 페이지" Padding="0,40,0,0"> <CollectionView x:Name="collectionView" SelectionMode="Single"> <CollectionView.ItemsSource> <x:Array Type="{x:Type local:PageItem}"> <local:PageItem IconSource="sample1.png" Title="연락처" TargetType="{x:Type local:ContactPage}" /> <local:PageItem IconSource="sample2.png" Title="할일" TargetType="{x:Type local:TodoListPage}" /> <local:PageItem IconSource="sample3.png" Title="리마인더" TargetType="{x:Type local:ReminderPage}" /> </x:Array> </CollectionView.ItemsSource> <CollectionView.ItemTemplate> <DataTemplate> <Grid Padding="5,10"> <Grid.ColumnDefinitions> <ColumnDefinition Width="30"/> <ColumnDefinition Width="*" /> </Grid.ColumnDefinitions> <Image Source="{Binding IconSource}" /> <Label Grid.Column="1" VerticalOptions="Center" Margin="20,0" FontAttributes="Bold" FontSize="20" Text="{Binding Title}" /> </Grid> </DataTemplate> </CollectionView.ItemTemplate> </CollectionView> </ContentPage> |
▶ MenuPage.xaml.cs
1 2 3 4 5 6 7 8 9 10 11 12 13 14 15 16 17 18 19 20 21 22 23 24 25 26 27 28 29 30 31 32 33 34 35 36 37 38 39 40 41 42 43 44 45 46 47 48 49 50 51 52 53 |
namespace TestProject; /// <summary> /// 메뉴 페이지 /// </summary> public partial class MenuPage : ContentPage { //////////////////////////////////////////////////////////////////////////////////////////////////// Constructor ////////////////////////////////////////////////////////////////////////////////////////// Public #region 생성자 - MenuPage() /// <summary> /// 생성자 /// </summary> public MenuPage() { InitializeComponent(); this.collectionView.SelectionChanged += collectionView_SelectionChanged; } #endregion //////////////////////////////////////////////////////////////////////////////////////////////////// Method ////////////////////////////////////////////////////////////////////////////////////////// Private #region 컬렉션 뷰 선택 변경시 처리하기 - collectionView_SelectionChanged(sender, e) /// <summary> /// 컬렉션 뷰 선택 변경시 처리하기 /// </summary> /// <param name="sender">이벤트 발생자</param> /// <param name="e">이벤트 인자</param> /// <exception cref="NotImplementedException"></exception> private void collectionView_SelectionChanged(object sender, SelectionChangedEventArgs e) { var item = e.CurrentSelection.FirstOrDefault() as PageItem; if(item != null) { MainPage mainPage = App.Current.MainPage as MainPage; mainPage.Detail = new NavigationPage((Page)Activator.CreateInstance(item.TargetType)); mainPage.IsPresented = false; } } #endregion } |
▶ MainPage.xaml
1 2 3 4 5 6 7 8 9 10 11 12 13 14 15 16 17 18 |
<?xml version="1.0" encoding="utf-8" ?> <FlyoutPage x:Class="TestProject.MainPage" xmlns="http://schemas.microsoft.com/dotnet/2021/maui" xmlns:x="http://schemas.microsoft.com/winfx/2009/xaml" xmlns:local="clr-namespace:TestProject"> <FlyoutPage.Flyout> <local:MenuPage x:Name="menuPage" /> </FlyoutPage.Flyout> <FlyoutPage.Detail> <NavigationPage> <x:Arguments> <local:ContactPage /> </x:Arguments> </NavigationPage> </FlyoutPage.Detail> </FlyoutPage> |
TestProject.zip
■ SearchHandler 엘리먼트의 Keyboard 속성을 사용하는 방법을 보여준다. ▶ CatPage.xaml
1 2 3 4 5 6 7 8 9 10 11 12 13 14 15 16 17 18 19 20 21 |
<?xml version="1.0" encoding="utf-8" ?> <ContentPage x:Class="TestProject.CatPage" xmlns="http://schemas.microsoft.com/dotnet/2021/maui" xmlns:x="http://schemas.microsoft.com/winfx/2009/xaml" xmlns:local="clr-namespace:TestProject" Title="Cat Page" BackgroundColor="White"> <Shell.SearchHandler> <local:AnimalSearchHandler Keyboard="Text" DisplayMemberName="Name" Placeholder="동물명을 입력해 주시기 바랍니다." /> </Shell.SearchHandler> <StackLayout> <Label Text="CAT PAGE" VerticalOptions="CenterAndExpand" HorizontalOptions="CenterAndExpand" /> </StackLayout> </ContentPage> |
TestProject.zip
