■ Shell 엘리먼트의 BackButtonBehavior 속성을 사용해 뒤로가기 버튼 동작을 설정하는 방법을 보여준다. ▶ MonkeyDetailPage.xaml
1 2 3 4 5 6 7 8 9 10 11 12 13 14 15 16 17 18 19 20 21 |
<?xml version="1.0" encoding="utf-8" ?> <ContentPage x:Class="TestProject.MonkeyDetailPage" x:Name="contentPage" xmlns="http://schemas.microsoft.com/dotnet/2021/maui" xmlns:x="http://schemas.microsoft.com/winfx/2009/xaml" Title="Monkey Detail Page" BackgroundColor="White" BindingContext="{x:Reference contentPage}"> <Shell.BackButtonBehavior> <BackButtonBehavior IconOverride="dotnet_bot.png" Command="{Binding BackButtonCommand}" /> </Shell.BackButtonBehavior> <StackLayout> <Label x:Name="label" VerticalOptions="CenterAndExpand" HorizontalOptions="CenterAndExpand" Text="MONKEY DETAIL PAGE" /> </StackLayout> </ContentPage> |
▶ MonkeyDetailPage.xaml.cs
1 2 3 4 5 6 7 8 9 10 11 12 13 14 15 16 17 18 19 20 21 22 23 24 25 26 27 28 29 30 31 32 33 34 35 36 37 38 39 40 41 42 43 44 45 46 47 48 49 50 51 52 53 54 55 56 57 58 59 60 61 62 63 64 65 66 67 68 69 70 71 72 73 74 75 76 77 78 79 |
using System.Windows.Input; using TestProject.Models; namespace TestProject; /// <summary> /// 원숭이 페이지 /// </summary> [QueryProperty(nameof(Monkey), "monkey")] public partial class MonkeyDetailPage : ContentPage { //////////////////////////////////////////////////////////////////////////////////////////////////// Property ////////////////////////////////////////////////////////////////////////////////////////// Public #region 뒤로가기 버튼 명령 - BackButtonCommand /// <summary> /// 뒤로가기 버튼 명령 /// </summary> public ICommand BackButtonCommand { get; private set; } = new Command ( () => { Shell.Current.Navigation.PopAsync(); } ); #endregion #region 원숭이 - Monkey /// <summary> /// 원숭이 /// </summary> public MonkeyModel Monkey { get; set; } #endregion //////////////////////////////////////////////////////////////////////////////////////////////////// Constructor ////////////////////////////////////////////////////////////////////////////////////////// Public #region 생성자 - MonkeyDetailPage() /// <summary> /// 생성자 /// </summary> public MonkeyDetailPage() { InitializeComponent(); } #endregion //////////////////////////////////////////////////////////////////////////////////////////////////// Method ////////////////////////////////////////////////////////////////////////////////////////// Protected #region 표시시 처리하기 - OnAppearing() /// <summary> /// 표시시 처리하기 /// </summary> protected override void OnAppearing() { base.OnAppearing(); if(Monkey != null) { this.label.Text = $"MONKEY DETAIL PAGE : {Monkey.Name}, {Monkey.Time:HH:mm:ss}"; } else { this.label.Text = "MONKEY DETAIL PAGE"; } } #endregion } |
TestProject.zip
■ Shell 엘리먼트의 BackButtonBehavior 속성을 사용해 뒤로가기 버튼 동작을 설정하는 방법을 보여준다. ▶ MonkeyDetailViewModel.cs
1 2 3 4 5 6 7 8 9 10 11 12 13 14 15 16 17 18 19 20 21 22 23 24 25 26 27 28 29 30 31 32 33 34 35 36 37 38 39 40 41 42 43 44 |
using System.Windows.Input; namespace TestProject.ViewModels; /// <summary> /// 원숭이 상세 뷰 모델 /// </summary> public class MonkeyDetailViewModel { //////////////////////////////////////////////////////////////////////////////////////////////////// Property ////////////////////////////////////////////////////////////////////////////////////////// Public #region 뒤로가기 버튼 명령 - BackButtonCommand /// <summary> /// 뒤로가기 버튼 명령 /// </summary> public ICommand BackButtonCommand { get; private set; } #endregion //////////////////////////////////////////////////////////////////////////////////////////////////// Constructor ////////////////////////////////////////////////////////////////////////////////////////// Public #region 생성자 - MonkeyDetailViewModel() /// <summary> /// 생성자 /// </summary> public MonkeyDetailViewModel() { BackButtonCommand = new Command ( () => { Shell.Current.Navigation.PopAsync(); } ); } #endregion } |
▶ MonkeyDetailPage.xaml
1 2 3 4 5 6 7 8 9 10 11 12 13 14 15 16 17 18 19 20 21 22 23 24 |
<?xml version="1.0" encoding="utf-8" ?> <ContentPage x:Class="TestProject.MonkeyDetailPage" xmlns="http://schemas.microsoft.com/dotnet/2021/maui" xmlns:x="http://schemas.microsoft.com/winfx/2009/xaml" xmlns:viewmodel="clr-namespace:TestProject.ViewModels" Title="Monkey Detail Page" BackgroundColor="White"> <ContentPage.BindingContext> <viewmodel:MonkeyDetailViewModel /> </ContentPage.BindingContext> <Shell.BackButtonBehavior> <BackButtonBehavior IconOverride="dotnet_bot.png" Command="{Binding BackButtonCommand}" /> </Shell.BackButtonBehavior> <StackLayout> <Label x:Name="label" VerticalOptions="CenterAndExpand" HorizontalOptions="CenterAndExpand" Text="MONKEY DETAIL PAGE" /> </StackLayout> </ContentPage> |
TestProject.zip
■ Shell 클래스의 GoToAsync 메소드 사용시 객체 기반 쿼리 매개 변수를 전달하는 방법을 보여준다. (QueryPropertyAttribute 클래스 사용) ▶ MonkeyModel.cs
1 2 3 4 5 6 7 8 9 10 11 12 13 14 15 16 17 18 19 20 21 22 23 24 25 26 27 28 29 30 |
namespace TestProject.Models { /// <summary> /// 원숭이 모델 /// </summary> public class MonkeyModel { //////////////////////////////////////////////////////////////////////////////////////////////////// Property ////////////////////////////////////////////////////////////////////////////////////////// Public #region 명칭 - Name /// <summary> /// 명칭 /// </summary> public string Name { get; set; } #endregion #region 시간 - Time /// <summary> /// 시간 /// </summary> public DateTime Time { get; set; } #endregion } } |
▶ MonkeyPage.xaml.cs
더 읽기
■ Shell 클래스의 GoToAsync 메소드 사용시 객체 기반 쿼리 매개 변수를 전달하는 방법을 보여준다. (IQueryAttributable 인터페이스 사용) ▶ MonkeyModel.cs
1 2 3 4 5 6 7 8 9 10 11 12 13 14 15 16 17 18 19 20 21 22 23 24 25 26 27 28 29 30 |
namespace TestProject.Models { /// <summary> /// 원숭이 모델 /// </summary> public class MonkeyModel { //////////////////////////////////////////////////////////////////////////////////////////////////// Property ////////////////////////////////////////////////////////////////////////////////////////// Public #region 명칭 - Name /// <summary> /// 명칭 /// </summary> public string Name { get; set; } #endregion #region 시간 - Time /// <summary> /// 시간 /// </summary> public DateTime Time { get; set; } #endregion } } |
▶ MonkeyPage.xaml.cs
더 읽기
■ Shell 클래스의 GoToAsync 메소드 사용시 문자열 기반 쿼리 매개 변수를 전달하는 방법을 보여준다. (IQueryAttributable 인터페이스 사용) ▶ MonkeyPage.xaml.cs
1 2 3 4 5 6 7 8 9 10 11 12 13 14 15 16 17 18 19 20 21 22 23 24 25 26 27 28 29 30 31 32 33 34 35 36 37 38 39 40 41 42 43 |
namespace TestProject; /// <summary> /// 원숭이 페이지 /// </summary> public partial class MonkeyPage : ContentPage { //////////////////////////////////////////////////////////////////////////////////////////////////// Constructor ////////////////////////////////////////////////////////////////////////////////////////// Public #region 생성자 - MonkeyPage() /// <summary> /// 생성자 /// </summary> public MonkeyPage() { InitializeComponent(); this.detailButton.Clicked += detailButton_Clicked; } #endregion //////////////////////////////////////////////////////////////////////////////////////////////////// Constructor ////////////////////////////////////////////////////////////////////////////////////////// Public #region 원숭이 상세 버튼 클릭시 처리하기 - detailButton_Clicked(sender, e) /// <summary> /// 원숭이 상세 버튼 클릭시 처리하기 /// </summary> /// <param name="sender">이벤트 발생자</param> /// <param name="e">이벤트 인자</param> private async void detailButton_Clicked(object sender, EventArgs e) { await Shell.Current.GoToAsync($"//동물/원숭이/원숭이상세?name=홍길동&&time={DateTime.Now:HH:mm:ss}"); } #endregion } |
▶ MonkeyDetailPage.xaml.cs
더 읽기
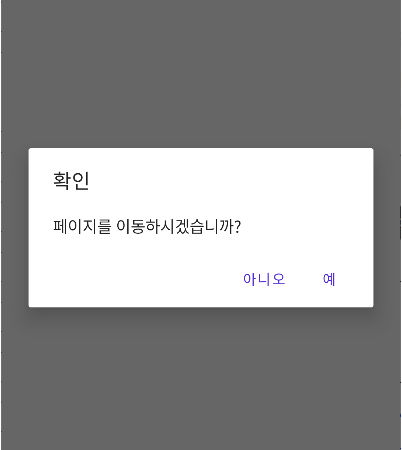
■ ShellNavigatingEventArgs 클래스의 GetDeferral 메소드를 사용해 탐색 지연을 사용하는 방법을 보여준다. ▶ AppShell.xaml
1 2 3 4 5 6 7 8 9 10 11 12 13 14 15 16 17 18 19 20 21 22 23 24 25 26 27 28 29 30 31 32 33 34 35 36 37 38 39 40 41 42 43 44 45 46 47 |
<?xml version="1.0" encoding="utf-8" ?> <Shell x:Class="TestProject.AppShell" x:Name="shell" xmlns="http://schemas.microsoft.com/dotnet/2021/maui" xmlns:x="http://schemas.microsoft.com/winfx/2009/xaml" xmlns:local="clr-namespace:TestProject"> <FlyoutItem Route="동물" FlyoutDisplayOptions="AsMultipleItems"> <Tab Route="국내" Icon="sample1.png" Title="국내"> <ShellContent Route="고양이" Icon="sample2.png" Title="고양이" ContentTemplate="{DataTemplate local:CatPage}" /> <ShellContent Route="개" Icon="sample3.png" Title="개" ContentTemplate="{DataTemplate local:DogPage}" /> </Tab> <ShellContent Route="원숭이" Icon="sample1.png" Title="원숭이" ContentTemplate="{DataTemplate local:MonkeyPage}" /> <ShellContent Route="코끼리" Icon="sample2.png" Title="코끼리" ContentTemplate="{DataTemplate local:ElephantPage}" /> <ShellContent Route="곰" Icon="sample3.png" Title="곰" ContentTemplate="{DataTemplate local:BearPage}" /> </FlyoutItem> <ShellContent Route="정보" Icon="sample1.png" Title="정보" ContentTemplate="{DataTemplate local:AboutPage}" /> </Shell> |
▶ AppShell.xaml.cs
1 2 3 4 5 6 7 8 9 10 11 12 13 14 15 16 17 18 19 20 21 22 23 24 25 26 27 28 29 30 31 32 33 34 35 36 37 38 39 40 41 42 43 44 45 46 47 48 49 50 51 52 53 54 55 56 57 58 |
namespace TestProject; /// <summary> /// 앱 쉘 /// </summary> public partial class AppShell : Shell { //////////////////////////////////////////////////////////////////////////////////////////////////// Constructor ////////////////////////////////////////////////////////////////////////////////////////// Public #region 생성자 - AppShell() /// <summary> /// 생성자 /// </summary> public AppShell() { InitializeComponent(); Routing.RegisterRoute("원숭이/원숭이상세", typeof(MonkeyDetailPage)); } #endregion //////////////////////////////////////////////////////////////////////////////////////////////////// Method ////////////////////////////////////////////////////////////////////////////////////////// Protected #region 탐색 전 처리하기 - OnNavigating(e) /// <summary> /// 탐색 전 처리하기 /// </summary> /// <param name="e">이벤트 인자</param> protected override async void OnNavigating(ShellNavigatingEventArgs e) { base.OnNavigating(e); if(e.Current != null && e.Current.Location.OriginalString.StartsWith("//동물/국내/") && e.Target.Location.OriginalString.StartsWith("//동물/국내/")) { return; } ShellNavigatingDeferral deferral = e.GetDeferral(); string result = await DisplayActionSheet("확인", "예", "아니오", "페이지를 이동하시겠습니까?"); if(result != "예") { e.Cancel(); } deferral.Complete(); } #endregion } |
TestProject.zip
■ Shell 클래스의 OnNavigating 메소드를 사용해 뒤로가기 탐색을 취소하는 방법을 보여준다. ▶ AppShell.xaml.cs
1 2 3 4 5 6 7 8 9 10 11 12 13 14 15 16 17 18 19 20 21 22 23 24 25 26 27 28 29 30 31 32 33 34 35 36 37 38 39 40 41 42 43 44 45 46 |
namespace TestProject; /// <summary> /// 앱 쉘 /// </summary> public partial class AppShell : Shell { //////////////////////////////////////////////////////////////////////////////////////////////////// Constructor ////////////////////////////////////////////////////////////////////////////////////////// Public #region 생성자 - AppShell() /// <summary> /// 생성자 /// </summary> public AppShell() { InitializeComponent(); } #endregion //////////////////////////////////////////////////////////////////////////////////////////////////// Method ////////////////////////////////////////////////////////////////////////////////////////// Protected #region 탐색 전 처리하기 - OnNavigating(e) /// <summary> /// 탐색 전 처리하기 /// </summary> /// <param name="e">이벤트 발생자</param> protected override void OnNavigating(ShellNavigatingEventArgs e) { base.OnNavigating(e); // 뒤로가기 탐색을 취소한다. if(e.Source == ShellNavigationSource.Pop) { e.Cancel(); } } #endregion } |
■ Shell 클래스의 GoToAsync 메소드를 사용해 뒤로 탐색하는 방법을 보여준다. ▶ 예제 코드 (C#)
|
|
await Shell.Current.GoToAsync(".."); await Shell.Current.GoToAsync("../route"); await Shell.Current.GoToAsync("../../route"); |
■ Routing 클래스의 RegisterRoute 정적 메소드를 사용해 상세 페이지 경로를 등록하는 방법을 보여준다. ▶ AppShell.xaml
1 2 3 4 5 6 7 8 9 10 11 12 13 14 15 16 17 18 19 20 21 22 23 24 25 26 27 28 29 30 31 32 33 34 35 36 37 38 39 40 41 42 43 44 45 46 47 |
<?xml version="1.0" encoding="utf-8" ?> <Shell x:Class="TestProject.AppShell" x:Name="shell" xmlns="http://schemas.microsoft.com/dotnet/2021/maui" xmlns:x="http://schemas.microsoft.com/winfx/2009/xaml" xmlns:local="clr-namespace:TestProject"> <FlyoutItem Route="동물" FlyoutDisplayOptions="AsMultipleItems"> <Tab Route="국내" Title="국내" Icon="sample1.png"> <ShellContent Route="고양이" Title="고양이" Icon="sample2.png" ContentTemplate="{DataTemplate local:CatPage}" /> <ShellContent Route="개" Title="개" Icon="sample3.png" ContentTemplate="{DataTemplate local:DogPage}" /> </Tab> <ShellContent Route="원숭이" Title="원숭이" Icon="sample1.png" ContentTemplate="{DataTemplate local:MonkeyPage}" /> <ShellContent Route="코끼리" Title="코끼리" Icon="sample2.png" ContentTemplate="{DataTemplate local:ElephantPage}" /> <ShellContent Route="곰" Title="곰" Icon="sample3.png" ContentTemplate="{DataTemplate local:BearPage}" /> </FlyoutItem> <ShellContent Route="정보" Title="정보" Icon="sample1.png" ContentTemplate="{DataTemplate local:AboutPage}" /> </Shell> |
▶ AppShell.xaml.cs
1 2 3 4 5 6 7 8 9 10 11 12 13 14 15 16 17 18 19 20 21 22 23 24 25 26 |
namespace TestProject; /// <summary> /// 앱 쉘 /// </summary> public partial class AppShell : Shell { //////////////////////////////////////////////////////////////////////////////////////////////////// Constructor ////////////////////////////////////////////////////////////////////////////////////////// Public #region 생성자 - AppShell() /// <summary> /// 생성자 /// </summary> public AppShell() { InitializeComponent(); Routing.RegisterRoute("원숭이/원숭이상세", typeof(MonkeyDetailPage)); } #endregion } |
▶ MonkeyPage.xaml
1 2 3 4 5 6 7 8 9 10 11 12 13 14 15 16 17 18 19 20 21 |
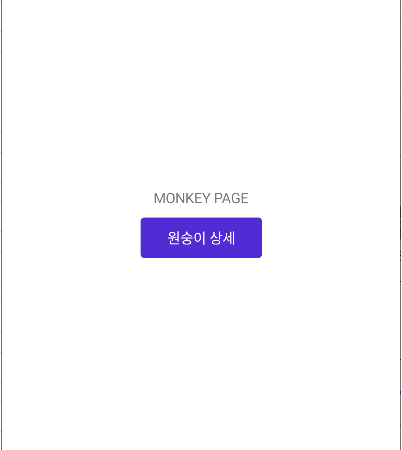
<?xml version="1.0" encoding="utf-8" ?> <ContentPage x:Class="TestProject.MonkeyPage" xmlns="http://schemas.microsoft.com/dotnet/2021/maui" xmlns:x="http://schemas.microsoft.com/winfx/2009/xaml" Title="Monkey Page" BackgroundColor="White"> <StackLayout HorizontalOptions="Center" VerticalOptions="Center"> <Label Text="MONKEY PAGE" VerticalOptions="Center" HorizontalOptions="Center" /> <Button x:Name="detailButton" Margin="10" WidthRequest="120" HeightRequest="40" Text="원숭이 상세" /> </StackLayout> </ContentPage> |
더 읽기
■ Shell 클래스의 GoToAsync 메소드를 사용해 페이지를 이동하는 방법을 보여준다. ▶ AppShell.xaml
1 2 3 4 5 6 7 8 9 10 11 12 13 14 15 16 17 18 19 20 21 22 23 24 25 26 27 28 29 30 31 32 33 34 35 36 37 38 39 40 41 42 43 44 45 46 47 |
<?xml version="1.0" encoding="utf-8" ?> <Shell x:Class="TestProject.AppShell" x:Name="shell" xmlns="http://schemas.microsoft.com/dotnet/2021/maui" xmlns:x="http://schemas.microsoft.com/winfx/2009/xaml" xmlns:local="clr-namespace:TestProject"> <FlyoutItem Route="동물" FlyoutDisplayOptions="AsMultipleItems"> <Tab Route="국내" Icon="sample1.png" Title="국내"> <ShellContent Route="고양이" Icon="sample2.png" Title="고양이" ContentTemplate="{DataTemplate local:CatPage}" /> <ShellContent Route="개" Icon="sample3.png" Title="개" ContentTemplate="{DataTemplate local:DogPage}" /> </Tab> <ShellContent Route="원숭이" Icon="sample1.png" Title="원숭이" ContentTemplate="{DataTemplate local:MonkeyPage}" /> <ShellContent Route="코끼리" Icon="sample2.png" Title="코끼리" ContentTemplate="{DataTemplate local:ElephantPage}" /> <ShellContent Route="곰" Icon="sample3.png" Title="곰" ContentTemplate="{DataTemplate local:BearPage}" /> </FlyoutItem> <ShellContent Route="정보" Icon="sample1.png" Title="정보" ContentTemplate="{DataTemplate local:AboutPage}" /> </Shell> |
▶ MonkeyPage.xaml
1 2 3 4 5 6 7 8 9 10 11 12 13 14 15 16 17 18 19 20 21 22 |
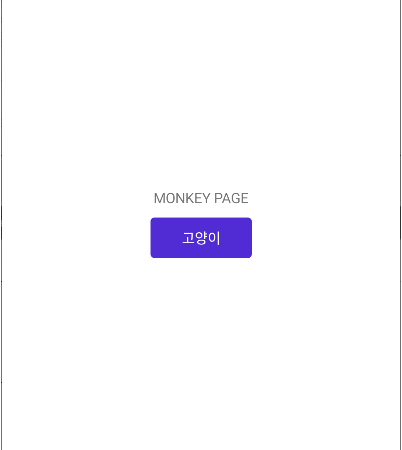
<?xml version="1.0" encoding="utf-8" ?> <ContentPage x:Class="TestProject.MonkeyPage" xmlns="http://schemas.microsoft.com/dotnet/2021/maui" xmlns:x="http://schemas.microsoft.com/winfx/2009/xaml" Title="Monkey Page" BackgroundColor="White"> <StackLayout HorizontalOptions="Center" VerticalOptions="Center"> <Label HorizontalOptions="Center" VerticalOptions="Center" Text="MONKEY PAGE" /> <Button x:Name="catButton" Margin="10" WidthRequest="100" HeightRequest="40" Text="고양이" /> </StackLayout> </ContentPage> |
▶ MonkeyPage.xaml.cs
1 2 3 4 5 6 7 8 9 10 11 12 13 14 15 16 17 18 19 20 21 22 23 24 25 26 27 28 29 30 31 32 33 34 35 36 37 38 39 40 41 42 43 |
namespace TestProject; /// <summary> /// 원숭이 페이지 /// </summary> public partial class MonkeyPage : ContentPage { //////////////////////////////////////////////////////////////////////////////////////////////////// Constructor ////////////////////////////////////////////////////////////////////////////////////////// Public #region 생성자 - MonkeyPage() /// <summary> /// 생성자 /// </summary> public MonkeyPage() { InitializeComponent(); this.catButton.Clicked += catButton_Clicked; } #endregion //////////////////////////////////////////////////////////////////////////////////////////////////// Constructor ////////////////////////////////////////////////////////////////////////////////////////// Public #region 고양이 버튼 클릭시 처리하기 - catButton_Clicked(sender, e) /// <summary> /// 고양이 버튼 클릭시 처리하기 /// </summary> /// <param name="sender">이벤트 발생자</param> /// <param name="e">이벤트 인자</param> private async void catButton_Clicked(object sender, EventArgs e) { await Shell.Current.GoToAsync("//동물/국내/고양이"); } #endregion } |
TestProject.zip
■ Shell 엘리먼트의 TitleView 속성을 사용해 쉘 제목을 설정하는 방법을 보여준다. ▶ AppShell.xaml
1 2 3 4 5 6 7 8 9 10 11 12 13 14 15 16 17 18 19 20 21 22 |
<?xml version="1.0" encoding="utf-8" ?> <Shell x:Class="TestProject.AppShell" xmlns="http://schemas.microsoft.com/dotnet/2021/maui" xmlns:x="http://schemas.microsoft.com/winfx/2009/xaml" xmlns:local="clr-namespace:TestProject"> <TabBar> <ShellContent Icon="sample1.png" Title="고양이" ContentTemplate="{DataTemplate local:CatPage}" /> <ShellContent Icon="sample2.png" Title="개" ContentTemplate="{DataTemplate local:DogPage}" /> <ShellContent Icon="sample3.png" Title="원숭이" ContentTemplate="{DataTemplate local:MonkeyPage}" /> </TabBar> </Shell> |
▶ CatPage.xaml
1 2 3 4 5 6 7 8 9 10 11 12 13 14 15 16 17 18 19 20 21 |
<?xml version="1.0" encoding="utf-8" ?> <ContentPage x:Class="TestProject.CatPage" xmlns="http://schemas.microsoft.com/dotnet/2021/maui" xmlns:x="http://schemas.microsoft.com/winfx/2009/xaml" Title="Cat Page" BackgroundColor="White"> <Shell.TitleView> <Image HorizontalOptions="Center" VerticalOptions="Center" Source="dotnet_bot.png" /> </Shell.TitleView> <StackLayout> <Label HorizontalOptions="CenterAndExpand" VerticalOptions="CenterAndExpand" Text="CAT PAGE" /> </StackLayout> </ContentPage> |
TestProject.zip
■ Shell 엘리먼트의 NavBarIsVisible 첨부 속성을 사용해 탐색바 표시 여부를 설정하는 방법을 보여준다. ▶ AppShell.xaml
1 2 3 4 5 6 7 8 9 10 11 12 13 14 15 16 17 18 19 20 21 22 |
<?xml version="1.0" encoding="utf-8" ?> <Shell x:Class="TestProject.AppShell" xmlns="http://schemas.microsoft.com/dotnet/2021/maui" xmlns:x="http://schemas.microsoft.com/winfx/2009/xaml" xmlns:local="clr-namespace:TestProject"> <FlyoutItem FlyoutDisplayOptions="AsMultipleItems"> <ShellContent Icon="sample1.png" Title="고양이" ContentTemplate="{DataTemplate local:CatPage}" /> <ShellContent Icon="sample2.png" Title="개" ContentTemplate="{DataTemplate local:DogPage}" /> <ShellContent Icon="sample3.png" Title="원숭이" ContentTemplate="{DataTemplate local:MonkeyPage}" /> </FlyoutItem> </Shell> |
▶ DogPage.xaml
|
|
<?xml version="1.0" encoding="utf-8" ?> <ContentPage x:Class="TestProject.DogPage" xmlns="http://schemas.microsoft.com/dotnet/2021/maui" xmlns:x="http://schemas.microsoft.com/winfx/2009/xaml" Title="Dog Page" BackgroundColor="White" Shell.NavBarIsVisible="False"> <StackLayout> <Label HorizontalOptions="CenterAndExpand" VerticalOptions="CenterAndExpand" Text="DOG PAGE" /> </StackLayout> </ContentPage> |
TestProject.zip
■ Shell 엘리먼트의 NavBarHasShadow 첨부 속성을 사용해 탐색바 그림자를 설정하는 방법을 보여준다. ▶ CatPage.xaml
|
|
<?xml version="1.0" encoding="utf-8" ?> <ContentPage x:Class="TestProject.CatPage" xmlns="http://schemas.microsoft.com/dotnet/2021/maui" xmlns:x="http://schemas.microsoft.com/winfx/2009/xaml" Title="Cat Page" BackgroundColor="White" Shell.NavBarHasShadow="False"> <StackLayout> <Label HorizontalOptions="CenterAndExpand" VerticalOptions="CenterAndExpand" Text="CAT PAGE" /> </StackLayout> </ContentPage> |
▶ DogPage.xaml
|
|
<?xml version="1.0" encoding="utf-8" ?> <ContentPage x:Class="TestProject.DogPage" xmlns="http://schemas.microsoft.com/dotnet/2021/maui" xmlns:x="http://schemas.microsoft.com/winfx/2009/xaml" Title="Dog Page" BackgroundColor="White" Shell.NavBarHasShadow="False"> <StackLayout> <Label HorizontalOptions="CenterAndExpand" VerticalOptions="CenterAndExpand" Text="DOG PAGE" /> </StackLayout> </ContentPage> |
▶ MonkeyPage.xaml
|
|
<?xml version="1.0" encoding="utf-8" ?> <ContentPage x:Class="TestProject.MonkeyPage" xmlns="http://schemas.microsoft.com/dotnet/2021/maui" xmlns:x="http://schemas.microsoft.com/winfx/2009/xaml" Title="Monkey Page" BackgroundColor="White" Shell.NavBarHasShadow="False"> <StackLayout> <Label HorizontalOptions="CenterAndExpand" VerticalOptions="CenterAndExpand" Text="MONKEY PAGE" /> </StackLayout> </ContentPage> |
▶
더 읽기
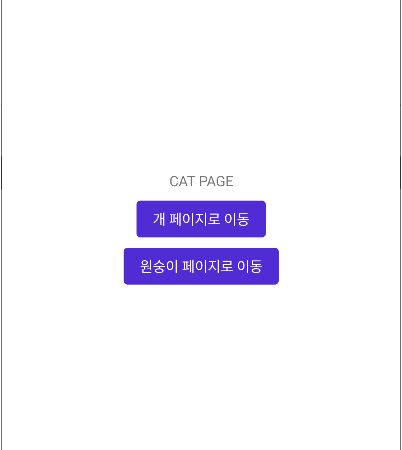
■ Shell 엘리먼트의 PresentationMode 첨부 속성을 사용하는 방법을 보여준다. ▶ CatPage.xaml
1 2 3 4 5 6 7 8 9 10 11 12 13 14 15 16 17 18 19 20 21 22 23 24 |
<?xml version="1.0" encoding="utf-8" ?> <ContentPage x:Class="TestProject.CatPage" xmlns="http://schemas.microsoft.com/dotnet/2021/maui" xmlns:x="http://schemas.microsoft.com/winfx/2009/xaml" Title="Cat Page" BackgroundColor="White" Shell.PresentationMode="NotAnimated"> <StackLayout HorizontalOptions="Center" VerticalOptions="Center" Spacing="10"> <Label HorizontalOptions="Center" Text="CAT PAGE" /> <Button x:Name="dongPageButton" HorizontalOptions="Center" Text="개 페이지로 이동" /> <Button x:Name="monkeyPageButton" HorizontalOptions="Center" Text="원숭이 페이지로 이동" /> </StackLayout> </ContentPage> |
▶ CatPage.xaml.cs
1 2 3 4 5 6 7 8 9 10 11 12 13 14 15 16 17 18 19 20 21 22 23 24 25 26 27 28 29 30 31 32 33 34 35 36 37 38 39 40 41 42 43 44 45 46 47 48 49 50 51 52 53 54 55 56 57 |
namespace TestProject; /// <summary> /// 고양이 페이지 /// </summary> public partial class CatPage : ContentPage { //////////////////////////////////////////////////////////////////////////////////////////////////// Constructor ////////////////////////////////////////////////////////////////////////////////////////// Public #region 생성자 - CatPage() /// <summary> /// 생성자 /// </summary> public CatPage() { InitializeComponent(); this.dongPageButton.Clicked += dongPageButton_Clicked; this.monkeyPageButton.Clicked += monkeyPageButton_Clicked; } #endregion //////////////////////////////////////////////////////////////////////////////////////////////////// Method ////////////////////////////////////////////////////////////////////////////////////////// Private #region 개 페이지로 이동 버튼 클릭시 처리하기 - dongPageButton_Clicked(sender, e) /// <summary> /// 개 페이지로 이동 버튼 클릭시 처리하기 /// </summary> /// <param name="sender">이벤트 발생자</param> /// <param name="e">이벤트 인자</param> private async void dongPageButton_Clicked(object sender, EventArgs e) { await Shell.Current.GoToAsync("//동물/개", true); } #endregion #region 원숭이 페이지로 이동 버튼 클릭시 처리하기 - monkeyPageButton_Clicked(sender, e) /// <summary> /// 원숭이 페이지로 이동 버튼 클릭시 처리하기 /// </summary> /// <param name="sender">이벤트 발생자</param> /// <param name="e">이벤트 인자</param> private async void monkeyPageButton_Clicked(object sender, EventArgs e) { await Shell.Current.GoToAsync("//동물/원숭이", true); } #endregion } |
▶ DogPage.xaml
1 2 3 4 5 6 7 8 9 10 11 12 13 14 15 16 17 18 19 20 21 22 23 24 |
<?xml version="1.0" encoding="utf-8" ?> <ContentPage x:Class="TestProject.DogPage" xmlns="http://schemas.microsoft.com/dotnet/2021/maui" xmlns:x="http://schemas.microsoft.com/winfx/2009/xaml" Title="Dog Page" BackgroundColor="White" Shell.PresentationMode="NotAnimated"> <StackLayout HorizontalOptions="Center" VerticalOptions="Center" Spacing="10"> <Label HorizontalOptions="Center" Text="DOG PAGE" /> <Button x:Name="catPageButton" HorizontalOptions="Center" Text="고양이 페이지로 이동" /> <Button x:Name="monkeyPageButton" HorizontalOptions="Center" Text="원숭이 페이지로 이동" /> </StackLayout> </ContentPage> |
▶ DogPage.xaml.cs
1 2 3 4 5 6 7 8 9 10 11 12 13 14 15 16 17 18 19 20 21 22 23 24 25 26 27 28 29 30 31 32 33 34 35 36 37 38 39 40 41 42 43 44 45 46 47 48 49 50 51 52 53 54 55 56 57 |
namespace TestProject; /// <summary> /// 개 페이지 /// </summary> public partial class DogPage : ContentPage { //////////////////////////////////////////////////////////////////////////////////////////////////// Constructor ////////////////////////////////////////////////////////////////////////////////////////// Public #region 생성자 - DogPage() /// <summary> /// 생성자 /// </summary> public DogPage() { InitializeComponent(); this.catPageButton.Clicked += catPageButton_Clicked; this.monkeyPageButton.Clicked += monkeyPageButton_Clicked; } #endregion //////////////////////////////////////////////////////////////////////////////////////////////////// Method ////////////////////////////////////////////////////////////////////////////////////////// Private #region 고양이 페이지로 이동 버튼 클릭시 처리하기 - catPageButton_Clicked(sender, e) /// <summary> /// 고양이 페이지로 이동 버튼 클릭시 처리하기 /// </summary> /// <param name="sender">이벤트 발생자</param> /// <param name="e">이벤트 인자</param> private async void catPageButton_Clicked(object sender, EventArgs e) { await Shell.Current.GoToAsync("//동물/고양이", true); } #endregion #region 원숭이 페이지로 이동 버튼 클릭시 처리하기 - monkeyPageButton_Clicked(sender, e) /// <summary> /// 원숭이 페이지로 이동 버튼 클릭시 처리하기 /// </summary> /// <param name="sender">이벤트 발생자</param> /// <param name="e">이벤트 인자</param> private async void monkeyPageButton_Clicked(object sender, EventArgs e) { await Shell.Current.GoToAsync("//동물/원숭이", true); } #endregion } |
▶
더 읽기
■ Shell 엘리먼트의 BackgroundColor/TitleColor/UnselectedColor 첨부 속성을 사용하는 방법을 보여준다. ▶ AppShell.xaml
1 2 3 4 5 6 7 8 9 10 11 12 13 14 15 16 17 18 19 20 21 22 23 24 25 26 27 28 |
<?xml version="1.0" encoding="utf-8" ?> <Shell x:Class="TestProject.AppShell" xmlns="http://schemas.microsoft.com/dotnet/2021/maui" xmlns:x="http://schemas.microsoft.com/winfx/2009/xaml" xmlns:local="clr-namespace:TestProject"> <TabBar> <ShellContent Icon="sample1.png" Title="고양이" Shell.BackgroundColor="Blue" Shell.TitleColor="White" Shell.UnselectedColor="Magenta" ContentTemplate="{DataTemplate local:CatPage}" /> <ShellContent Icon="sample2.png" Title="개" ContentTemplate="{DataTemplate local:DogPage}" /> <ShellContent Icon="sample3.png" Title="원숭이" Shell.BackgroundColor="Blue" Shell.TitleColor="White" Shell.UnselectedColor="Magenta" ContentTemplate="{DataTemplate local:MonkeyPage}" /> </TabBar> </Shell> |
TestProject.zip
■ Shell 엘리먼트의 BackgroundColor/TitleColor/UnselectedColor 속성을 사용하는 방법을 보여준다. ▶ AppShell.xaml
1 2 3 4 5 6 7 8 9 10 11 12 13 14 15 16 17 18 19 20 21 22 23 24 25 |
<?xml version="1.0" encoding="utf-8" ?> <Shell x:Class="TestProject.AppShell" xmlns="http://schemas.microsoft.com/dotnet/2021/maui" xmlns:x="http://schemas.microsoft.com/winfx/2009/xaml" xmlns:local="clr-namespace:TestProject" BackgroundColor="Blue" TitleColor="White" UnselectedColor="Magenta"> <TabBar> <ShellContent Icon="sample1.png" Title="고양이" ContentTemplate="{DataTemplate local:CatPage}" /> <ShellContent Icon="sample2.png" Title="개" ContentTemplate="{DataTemplate local:DogPage}" /> <ShellContent Icon="sample3.png" Title="원숭이" ContentTemplate="{DataTemplate local:MonkeyPage}" /> </TabBar> </Shell> |
TestProject.zip
■ ShellContent 엘리먼트의 Content 속성에서 ContentPage 객체를 앱 시작시 생성하는 방법을 보여준다. ▶ AppShell.xaml
1 2 3 4 5 6 7 8 9 10 11 12 13 14 15 16 17 18 19 20 21 22 23 24 25 |
<?xml version="1.0" encoding="utf-8" ?> <Shell x:Class="TestProject.AppShell" xmlns="http://schemas.microsoft.com/dotnet/2021/maui" xmlns:x="http://schemas.microsoft.com/winfx/2009/xaml" xmlns:local="clr-namespace:TestProject"> <TabBar> <ShellContent Icon="sample1.png" Title="고양이"> <local:CatPage /> </ShellContent> <ShellContent Icon="sample2.png" Title="개"> <local:DogPage /> </ShellContent> <ShellContent Icon="sample3.png" Title="원숭이"> <local:MonkeyPage /> </ShellContent> </TabBar> </Shell> |
※ CatPage, DogPage 및 MonkeyPage는 탐색에 대한
더 읽기
■ ShellContent 엘리먼트의 IsVisible 속성을 사용하는 방법을 보여준다. ▶ AppShell.xaml
1 2 3 4 5 6 7 8 9 10 11 12 13 14 15 16 17 18 19 20 21 22 23 24 25 26 |
<?xml version="1.0" encoding="utf-8" ?> <Shell x:Class="TestProject.AppShell" xmlns="http://schemas.microsoft.com/dotnet/2021/maui" xmlns:x="http://schemas.microsoft.com/winfx/2009/xaml" xmlns:local="clr-namespace:TestProject"> <TabBar> <Tab Icon="sample1.png" Title="Domestic"> <ShellContent Title="고양이" ContentTemplate="{DataTemplate local:CatPage}" /> <ShellContent Title="개" ContentTemplate="{DataTemplate local:DogPage}" IsVisible="False" /> </Tab> <Tab Icon="sample2.png" Title="원숭이"> <ShellContent ContentTemplate="{DataTemplate local:MonkeyPage}" /> </Tab> </TabBar> </Shell> |
TestProject.zip
■ Shell 엘리먼트의 TabBarIsVisible 속성을 사용해 탭바 표시를 숨기는 방법을 보여준다. ▶ AppShell.xaml
1 2 3 4 5 6 7 8 9 10 11 12 13 14 15 16 17 18 19 20 21 22 23 24 25 26 |
<?xml version="1.0" encoding="utf-8" ?> <Shell x:Class="TestProject.AppShell" xmlns="http://schemas.microsoft.com/dotnet/2021/maui" xmlns:x="http://schemas.microsoft.com/winfx/2009/xaml" xmlns:local="clr-namespace:TestProject" TabBarIsVisible="false"> <TabBar> <Tab Icon="sample1.png" Title="Domestic"> <ShellContent Title="고양이" ContentTemplate="{DataTemplate local:CatPage}" /> <ShellContent Title="개" ContentTemplate="{DataTemplate local:DogPage}" /> </Tab> <Tab Icon="sample2.png" Title="원숭이"> <ShellContent ContentTemplate="{DataTemplate local:MonkeyPage}" /> </Tab> </TabBar> </Shell> |
TestProject.zip
■ Shell 엘리먼트의 TabBarUnselectedColor 속성을 사용해 탭바 미선택 색상을 설정하는 방법을 보여준다. ▶ AppShell.xaml
1 2 3 4 5 6 7 8 9 10 11 12 13 14 15 16 17 18 19 20 21 22 23 24 25 26 |
<?xml version="1.0" encoding="utf-8" ?> <Shell x:Class="TestProject.AppShell" xmlns="http://schemas.microsoft.com/dotnet/2021/maui" xmlns:x="http://schemas.microsoft.com/winfx/2009/xaml" xmlns:local="clr-namespace:TestProject" TabBarUnselectedColor="Red"> <TabBar> <Tab Icon="sample1.png" Title="Domestic"> <ShellContent Title="고양이" ContentTemplate="{DataTemplate local:CatPage}" /> <ShellContent Title="개" ContentTemplate="{DataTemplate local:DogPage}" /> </Tab> <Tab Icon="sample2.png" Title="원숭이"> <ShellContent ContentTemplate="{DataTemplate local:MonkeyPage}" /> </Tab> </TabBar> </Shell> |
TestProject.zip
■ Shell 엘리먼트의 TabBarTitleColor 속성을 사용해 탭바 제목 색상을 설정하는 방법을 보여준다. ▶ AppShell.xaml
1 2 3 4 5 6 7 8 9 10 11 12 13 14 15 16 17 18 19 20 21 22 23 24 25 26 |
<?xml version="1.0" encoding="utf-8" ?> <Shell x:Class="TestProject.AppShell" xmlns="http://schemas.microsoft.com/dotnet/2021/maui" xmlns:x="http://schemas.microsoft.com/winfx/2009/xaml" xmlns:local="clr-namespace:TestProject" TabBarTitleColor="Red"> <TabBar> <Tab Icon="sample1.png" Title="Domestic"> <ShellContent Title="고양이" ContentTemplate="{DataTemplate local:CatPage}" /> <ShellContent Title="개" ContentTemplate="{DataTemplate local:DogPage}" /> </Tab> <Tab Icon="sample2.png" Title="원숭이"> <ShellContent ContentTemplate="{DataTemplate local:MonkeyPage}" /> </Tab> </TabBar> </Shell> |
TestProject.zip
■ Shell 엘리먼트의 TabBarDisabledColor 속성을 사용해 탭바 비활성화 색상을 설정하는 방법을 보여준다. ▶ AppShell.xaml
1 2 3 4 5 6 7 8 9 10 11 12 13 14 15 16 17 18 19 20 21 22 23 24 25 26 27 |
<?xml version="1.0" encoding="utf-8" ?> <Shell x:Class="TestProject.AppShell" xmlns="http://schemas.microsoft.com/dotnet/2021/maui" xmlns:x="http://schemas.microsoft.com/winfx/2009/xaml" xmlns:local="clr-namespace:TestProject" TabBarDisabledColor="Red"> <TabBar> <Tab Icon="sample1.png" Title="Domestic"> <ShellContent Title="고양이" ContentTemplate="{DataTemplate local:CatPage}" /> <ShellContent Title="개" ContentTemplate="{DataTemplate local:DogPage}" /> </Tab> <Tab Icon="sample2.png" Title="원숭이" IsEnabled="False"> <ShellContent ContentTemplate="{DataTemplate local:MonkeyPage}" /> </Tab> </TabBar> </Shell> |
TestProject.zip
■ Shell 엘리먼트의 TabBarBackgroundColor 속성을 사용해 탭바 배경색을 설정하는 방법을 보여준다. ▶ AppShell.xaml
1 2 3 4 5 6 7 8 9 10 11 12 13 14 15 16 17 18 19 20 21 22 23 24 25 26 |
<?xml version="1.0" encoding="utf-8" ?> <Shell x:Class="TestProject.AppShell" xmlns="http://schemas.microsoft.com/dotnet/2021/maui" xmlns:x="http://schemas.microsoft.com/winfx/2009/xaml" xmlns:local="clr-namespace:TestProject" TabBarBackgroundColor="Red"> <TabBar> <Tab Icon="sample1.png" Title="Domestic"> <ShellContent Title="고양이" ContentTemplate="{DataTemplate local:CatPage}" /> <ShellContent Title="개" ContentTemplate="{DataTemplate local:DogPage}" /> </Tab> <Tab Icon="sample2.png" Title="원숭이"> <ShellContent ContentTemplate="{DataTemplate local:MonkeyPage}" /> </Tab> </TabBar> </Shell> |
TestProject.zip
■ TabBar 엘리먼트를 사용하는 방법을 보여준다. ▶ AppShell.xaml
1 2 3 4 5 6 7 8 9 10 11 12 13 14 15 16 17 18 19 20 21 22 23 24 25 |
<?xml version="1.0" encoding="utf-8" ?> <Shell x:Class="TestProject.AppShell" xmlns="http://schemas.microsoft.com/dotnet/2021/maui" xmlns:x="http://schemas.microsoft.com/winfx/2009/xaml" xmlns:local="clr-namespace:TestProject"> <TabBar> <Tab Icon="sample1.png" Title="Domestic"> <ShellContent Title="고양이" ContentTemplate="{DataTemplate local:CatPage}" /> <ShellContent Title="개" ContentTemplate="{DataTemplate local:DogPage}" /> </Tab> <Tab Icon="sample2.png" Title="원숭이"> <ShellContent ContentTemplate="{DataTemplate local:MonkeyPage}" /> </Tab> </TabBar> </Shell> |
TestProject.zip
■ TabBar 엘리먼트를 사용하는 방법을 보여준다. ▶ AppShell.xaml
1 2 3 4 5 6 7 8 9 10 11 12 13 14 15 16 17 18 19 20 |
<?xml version="1.0" encoding="utf-8" ?> <Shell x:Class="TestProject.AppShell" xmlns="http://schemas.microsoft.com/dotnet/2021/maui" xmlns:x="http://schemas.microsoft.com/winfx/2009/xaml" xmlns:local="clr-namespace:TestProject"> <TabBar> <Tab Icon="sample1.png" Title="고양이"> <ShellContent ContentTemplate="{DataTemplate local:CatPage}" /> </Tab> <Tab Icon="sample2.png" Title="개"> <ShellContent ContentTemplate="{DataTemplate local:DogPage}" /> </Tab> </TabBar> </Shell> |
TestProject.zip
