■ OverlappedPresenter 클래스의 Create 정적 메소드를 사용해 OverlappedPresenter 객체를 만드는 방법을 보여준다. ▶ 예제 코드 (C#)
|
|
using Microsoft.UI.Windowing; OverlappedPresenter overlappedPresenter = OverlappedPresenter.Create(); overlappedPresenter.IsResizable = true; overlappedPresenter.IsMaximizable = true; overlappedPresenter.IsMinimizable = true; |
■ AppWindow 클래스의 Create 정적 메소드를 사용해 윈도우를 만드는 방법을 보여준다. ※ 비주얼 스튜디오에서 TestProject(Unpackaged) 모드로 빌드한다. ※ TestProject.csproj 프로젝트 파일에서 WindowsPackageType
더 읽기
■ AppWindow 클래스의 Changed 이벤트를 사용해 윈도우 변경시 처리하는 방법을 보여준다. ※ 비주얼 스튜디오에서 TestProject(Unpackaged) 모드로 빌드한다. ※ TestProject.csproj 프로젝트 파일에서 WindowsPackageType
더 읽기
■ XamlRoot 클래스의 Changed 이벤들를 사용해 XAML 요소 트리에서 루트 속성 변경시 처리하는 방법을 보여준다. ※ 비주얼 스튜디오에서 TestProject(Unpackaged) 모드로 빌드한다. ※
더 읽기
■ Setter 엘리먼트의 Target 속성에서 특정 엘리먼트의 첨부 속성을 설정하는 방법을 보여준다. ※ 비주얼 스튜디오에서 TestProject(Unpackaged) 모드로 빌드한다. ※ TestProject.csproj 프로젝트 파일에서
더 읽기
■ AdaptiveTrigger 엘리먼트의 MinWindowWidth 속성을 사용해 컨트롤이 일정 크기 이상일 경우 처리하는 방법을 보여준다. ▶ 예제 코드 (XAML)
1 2 3 4 5 6 7 8 9 10 11 12 13 14 15 16 17 18 19 20 21 22 |
<Grid> <VisualStateManager.VisualStateGroups> <VisualStateGroup> <VisualState> <VisualState.StateTriggers> <AdaptiveTrigger MinWindowWidth="640" /> </VisualState.StateTriggers> <VisualState.Setters> <Setter Target="splitView.DisplayMode" Value="Inline" /> <Setter Target="splitView.IsPaneOpen" Value="True" /> </VisualState.Setters> </VisualState> </VisualStateGroup> </VisualStateManager.VisualStateGroups> <SplitView Name="splitView" DisplayMode="CompactInline" CompactPaneLength="20" IsPaneOpen="False"> </SplitView> </Grid> |
■ VisualState 엘리먼트의 StateTriggers 속성에서 AdaptiveTrigger 엘리먼트를 사용해 컨트롤의 비주얼 상태를 변경하는 방법을 보여준다. ※ 비주얼 스튜디오에서 TestProject(Unpackaged) 모드로 빌드한다. ※ TestProject.csproj
더 읽기
■ VisualState 엘리먼트를 만드는 방법을 보여준다. ▶ 예제 코드 (XAML)
1 2 3 4 5 6 7 8 9 10 11 12 13 14 15 16 17 18 19 20 21 22 23 24 25 26 27 28 29 30 31 32 33 34 |
<Grid> <VisualStateManager.VisualStateGroups> <VisualStateGroup> <VisualState x:Name="DefaultState"> <Storyboard /> </VisualState> <VisualState x:Name="WideState"> <Storyboard> <ObjectAnimationUsingKeyFrames Storyboard.TargetName="splitView" Storyboard.TargetProperty="DisplayMode"> <DiscreteObjectKeyFrame KeyTime="0"> <DiscreteObjectKeyFrame.Value> <SplitViewDisplayMode>Inline</SplitViewDisplayMode> </DiscreteObjectKeyFrame.Value> </DiscreteObjectKeyFrame> </ObjectAnimationUsingKeyFrames> <ObjectAnimationUsingKeyFrames Storyboard.TargetName="splitView" Storyboard.TargetProperty="IsPaneOpen"> <DiscreteObjectKeyFrame KeyTime="0" Value="True" /> </ObjectAnimationUsingKeyFrames> </Storyboard> </VisualState> </VisualStateGroup> </VisualStateManager.VisualStateGroups> <SplitView Name="splitView" DisplayMode="CompactInline" CompactPaneLength="20" IsPaneOpen="False"> </SplitView> </Grid> |
■ VisualStateManager 엘리먼트의 VisualStateGroups 첨부 속성을 사용해 비주얼 상태 그룹을 설정하는 방법을 보여준다. ▶ 예제 코드 (XAML)
1 2 3 4 5 6 7 8 9 10 11 12 13 14 15 16 17 18 19 20 21 22 23 24 25 26 27 28 29 30 31 32 33 34 |
<Grid> <VisualStateManager.VisualStateGroups> <VisualStateGroup> <VisualState x:Name="DefaultState"> <Storyboard /> </VisualState> <VisualState x:Name="WideState"> <Storyboard> <ObjectAnimationUsingKeyFrames Storyboard.TargetName="splitView" Storyboard.TargetProperty="DisplayMode"> <DiscreteObjectKeyFrame KeyTime="0"> <DiscreteObjectKeyFrame.Value> <SplitViewDisplayMode>Inline</SplitViewDisplayMode> </DiscreteObjectKeyFrame.Value> </DiscreteObjectKeyFrame> </ObjectAnimationUsingKeyFrames> <ObjectAnimationUsingKeyFrames Storyboard.TargetName="splitView" Storyboard.TargetProperty="IsPaneOpen"> <DiscreteObjectKeyFrame KeyTime="0" Value="True" /> </ObjectAnimationUsingKeyFrames> </Storyboard> </VisualState> </VisualStateGroup> </VisualStateManager.VisualStateGroups> <SplitView Name="splitView" DisplayMode="CompactInline" CompactPaneLength="20" IsPaneOpen="False"> </SplitView> </Grid> |
■ ObjectAnimationUsingKeyFrames 엘리먼트에서 DiscreteObjectKeyFrame 엘리먼트를 사용해 특정 객체의 속성값을 설정하는 방법을 보여준다. ▶ 예제 코드 (XAML)
1 2 3 4 5 6 7 8 9 10 11 12 13 14 15 16 17 18 19 20 21 22 23 24 25 26 27 28 29 30 31 32 33 34 35 36 37 38 39 40 41 42 |
<?xml version="1.0" encoding="utf-8"?> <Page x:Class="TestProject.MainPage" xmlns="http://schemas.microsoft.com/winfx/2006/xaml/presentation" xmlns:x="http://schemas.microsoft.com/winfx/2006/xaml" Background="{ThemeResource ApplicationPageBackgroundThemeBrush}" FontFamily="나눔고딕코딩" FontSize="16"> <Grid> <VisualStateManager.VisualStateGroups> <VisualStateGroup> <VisualState x:Name="DefaultState"> <Storyboard /> </VisualState> <VisualState x:Name="WideState"> <Storyboard> <ObjectAnimationUsingKeyFrames Storyboard.TargetName="splitView" Storyboard.TargetProperty="DisplayMode"> <DiscreteObjectKeyFrame KeyTime="0"> <DiscreteObjectKeyFrame.Value> <SplitViewDisplayMode>Inline</SplitViewDisplayMode> </DiscreteObjectKeyFrame.Value> </DiscreteObjectKeyFrame> </ObjectAnimationUsingKeyFrames> <ObjectAnimationUsingKeyFrames Storyboard.TargetName="splitView" Storyboard.TargetProperty="IsPaneOpen"> <DiscreteObjectKeyFrame KeyTime="0" Value="True" /> </ObjectAnimationUsingKeyFrames> </Storyboard> </VisualState> </VisualStateGroup> </VisualStateManager.VisualStateGroups> <SplitView Name="splitView" DisplayMode="CompactInline" CompactPaneLength="20" IsPaneOpen="False"> </SplitView> </Grid> </Page> |
■ VisualStateManager 클래스의 GoToState 정적 메소드를 사용해 SplitView 컨트롤의 비주얼 상태를 변경하는 방법을 보여준다. ※ 비주얼 스튜디오에서 TestProject(Unpackaged) 모드로 빌드한다. ※ TestProject.csproj
더 읽기
■ KeyboardAccelerator 클래스의 Invoked 이벤트를 사용해 단축키를 누르는 경우 페이지 뒤로 가거나 앞으로 가는 방법을 보여준다. ※ 비주얼 스튜디오에서 TestProject(Unpackaged) 모드로 빌드한다.
더 읽기
■ Button 엘리먼트의 Click 이벤트를 사용해 BACK 버튼 클릭시 뒤로 가는 방법을 보여준다. ※ 비주얼 스튜디오에서 TestProject(Unpackaged) 모드로 빌드한다. ※ TestProject.csproj 프로젝트
더 읽기
■ CommandBar 엘리먼트의 Content 속성을 사용해 BACK 버튼을 만드는 방법을 보여준다. ※ 비주얼 스튜디오에서 TestProject(Unpackaged) 모드로 빌드한다. ※ TestProject.csproj 프로젝트 파일에서 WindowsPackageType
더 읽기
■ Button 엘리먼트의 Style/IsEnabled 속성을 사용해 페이지에서 BACK 버튼을 만드는 방법을 보여준다. ※ 비주얼 스튜디오에서 TestProject(Unpackaged) 모드로 빌드한다. ※ TestProject.csproj 프로젝트 파일에서
더 읽기
■ SlideNavigationTransitionInfo 클래스의 Effect 속성을 사용해 페이지 전환시 슬라이드 애니메이션을 만드는 방법을 보여준다. ※ 비주얼 스튜디오에서 TestProject(Unpackaged) 모드로 빌드한다. ※ TestProject.csproj 프로젝트
더 읽기
■ Page 엘리먼트의 NavigationCacheMode 속성을 사용해 페이지 캐시를 설정하는 방법을 보여준다. ※ 비주얼 스튜디오에서 TestProject(Unpackaged) 모드로 빌드한다. ※ TestProject.csproj 프로젝트 파일에서 WindowsPackageType
더 읽기
■ Frame 클래스의 Navigate 메소드 사용시 인자를 전달하는 방법을 보여준다. ※ 비주얼 스튜디오에서 TestProject(Unpackaged) 모드로 빌드한다. ※ TestProject.csproj 프로젝트 파일에서 WindowsPackageType 태그를
더 읽기
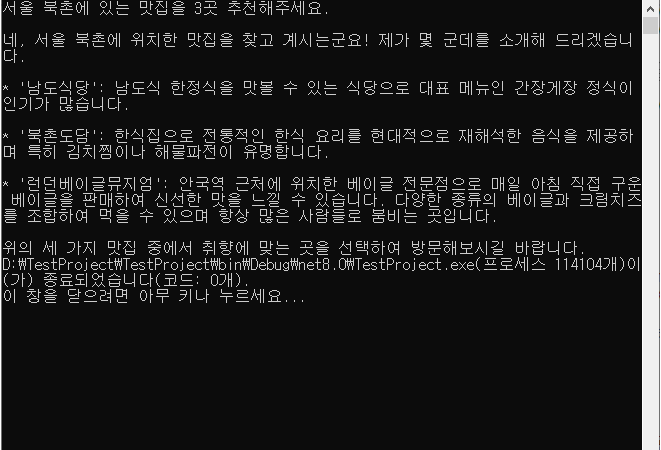
■ HttpClient 클래스를 사용해 네이버 HyperCLOVA X와 통신하는 방법을 보여준다. (이벤트) ▶ AIFilter.cs
1 2 3 4 5 6 7 8 9 10 11 12 13 14 15 16 17 18 19 20 21 22 23 24 25 26 27 28 29 30 31 32 33 34 35 36 37 38 39 40 41 42 43 44 45 46 47 48 49 50 51 |
using Newtonsoft.Json; namespace TestProject; /// <summary> /// AI 필터 /// </summary> public class AIFilter { //////////////////////////////////////////////////////////////////////////////////////////////////// Property ////////////////////////////////////////////////////////////////////////////////////////// Public #region 그룹명 - GroupName /// <summary> /// 그룹명 /// </summary> [JsonProperty("groupName")] public string GroupName { get; set; } #endregion #region 명칭 - Name /// <summary> /// 명칭 /// </summary> [JsonProperty("name")] public string Name { get; set; } #endregion #region 점수 - Score /// <summary> /// 점수 /// </summary> [JsonProperty("score")] public string Score { get; set; } #endregion #region 결과 - Result /// <summary> /// 결과 /// </summary> [JsonProperty("result")] public string Result { get; set; } #endregion } |
▶ Message.cs
1 2 3 4 5 6 7 8 9 10 11 12 13 14 15 16 17 18 19 20 21 22 23 24 25 26 27 28 29 30 31 32 33 |
using Newtonsoft.Json; namespace TestProject; /// <summary> /// 메시지 /// </summary> public class Message { //////////////////////////////////////////////////////////////////////////////////////////////////// Property ////////////////////////////////////////////////////////////////////////////////////////// Public #region 역할 - Role /// <summary> /// 역할 /// </summary> [JsonProperty("role")] public string Role { get; set; } #endregion #region 내용 - Content /// <summary> /// 내용 /// </summary> [JsonProperty("content")] public string Content { get; set; } #endregion } |
▶ RequestMessage.cs
1 2 3 4 5 6 7 8 9 10 11 12 13 14 15 16 17 18 19 20 21 22 23 24 25 26 27 28 29 30 31 32 33 34 35 36 37 38 39 40 41 42 43 44 45 46 47 48 49 50 51 52 53 54 55 56 57 58 59 60 61 62 63 64 65 66 67 68 69 70 71 72 73 74 75 76 77 78 79 80 81 82 83 84 85 86 87 88 89 90 91 92 93 94 95 96 |
using Newtonsoft.Json; namespace TestProject; /// <summary> /// 요청 메시지 /// </summary> public class RequestMessage { //////////////////////////////////////////////////////////////////////////////////////////////////// Property ////////////////////////////////////////////////////////////////////////////////////////// Public #region 메시지 리스트 - MessageList /// <summary> /// 메시지 리스트 /// </summary> [JsonProperty("messages")] public List<Message> MessageList { get; set; } #endregion #region Top P - TopP /// <summary> /// TopP /// </summary> [JsonProperty("topP")] public double TopP { get; set; } #endregion #region Top K - TopK /// <summary> /// TopK /// </summary> [JsonProperty("topK")] public int TopK { get; set; } #endregion #region 최대 토큰 카운트 - MaximumTokenCount /// <summary> /// 최대 토큰 카운트 /// </summary> [JsonProperty("maxTokens")] public int MaximumTokenCount { get; set; } #endregion #region 온도 - Temperature /// <summary> /// 온도 /// </summary> [JsonProperty("temperature")] public double Temperature { get; set; } #endregion #region 반복 패널티 - RepeatPenalty /// <summary> /// 반복 패널티 /// </summary> [JsonProperty("repeatPenalty")] public double RepeatPenalty { get; set; } #endregion #region Stop Before - StopBefore /// <summary> /// Stop Before /// </summary> [JsonProperty("stopBefore")] public List<string> StopBefore { get; set; } #endregion #region AI 필터 포함 여부 - IncludeAIFilters /// <summary> /// AI 필터 포함 여부 /// </summary> [JsonProperty("includeAiFilters")] public bool IncludeAIFilters { get; set; } #endregion #region 시드 - Seed /// <summary> /// 시드 /// </summary> [JsonProperty("seed")] public int Seed { get; set; } #endregion } |
▶ ResponseMessage.cs
더 읽기
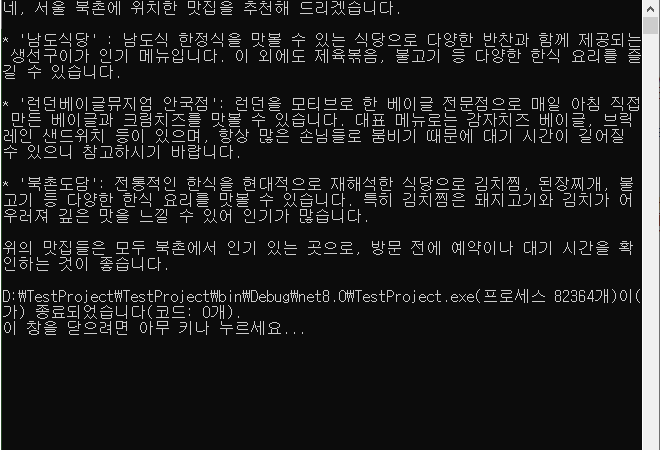
■ HttpClient 클래스를 사용해 네이버 HyperCLOVA X와 통신하는 방법을 보여준다. ▶ AIFilter.cs
1 2 3 4 5 6 7 8 9 10 11 12 13 14 15 16 17 18 19 20 21 22 23 24 25 26 27 28 29 30 31 32 33 34 35 36 37 38 39 40 41 42 43 44 45 46 47 48 49 50 51 |
using Newtonsoft.Json; namespace TestProject; /// <summary> /// AI 필터 /// </summary> public class AIFilter { //////////////////////////////////////////////////////////////////////////////////////////////////// Property ////////////////////////////////////////////////////////////////////////////////////////// Public #region 그룹명 - GroupName /// <summary> /// 그룹명 /// </summary> [JsonProperty("groupName")] public string GroupName { get; set; } #endregion #region 명칭 - Name /// <summary> /// 명칭 /// </summary> [JsonProperty("name")] public string Name { get; set; } #endregion #region 점수 - Score /// <summary> /// 점수 /// </summary> [JsonProperty("score")] public string Score { get; set; } #endregion #region 결과 - Result /// <summary> /// 결과 /// </summary> [JsonProperty("result")] public string Result { get; set; } #endregion } |
▶ Message.cs
1 2 3 4 5 6 7 8 9 10 11 12 13 14 15 16 17 18 19 20 21 22 23 24 25 26 27 28 29 30 31 32 33 |
using Newtonsoft.Json; namespace TestProject; /// <summary> /// 메시지 /// </summary> public class Message { //////////////////////////////////////////////////////////////////////////////////////////////////// Property ////////////////////////////////////////////////////////////////////////////////////////// Public #region 역할 - Role /// <summary> /// 역할 /// </summary> [JsonProperty("role")] public string Role { get; set; } #endregion #region 내용 - Content /// <summary> /// 내용 /// </summary> [JsonProperty("content")] public string Content { get; set; } #endregion } |
▶ RequestMessage.cs
1 2 3 4 5 6 7 8 9 10 11 12 13 14 15 16 17 18 19 20 21 22 23 24 25 26 27 28 29 30 31 32 33 34 35 36 37 38 39 40 41 42 43 44 45 46 47 48 49 50 51 52 53 54 55 56 57 58 59 60 61 62 63 64 65 66 67 68 69 70 71 72 73 74 75 76 77 78 79 80 81 82 83 84 85 86 87 88 89 90 91 92 93 94 95 96 |
using Newtonsoft.Json; namespace TestProject; /// <summary> /// 요청 메시지 /// </summary> public class RequestMessage { //////////////////////////////////////////////////////////////////////////////////////////////////// Property ////////////////////////////////////////////////////////////////////////////////////////// Public #region 메시지 리스트 - MessageList /// <summary> /// 메시지 리스트 /// </summary> [JsonProperty("messages")] public List<Message> MessageList { get; set; } #endregion #region Top P - TopP /// <summary> /// TopP /// </summary> [JsonProperty("topP")] public double TopP { get; set; } #endregion #region Top K - TopK /// <summary> /// TopK /// </summary> [JsonProperty("topK")] public int TopK { get; set; } #endregion #region 최대 토큰 카운트 - MaximumTokenCount /// <summary> /// 최대 토큰 카운트 /// </summary> [JsonProperty("maxTokens")] public int MaximumTokenCount { get; set; } #endregion #region 온도 - Temperature /// <summary> /// 온도 /// </summary> [JsonProperty("temperature")] public double Temperature { get; set; } #endregion #region 반복 패널티 - RepeatPenalty /// <summary> /// 반복 패널티 /// </summary> [JsonProperty("repeatPenalty")] public double RepeatPenalty { get; set; } #endregion #region Stop Before - StopBefore /// <summary> /// Stop Before /// </summary> [JsonProperty("stopBefore")] public List<string> StopBefore { get; set; } #endregion #region AI 필터 포함 여부 - IncludeAIFilters /// <summary> /// AI 필터 포함 여부 /// </summary> [JsonProperty("includeAiFilters")] public bool IncludeAIFilters { get; set; } #endregion #region 시드 - Seed /// <summary> /// 시드 /// </summary> [JsonProperty("seed")] public int Seed { get; set; } #endregion } |
▶ ResponseMessage.cs
1 2 3 4 5 6 7 8 9 10 11 12 13 14 15 16 17 18 19 20 21 22 23 24 25 26 27 28 29 30 31 32 33 |
using Newtonsoft.Json; namespace TestProject; /// <summary> /// 응답 메시지 /// </summary> public class ResponseMessage { //////////////////////////////////////////////////////////////////////////////////////////////////// Property ////////////////////////////////////////////////////////////////////////////////////////// Public #region 상태 - Status /// <summary> /// 상태 /// </summary> [JsonProperty("status")] public ResponseStatus Status { get; set; } #endregion #region 결과 - Result /// <summary> /// 결과 /// </summary> [JsonProperty("result")] public ResponseResult Result { get; set; } #endregion } |
더 읽기
■ NSIS를 이용해 WinUI 3 버전 애플리케이션의 설치 파일을 만드는 방법을 보여준다. ※ NSIS 프로그램이 설치되어 있는 것으로 가정한다. ※ TestSolution.zip 파일
더 읽기
■ WinUI 3 버전 애플리케이션 배포용 기본 NSIS 스크립트를 만드는 방법을 보여준다. ▶ TestProject.nsi
1 2 3 4 5 6 7 8 9 10 11 12 13 14 15 16 17 18 19 20 21 22 23 24 25 26 27 28 29 30 31 32 33 34 35 36 37 38 39 40 41 42 43 44 45 46 47 48 49 50 51 52 53 54 55 |
; 설치 프로그램의 이름 정의 Name "TestProject" ; 생성될 설치 파일의 이름 OutFile "D:\TestProjectSetup.exe" ; 기본 설치 디렉토리 InstallDir "$PROGRAMFILES\TestProject" ; 필요한 관리자 권한 요청 RequestExecutionLevel admin ; 설치 페이지 정의 Page directory Page instfiles ; 언인스톨 페이지 정의 UninstPage uninstConfirm UninstPage instfiles ; 설치 섹션 Section "Install" ; 설치 디렉토리 설정 SetOutPath $INSTDIR ; 파일 복사 (D:\testproject\deploy의 모든 파일과 하위 디렉토리) File /r "D:\TestSolution\TestProject\bin\Release\net8.0-windows10.0.19041.0\win-x64\*.*" ; 시작 메뉴 바로가기 생성 CreateDirectory "$SMPROGRAMS\TestProject" CreateShortcut "$SMPROGRAMS\TestProject\TestProject.lnk" "$INSTDIR\TestProject.exe" ; 언인스톨러 생성 WriteUninstaller "$INSTDIR\Uninstall.exe" ; 레지스트리에 언인스톨 정보 추가 WriteRegStr HKLM "Software\Microsoft\Windows\CurrentVersion\Uninstall\TestProject" \ "DisplayName" "TestProject Application" WriteRegStr HKLM "Software\Microsoft\Windows\CurrentVersion\Uninstall\TestProject" \ "UninstallString" "$\"$INSTDIR\Uninstall.exe$\"" SectionEnd ; 언인스톨 섹션 Section "Uninstall" ; 설치된 파일 삭제 RMDir /r "$INSTDIR" ; 시작 메뉴 바로가기 삭제 RMDir /r "$SMPROGRAMS\TestProject" ; 레지스트리 항목 삭제 DeleteRegKey HKLM "Software\Microsoft\Windows\CurrentVersion\Uninstall\TestProject" SectionEnd |
■ Vector3KeyFrameAnimation 클래스의 InsertKeyFrame 메소드/Duration 속성을 사용해 벡터 애니메이션을 설정하는 방법을 보여준다. ▶ 예제 코드 (C#)
1 2 3 4 5 6 7 8 9 10 11 12 13 14 15 16 17 18 19 20 21 22 23 24 25 26 27 28 29 30 31 32 33 34 35 36 37 38 39 40 41 42 43 44 45 46 |
using System; using System.Numerics; using Microsoft.UI.Composition; using Microsoft.UI.Xaml.Controls; using Microsoft.UI.Xaml.Hosting; using Microsoft.UI.Xaml.Media.Imaging; // ... Image image; // ... BitmapImage bitmapImage = new BitmapImage(new Uri("ms-appx:///Assets/landscape.png")); bitmapImage.DecodePixelWidth = 800; bitmapImage.DecodePixelHeight = 600; image.Source = bitmapImage; Visual imageVisual = ElementCompositionPreview.GetElementVisual(image); Compositor compositor = imageVisual.Compositor; Vector3 centerPointVector3 = new Vector3((float)this.image.Width / 2, (float)this.image.Height / 2, 0f); imageVisual.Scale = new Vector3(1, 1, 1); imageVisual.Opacity = 0f; imageVisual.CenterPoint = centerPointVector3; Vector3KeyFrameAnimation scaleAnimation = compositor.CreateVector3KeyFrameAnimation(); scaleAnimation.InsertKeyFrame(0f, new Vector3(1, 1, 1)); CubicBezierEasingFunction scaleCubicBezierEasingFunction = compositor.CreateCubicBezierEasingFunction ( new Vector2(0.1f, 0.9f), new Vector2(0.2f, 1f ) ); scaleAnimation.InsertKeyFrame(1f, new Vector3(6, 6, 1), scaleCubicBezierEasingFunction); scaleAnimation.Duration = TimeSpan.FromSeconds(2); |
■ Compositor 클래스의 CreateVector3KeyFrameAnimation 메소드를 사용해 Vector3KeyFrameAnimation 객체를 만드는 방법을 보여준다. ▶ 예제 코드 (C#)
1 2 3 4 5 6 7 8 9 10 11 12 13 14 15 16 17 18 19 20 21 22 23 24 25 26 27 |
using System; using Microsoft.UI.Composition; using Microsoft.UI.Xaml.Controls; using Microsoft.UI.Xaml.Hosting; using Microsoft.UI.Xaml.Media.Imaging; // ... Image image; // ... BitmapImage bitmapImage = new BitmapImage(new Uri("ms-appx:///Assets/landscape.png")); bitmapImage.DecodePixelWidth = 800; bitmapImage.DecodePixelHeight = 600; image.Source = bitmapImage; Visual imageVisual = ElementCompositionPreview.GetElementVisual(image); Compositor compositor = imageVisual.Compositor; Vector3KeyFrameAnimation scaleAnimation = compositor.CreateVector3KeyFrameAnimation(); |
■ Visual 클래스의 CenterPoint 속성을 사용해 애니메이션 중심 포인트를 설정하는 방법을 보여준다. ▶ 예제 코드 (C#)
1 2 3 4 5 6 7 8 9 10 11 12 13 14 15 16 17 18 19 20 21 22 23 24 25 26 27 28 29 30 31 32 |
using System; using System.Numerics; using Microsoft.UI.Composition; using Microsoft.UI.Xaml.Controls; using Microsoft.UI.Xaml.Hosting; using Microsoft.UI.Xaml.Media.Imaging; // ... Image image; // ... BitmapImage bitmapImage = new BitmapImage(new Uri("ms-appx:///Assets/landscape.png")); bitmapImage.DecodePixelWidth = 800; bitmapImage.DecodePixelHeight = 600; image.Source = bitmapImage; Visual imageVisual = ElementCompositionPreview.GetElementVisual(image); Compositor compositor = imageVisual.Compositor; Vector3 centerPointVector3 = new Vector3((float)image.Width / 2, (float)image.Height / 2, 0f); imageVisual.Scale = new Vector3(1, 1, 1); imageVisual.Opacity = 0f; imageVisual.CenterPoint = centerPointVector3; |


