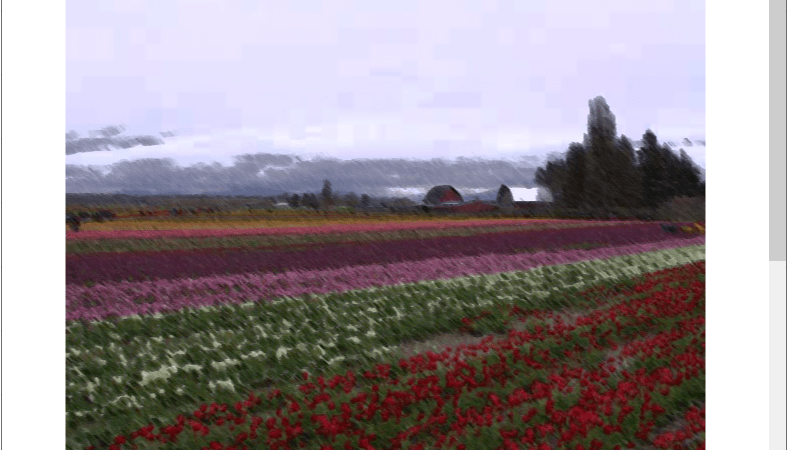
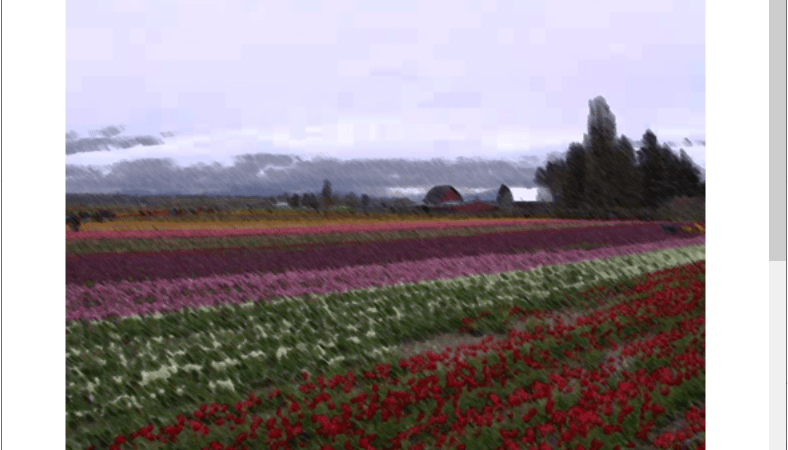
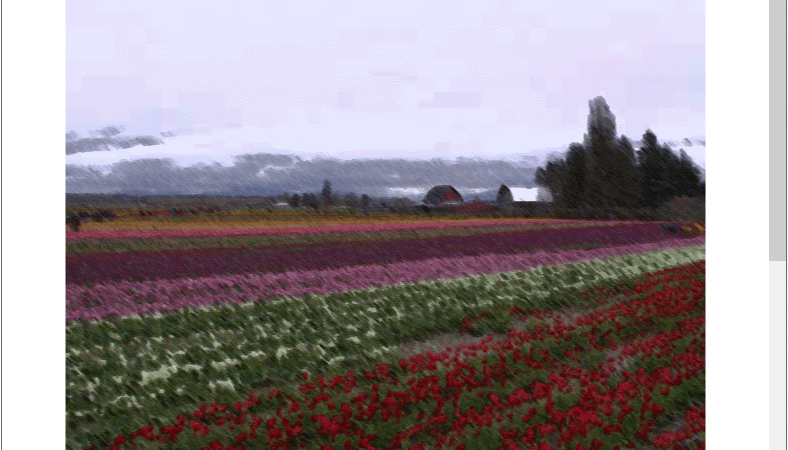
■ WmpBitmapDecoder 클래스를 사용해 WDP 파일을 로드하는 방법을 보여준다. ▶ MainWindow.xaml
|
|
<Window x:Class="TestProject.MainWindow" xmlns="http://schemas.microsoft.com/winfx/2006/xaml/presentation" xmlns:x="http://schemas.microsoft.com/winfx/2006/xaml" Width="800" Height="600" Title="TestProject" FontFamily="나눔고딕코딩" FontSize="16"> <ScrollViewer> <StackPanel Name="stackPanel" /> </ScrollViewer> </Window> |
▶ MainWindow.xaml.cs
1 2 3 4 5 6 7 8 9 10 11 12 13 14 15 16 17 18 19 20 21 22 23 24 25 26 27 28 29 30 31 32 33 34 35 36 37 38 39 40 41 42 43 44 45 46 47 48 49 50 51 52 53 54 55 56 57 58 59 60 61 62 63 64 65 66 67 68 69 70 71 |
using System; using System.IO; using System.Windows; using System.Windows.Controls; using System.Windows.Media; using System.Windows.Media.Imaging; namespace TestProject { /// <summary> /// 메인 윈도우 /// </summary> public partial class MainWindow : Window { //////////////////////////////////////////////////////////////////////////////////////////////////// Constructor ////////////////////////////////////////////////////////////////////////////////////////// Public #region 생성자 - MainWindow() /// <summary> /// 생성자 /// </summary> public MainWindow() { InitializeComponent(); FileStream stream = new FileStream("IMAGE\\tulipfarm.wdp", FileMode.Open, FileAccess.Read, FileShare.Read); WmpBitmapDecoder decoder1 = new WmpBitmapDecoder ( stream, BitmapCreateOptions.PreservePixelFormat, BitmapCacheOption.Default ); BitmapSource bitmapSource1 = decoder1.Frames[0]; Image image1 = new Image { Margin = new Thickness(20), Stretch = Stretch.None, Source = bitmapSource1 }; Uri uri = new Uri("IMAGE\\tulipfarm.wdp", UriKind.RelativeOrAbsolute); WmpBitmapDecoder decoder2 = new WmpBitmapDecoder ( uri, BitmapCreateOptions.PreservePixelFormat, BitmapCacheOption.Default ); BitmapSource bitmapSource2 = decoder2.Frames[0]; Image image2 = new Image { Margin = new Thickness(20), Stretch = Stretch.None, Source = bitmapSource2 }; this.stackPanel.Children.Add(image1); this.stackPanel.Children.Add(image2); } #endregion } } |
TestProject.zip
■ TiffBitmapDecoder 클래스를 사용해 TIFF 파일을 로드하는 방법을 보여준다. ▶ MainWindow.xaml
|
|
<Window x:Class="TestProject.MainWindow" xmlns="http://schemas.microsoft.com/winfx/2006/xaml/presentation" xmlns:x="http://schemas.microsoft.com/winfx/2006/xaml" Width="800" Height="600" Title="TestProject" FontFamily="나눔고딕코딩" FontSize="16"> <ScrollViewer> <StackPanel Name="stackPanel" /> </ScrollViewer> </Window> |
▶ MainWindow.xaml.cs
1 2 3 4 5 6 7 8 9 10 11 12 13 14 15 16 17 18 19 20 21 22 23 24 25 26 27 28 29 30 31 32 33 34 35 36 37 38 39 40 41 42 43 44 45 46 47 48 49 50 51 52 53 54 55 56 57 58 59 60 61 62 63 64 65 66 67 68 69 70 71 |
using System; using System.IO; using System.Windows; using System.Windows.Controls; using System.Windows.Media; using System.Windows.Media.Imaging; namespace TestProject { /// <summary> /// 메인 윈도우 /// </summary> public partial class MainWindow : Window { //////////////////////////////////////////////////////////////////////////////////////////////////// Constructor ////////////////////////////////////////////////////////////////////////////////////////// Public #region 생성자 - MainWindow() /// <summary> /// 생성자 /// </summary> public MainWindow() { InitializeComponent(); FileStream stream = new FileStream("IMAGE\\tulipfarm.tif", FileMode.Open, FileAccess.Read, FileShare.Read); TiffBitmapDecoder decoder1 = new TiffBitmapDecoder ( stream, BitmapCreateOptions.PreservePixelFormat, BitmapCacheOption.Default ); BitmapSource bitmapSource1 = decoder1.Frames[0]; Image image1 = new Image { Margin = new Thickness(20), Stretch = Stretch.None, Source = bitmapSource1 }; Uri uri = new Uri("IMAGE\\tulipfarm.tif", UriKind.RelativeOrAbsolute); TiffBitmapDecoder decoder2 = new TiffBitmapDecoder ( uri, BitmapCreateOptions.PreservePixelFormat, BitmapCacheOption.Default ); BitmapSource bitmapSource2 = decoder2.Frames[0]; Image image2 = new Image { Margin = new Thickness(20), Stretch = Stretch.None, Source = bitmapSource2 }; this.stackPanel.Children.Add(image1); this.stackPanel.Children.Add(image2); } #endregion } } |
TestProject.zip
■ PngBitmapDecoder 클래스를 사용해 PNG 파일을 로드하는 방법을 보여준다. ▶ MainWindow.xaml
|
|
<Window x:Class="TestProject.MainWindow" xmlns="http://schemas.microsoft.com/winfx/2006/xaml/presentation" xmlns:x="http://schemas.microsoft.com/winfx/2006/xaml" Width="800" Height="600" Title="TestProject" FontFamily="나눔고딕코딩" FontSize="16"> <StackPanel Name="stackPanel" HorizontalAlignment="Center" VerticalAlignment="Center" /> </Window> |
▶ MainWindow.xaml.cs
1 2 3 4 5 6 7 8 9 10 11 12 13 14 15 16 17 18 19 20 21 22 23 24 25 26 27 28 29 30 31 32 33 34 35 36 37 38 39 40 41 42 43 44 45 46 47 48 49 50 51 52 53 54 55 56 57 58 59 60 61 62 63 64 65 66 67 68 69 70 71 |
using System; using System.IO; using System.Windows; using System.Windows.Controls; using System.Windows.Media; using System.Windows.Media.Imaging; namespace TestProject { /// <summary> /// 메인 윈도우 /// </summary> public partial class MainWindow : Window { //////////////////////////////////////////////////////////////////////////////////////////////////// Constructor ////////////////////////////////////////////////////////////////////////////////////////// Public #region 생성자 - MainWindow() /// <summary> /// 생성자 /// </summary> public MainWindow() { InitializeComponent(); FileStream imageStreamSource = new FileStream("IMAGE\\smiley.png", FileMode.Open, FileAccess.Read, FileShare.Read); PngBitmapDecoder decoder1 = new PngBitmapDecoder ( imageStreamSource, BitmapCreateOptions.PreservePixelFormat, BitmapCacheOption.Default ); BitmapSource bitmapSource1 = decoder1.Frames[0]; Image image1 = new Image { Margin = new Thickness(20), Stretch = Stretch.None, Source = bitmapSource1 }; Uri uri = new Uri("IMAGE\\smiley.png", UriKind.RelativeOrAbsolute); PngBitmapDecoder decoder2 = new PngBitmapDecoder ( uri, BitmapCreateOptions.PreservePixelFormat, BitmapCacheOption.Default ); BitmapSource bitmapSource2 = decoder2.Frames[0]; Image image2 = new Image { Margin = new Thickness(20), Stretch = Stretch.None, Source = bitmapSource2 }; this.stackPanel.Children.Add(image1); this.stackPanel.Children.Add(image2); } #endregion } } |
TestProject.zip
■ JpegBitmapDecoder 클래스를 사용해 JPG 파일을 로드하는 방법을 보여준다. ▶ MainWindow.xaml
|
|
<Window x:Class="TestProject.MainWindow" xmlns="http://schemas.microsoft.com/winfx/2006/xaml/presentation" xmlns:x="http://schemas.microsoft.com/winfx/2006/xaml" Width="800" Height="600" Title="TestProject" FontFamily="나눔고딕코딩" FontSize="16"> <ScrollViewer> <StackPanel Name="stackPanel" /> </ScrollViewer> </Window> |
▶ MainWindow.xaml.cs
1 2 3 4 5 6 7 8 9 10 11 12 13 14 15 16 17 18 19 20 21 22 23 24 25 26 27 28 29 30 31 32 33 34 35 36 37 38 39 40 41 42 43 44 45 46 47 48 49 50 51 52 53 54 55 56 57 58 59 60 61 62 63 64 65 66 67 68 69 70 71 |
using System; using System.IO; using System.Windows; using System.Windows.Controls; using System.Windows.Media; using System.Windows.Media.Imaging; namespace TestProject { /// <summary> /// 메인 윈도우 /// </summary> public partial class MainWindow : Window { //////////////////////////////////////////////////////////////////////////////////////////////////// Constructor ////////////////////////////////////////////////////////////////////////////////////////// Public #region 생성자 - MainWindow() /// <summary> /// 생성자 /// </summary> public MainWindow() { InitializeComponent(); FileStream stream = new FileStream("IMAGE\\tulipfarm.jpg", FileMode.Open, FileAccess.Read, FileShare.Read); JpegBitmapDecoder decoder1 = new JpegBitmapDecoder ( stream, BitmapCreateOptions.PreservePixelFormat, BitmapCacheOption.Default ); BitmapSource bitmapSource1 = decoder1.Frames[0]; Image image1 = new Image { Margin = new Thickness(20), Stretch = Stretch.None, Source = bitmapSource1 }; Uri uri = new Uri("IMAGE\\tulipfarm.jpg", UriKind.RelativeOrAbsolute); JpegBitmapDecoder decoder2 = new JpegBitmapDecoder ( uri, BitmapCreateOptions.PreservePixelFormat, BitmapCacheOption.Default ); BitmapSource bitmapSource2 = decoder2.Frames[0]; Image image2 = new Image { Margin = new Thickness(20), Stretch = Stretch.None, Source = bitmapSource2 }; this.stackPanel.Children.Add(image1); this.stackPanel.Children.Add(image2); } #endregion } } |
TestProject.zip
■ GifBitmapDecoder 클래스를 사용해 GIF 파일을 로드하는 방법을 보여준다. ▶ MainWindow.xaml
|
|
<Window x:Class="TestProject.MainWindow" xmlns="http://schemas.microsoft.com/winfx/2006/xaml/presentation" xmlns:x="http://schemas.microsoft.com/winfx/2006/xaml" Width="800" Height="600" Title="TestProject" FontFamily="나눔고딕코딩" FontSize="16"> <ScrollViewer> <StackPanel Name="stackPanel" /> </ScrollViewer> </Window> |
▶ MainWindow.xaml.cs
1 2 3 4 5 6 7 8 9 10 11 12 13 14 15 16 17 18 19 20 21 22 23 24 25 26 27 28 29 30 31 32 33 34 35 36 37 38 39 40 41 42 43 44 45 46 47 48 49 50 51 52 53 54 55 56 57 58 59 60 61 62 63 64 65 66 67 68 69 70 71 |
using System; using System.IO; using System.Windows; using System.Windows.Controls; using System.Windows.Media; using System.Windows.Media.Imaging; namespace TestProject { /// <summary> /// 메인 윈도우 /// </summary> public partial class MainWindow : Window { //////////////////////////////////////////////////////////////////////////////////////////////////// Constructor ////////////////////////////////////////////////////////////////////////////////////////// Public #region 생성자 - MainWindow() /// <summary> /// 생성자 /// </summary> public MainWindow() { InitializeComponent(); FileStream stream = new FileStream("IMAGE\\tulipfarm.gif", FileMode.Open, FileAccess.Read, FileShare.Read); GifBitmapDecoder decoder1 = new GifBitmapDecoder ( stream, BitmapCreateOptions.PreservePixelFormat, BitmapCacheOption.Default ); BitmapSource bitmapSource1 = decoder1.Frames[0]; Image image1 = new Image { Margin = new Thickness(20), Stretch = Stretch.None, Source = bitmapSource1 }; Uri uri = new Uri("IMAGE\\tulipfarm.gif", UriKind.RelativeOrAbsolute); GifBitmapDecoder decoder2 = new GifBitmapDecoder ( uri, BitmapCreateOptions.PreservePixelFormat, BitmapCacheOption.Default ); BitmapSource bitmapSource2 = decoder2.Frames[0]; Image image2 = new Image { Margin = new Thickness(20), Stretch = Stretch.None, Source = bitmapSource2 }; this.stackPanel.Children.Add(image1); this.stackPanel.Children.Add(image2); } #endregion } } |
TestProject.zip
■ Uri 클래스의 Host 속성을 사용해 도메인 호스트를 구하는 방법을 보여준다. ▶ 예제 코드 (C#)
|
|
Uri uri = new Uri("https://icodebroker.tistory.com:80/"); Console.WriteLine(uri.Host); /* icodebroker.tistory.com */ |
■ Uri 클래스의 TryCreate 정적 메소드를 사용해 URL에서 파일명을 구하는 방법을 보여준다. ▶ Uri 클래스 : TryCreate 정적 메소드를 사용해 URL에서 파일명
더 읽기
■ Uri 클래스의 TryCreate 정적 메소드를 사용해 URL에서 파일명을 구하는 방법을 보여준다. ▶ Uri 클래스 : TryCreate 정적 메소드를 사용해 URL에서 파일명
더 읽기
■ Uri 클래스의 IsFile 속성을 사용해 URI에서 파일명을 구하는 방법을 보여준다. ▶ 예제 코드 (C#)
1 2 3 4 5 6 7 8 9 10 11 12 13 14 15 16 17 18 19 20 21 22 |
#region 파일명 구하기 - GetFileName(uri) /// <summary> /// 파일명 구하기 /// </summary> /// <param name="uri">URI</param> /// <returns>파일명</returns> public string GetFileName(Uri uri) { if(uri.IsFile) { string fileName = Path.GetFileName(uri.LocalPath); return fileName; } return null; } #endregion |
■ UriValidationBehavior 클래스에서 사용자 입력 URI를 검증하는 방법을 보여준다. ▶ MainPage.xaml
|
|
<?xml version="1.0" encoding="utf-8" ?> <ContentPage x:Class="TestProject.MainPage" xmlns="http://schemas.microsoft.com/dotnet/2021/maui" xmlns:x="http://schemas.microsoft.com/winfx/2009/xaml"> <Entry x:Name="entry" HorizontalOptions="Center" VerticalOptions="Center" BackgroundColor="Yellow" Placeholder="URI를 입력해 주시기 바랍니다." /> </ContentPage> |
▶ MainPage.xaml.cs
1 2 3 4 5 6 7 8 9 10 11 12 13 14 15 16 17 18 19 20 21 22 23 24 25 26 27 28 29 30 31 32 33 34 35 36 37 38 39 40 41 42 43 44 |
using CommunityToolkit.Maui.Behaviors; namespace TestProject; /// <summary> /// 메인 페이지 /// </summary> public partial class MainPage : ContentPage { //////////////////////////////////////////////////////////////////////////////////////////////////// Constructor ////////////////////////////////////////////////////////////////////////////////////////// Public #region 생성자 - MainPage() /// <summary> /// 생성자 /// </summary> public MainPage() { InitializeComponent(); Style validStyle = new Style(typeof(Entry)); validStyle.Setters.Add(new Setter { Property = Entry.TextColorProperty, Value = Colors.Green }); Style invalidStyle = new Style(typeof(Entry)); invalidStyle.Setters.Add(new Setter { Property = Entry.TextColorProperty, Value = Colors.Red }); UriValidationBehavior behavior = new UriValidationBehavior { ValidStyle = validStyle, InvalidStyle = invalidStyle, Flags = ValidationFlags.ValidateOnValueChanged, UriKind = UriKind.Absolute }; this.entry.Behaviors.Add(behavior); } #endregion } |
▶ MauiProgram.cs
1 2 3 4 5 6 7 8 9 10 11 12 13 14 15 16 17 18 19 20 21 22 23 24 25 26 27 28 29 30 31 32 33 34 35 36 37 38 39 40 41 42 |
using CommunityToolkit.Maui; namespace TestProject; /// <summary> /// MAUI 프로그램 /// </summary> public static class MauiProgram { //////////////////////////////////////////////////////////////////////////////////////////////////// Method ////////////////////////////////////////////////////////////////////////////////////////// Static //////////////////////////////////////////////////////////////////////////////// Public #region MAUI 앱 생성하기 - CreateMauiApp() /// <summary> /// MAUI 앱 생성하기 /// </summary> /// <returns>MAUI 앱</returns> public static MauiApp CreateMauiApp() { MauiAppBuilder builder = MauiApp.CreateBuilder(); builder .UseMauiApp<App>() .UseMauiCommunityToolkit() .ConfigureFonts ( fontCollection => { fontCollection.AddFont("OpenSans-Regular.ttf" , "OpenSansRegular" ); fontCollection.AddFont("OpenSans-Semibold.ttf", "OpenSansSemibold"); } ); return builder.Build(); } #endregion } |
TestProject.zip
■ UriValidationBehavior 엘리먼트에서 사용자 입력 URI를 검증하는 방법을 보여준다. ▶ MainPage.xaml
1 2 3 4 5 6 7 8 9 10 11 12 13 14 15 16 17 18 19 20 21 22 23 24 25 26 27 28 29 |
<?xml version="1.0" encoding="utf-8" ?> <ContentPage x:Class="TestProject.MainPage" xmlns="http://schemas.microsoft.com/dotnet/2021/maui" xmlns:x="http://schemas.microsoft.com/winfx/2009/xaml" xmlns:toolkit="http://schemas.microsoft.com/dotnet/2022/maui/toolkit"> <ContentPage.Resources> <Style x:Key="ValidEntryStyleKey" TargetType="Entry"> <Setter Property="TextColor" Value="Green" /> </Style> <Style x:Key="InvalidEntryStyleKey" TargetType="Entry"> <Setter Property="TextColor" Value="Red" /> </Style> </ContentPage.Resources> <Entry HorizontalOptions="Center" VerticalOptions="Center" BackgroundColor="Yellow" Placeholder="URI를 입력해 주시기 바랍니다."> <Entry.Behaviors> <toolkit:UriValidationBehavior ValidStyle="{StaticResource ValidEntryStyleKey}" InvalidStyle="{StaticResource InvalidEntryStyleKey}" Flags="ValidateOnValueChanged" UriKind="Absolute" /> </Entry.Behaviors> </Entry> </ContentPage> |
▶ MauiProgram.cs
1 2 3 4 5 6 7 8 9 10 11 12 13 14 15 16 17 18 19 20 21 22 23 24 25 26 27 28 29 30 31 32 33 34 35 36 37 38 39 40 41 42 |
using CommunityToolkit.Maui; namespace TestProject; /// <summary> /// MAUI 프로그램 /// </summary> public static class MauiProgram { //////////////////////////////////////////////////////////////////////////////////////////////////// Method ////////////////////////////////////////////////////////////////////////////////////////// Static //////////////////////////////////////////////////////////////////////////////// Public #region MAUI 앱 생성하기 - CreateMauiApp() /// <summary> /// MAUI 앱 생성하기 /// </summary> /// <returns>MAUI 앱</returns> public static MauiApp CreateMauiApp() { MauiAppBuilder builder = MauiApp.CreateBuilder(); builder .UseMauiApp<App>() .UseMauiCommunityToolkit() .ConfigureFonts ( fontCollection => { fontCollection.AddFont("OpenSans-Regular.ttf" , "OpenSansRegular" ); fontCollection.AddFont("OpenSans-Semibold.ttf", "OpenSansSemibold"); } ); return builder.Build(); } #endregion } |
TestProject.zip
■ UrlCreateFromPath API 함수를 사용해 디렉토리/파일 경로에서 URI를 구하는 방법을 보여준다. ▶ UrlCreateFromPath API 함수를 사용해 디렉토리/파일 경로에서 URI 구하기 예제 (C#)
더 읽기
■ Uri 클래스의 EscapeUriString/UnescapeDataString 정적 메소드를 사용해 이스케이프를 처리하는 방법을 보여준다. ▶ 예제 코드 (C#)
|
|
using System; using System.IO; string directoryPath = @"C:\테스트".Replace(Path.DirectorySeparatorChar, '/'); string escapedUriString = Uri.EscapeUriString(directoryPath); string unescapedUriString = Uri.UnescapeDataString(escapedUriString); Uri uri = new Uri(escapedUriString); Console.WriteLine($"이스케이프 문자열 : {escapedUriString }"); Console.WriteLine($"이스케이프 취소 문자열 : {unescapedUriString}"); Console.WriteLine($"절대 URI : {uri.AbsoluteUri }"); |
■ UriBuilder 클래스를 사용하는 방법을 보여준다. ▶ 예제 코드 (C#)
|
|
string directoryPath = @"C:\foo"; UriBuilder builder = new UriBuilder() { Scheme = Uri.UriSchemeFile, Host = string.Empty, Path = directoryPath }; Console.WriteLine(builder.Uri.AbsolutePath); Console.WriteLine(builder.Uri.AbsoluteUri ); |
■ Uri 클래스를 사용해 URI 문자열에서 퍼센트 인코딩(percent-encoding)을 사용하는 방법을 보여준다. ▶ 예제 코드 (C#)
|
|
using System; Uri uri = new Uri(@"C:\%51.txt"); Console.WriteLine($"절대 경로 : {uri.AbsolutePath}"); Console.WriteLine($"절대 URI : {uri.AbsoluteUri }"); |
■ Uri 클래스를 사용해 부모 URI를 구하는 방법을 보여준다. ▶ 예제 코드 (C#)
1 2 3 4 5 6 7 8 9 10 11 12 13 14 15 16 17 18 |
using System; using System.Text; string url = "c:\\fruit\\..\\meat\\"; Uri uri = new Uri(url); StringBuilder stringBuilder = new StringBuilder($"{uri.Scheme}://{uri.Authority}"); for(int i = 0; i < uri.Segments.Length - 1; i++) { stringBuilder.Append(uri.Segments[i]); } Console.WriteLine($"URL : {url}"); Console.WriteLine($"URI : {uri.AbsoluteUri}"); Console.WriteLine($"부모 URI : {stringBuilder.ToString().TrimEnd('/')}"); |
■ Uri 클래스의 AbsolutePath/AbsoluteUri 속성을 사용하는 방법을 보여준다. ▶ 예제 코드 (C#)
|
|
using System; Uri uri = new Uri("c:\\foo"); Console.WriteLine(uri.AbsoluteUri ); // file:///c:/foo Console.WriteLine(uri.AbsolutePath); // c:/foo |
■ StorageFile 클래스의 GetFileFromApplicationUriAsync 정적 메소드를 사용해 애플리케이션에서 파일을 구하는 방법을 보여준다. ▶ 예제 코드 (C#)
|
|
using System; using Windows.Storage; StorageFile storageFile = await StorageFile.GetFileFromApplicationUriAsync(new Uri("ms-appx:///DATA/Contacts.txt")); |
※ Contacts.txt 파일은 DATA 폴더
더 읽기
■ HyperlinkButton 엘리먼트의 NavigateUri 속성을 사용하는 방법을 보여준다. ▶ MainPage.xaml
|
|
<Page x:Class="TestProject.MainPage" xmlns="http://schemas.microsoft.com/winfx/2006/xaml/presentation" xmlns:x="http://schemas.microsoft.com/winfx/2006/xaml" Background="{ThemeResource ApplicationPageBackgroundThemeBrush}" FontFamily="나눔고딕코딩" FontSize="16"> <Grid> <HyperlinkButton HorizontalAlignment="Center" VerticalAlignment="Center" NavigateUri="https://icodebroker.tistory.com" Content="icodebroker 블로그" /> </Grid> </Page> |
▶ MainPage.xaml.cs
1 2 3 4 5 6 7 8 9 10 11 12 13 14 15 16 17 18 19 20 21 22 23 24 25 26 27 28 29 30 31 32 33 34 35 36 37 38 39 40 41 42 43 44 45 46 47 48 49 50 51 52 53 54 55 |
using Windows.Foundation; using Windows.Graphics.Display; using Windows.UI.ViewManagement; using Windows.UI.Xaml; using Windows.UI.Xaml.Controls; namespace TestProject { /// <summary> /// 메인 페이지 /// </summary> public sealed partial class MainPage : Page { //////////////////////////////////////////////////////////////////////////////////////////////////// Constructor ////////////////////////////////////////////////////////////////////////////////////////// Public #region 생성자 - MainPage() /// <summary> /// 생성자 /// </summary> public MainPage() { InitializeComponent(); #region 윈도우 크기를 설정한다. double width = 800d; double height = 600d; double dpi = (double)DisplayInformation.GetForCurrentView().LogicalDpi; ApplicationView.PreferredLaunchWindowingMode = ApplicationViewWindowingMode.PreferredLaunchViewSize; Size windowSize = new Size(width * 96d / dpi, height * 96d / dpi); ApplicationView.PreferredLaunchViewSize = windowSize; Window.Current.Activate(); ApplicationView.GetForCurrentView().TryResizeView(windowSize); #endregion #region 윈도우 제목을 설정한다. ApplicationView.GetForCurrentView().Title = "HyperlinkButton 엘리먼트 : NavigateUri 속성 사용하기"; #endregion } #endregion } } |
TestProject.zip
■ BmpBitmapDecoder 클래스를 사용해 BMP 이미지 파일을 로드하는 방법을 보여준다. ▶ MainWindow.xaml
|
|
<Window x:Class="TestProject.MainWindow" xmlns="http://schemas.microsoft.com/winfx/2006/xaml/presentation" xmlns:x="http://schemas.microsoft.com/winfx/2006/xaml" Width="800" Height="600" Title="BmpBitmapDecoder 클래스 : BMP 이미지 파일 로드하기" FontFamily="나눔고딕코딩" FontSize="16"> <Grid> <Image Name="image" Margin="10" Stretch="UniformToFill" /> </Grid> </Window> |
▶ MainWindow.xaml.cs
1 2 3 4 5 6 7 8 9 10 11 12 13 14 15 16 17 18 19 20 21 22 23 24 25 26 27 28 29 30 31 32 33 34 35 36 37 38 39 40 41 42 43 44 45 46 47 48 49 50 51 52 53 54 55 56 57 58 59 |
using System; using System.Windows; using System.Windows.Media.Imaging; namespace TestProject { /// <summary> /// 메인 윈도우 /// </summary> public partial class MainWindow : Window { //////////////////////////////////////////////////////////////////////////////////////////////////// Constructor ////////////////////////////////////////////////////////////////////////////////////////// Public #region 생성자 - MainWindow() /// <summary> /// 생성자 /// </summary> public MainWindow() { InitializeComponent(); Loaded += Window_Loaded; } #endregion //////////////////////////////////////////////////////////////////////////////////////////////////// Method ////////////////////////////////////////////////////////////////////////////////////////// Private #region 윈도우 로드시 처리하기 - Window_Loaded(sender, e) /// <summary> /// 윈도우 로드시 처리하기 /// </summary> /// <param name="sender">이벤트 발생자</param> /// <param name="e">이벤트 인자</param> private void Window_Loaded(object sender, RoutedEventArgs e) { Uri uri = new Uri("IMAGE/sample.bmp", UriKind.RelativeOrAbsolute); BmpBitmapDecoder decoder = new BmpBitmapDecoder ( uri, BitmapCreateOptions.PreservePixelFormat, BitmapCacheOption.Default ); BitmapSource bitmapSource = decoder.Frames[0]; this.image.Source = bitmapSource; } #endregion } } |
TestProject.zip
■ Uri 클래스에서 파일 경로를 사용해 이미지를 로드하는 방법을 보여준다. ▶ MainWindow.xaml
|
|
<Window x:Class="TestProject.MainWindow" xmlns="http://schemas.microsoft.com/winfx/2006/xaml/presentation" xmlns:x="http://schemas.microsoft.com/winfx/2006/xaml" Width="800" Height="600" Title="Uri 클래스 : 파일 경로를 사용해 이미지 로드하기" FontFamily="나눔고딕코딩" FontSize="16"> </Window> |
▶ MainWindow.xaml.cs
1 2 3 4 5 6 7 8 9 10 11 12 13 14 15 16 17 18 19 20 21 22 23 24 25 26 27 28 29 30 31 32 33 34 35 36 37 38 39 40 41 42 43 44 45 46 47 48 49 50 |
using System; using System.IO; using System.Reflection; using System.Windows; using System.Windows.Controls; using System.Windows.Media.Imaging; namespace TestProject { /// <summary> /// 메인 윈도우 /// </summary> public partial class MainWindow : Window { //////////////////////////////////////////////////////////////////////////////////////////////////// Constructor ////////////////////////////////////////////////////////////////////////////////////////// Public #region 생성자 - MainWindow() /// <summary> /// 생성자 /// </summary> public MainWindow() { InitializeComponent(); string filePath = Path.Combine(Path.GetDirectoryName(Assembly.GetExecutingAssembly().Location), "IMAGE\\sample.jpg"); Uri uri = new Uri(filePath); BitmapImage bitmapImage = new BitmapImage(); bitmapImage.BeginInit(); bitmapImage.UriSource = uri; bitmapImage.EndInit(); Image image = new Image(); image.Source = bitmapImage; Content = image; } #endregion } } |
TestProject.zip
■ Uri 클래스의 MakeRelativeUri 메소드를 사용해 상대 디렉토리 경로를 구하는 방법을 보여준다. ▶ Uri 클래스 : MakeRelativeUri 메소드를 사용해 상대 디렉토리 경로
더 읽기
■ Uri 클래스에서 리소스를 사용하는 방법을 보여준다. ▶ MainWindow.xaml
1 2 3 4 5 6 7 8 9 10 11 12 13 14 15 16 17 18 19 20 21 22 23 24 25 26 27 28 29 30 |
<Window x:Class="TestProject.MainWindow" xmlns="http://schemas.microsoft.com/winfx/2006/xaml/presentation" xmlns:x="http://schemas.microsoft.com/winfx/2006/xaml" Width="800" Height="600" Title="Uri 클래스 : 리소스 사용하기" FontFamily="나눔고딕코딩" FontSize="16"> <Grid Margin="10"> <Grid.RowDefinitions> <RowDefinition Height="50*" /> <RowDefinition Height="0" /> <RowDefinition Height="50*" /> </Grid.RowDefinitions> <Image x:Name="topImage" Grid.Row="0" Stretch="Uniform" /> <Image x:Name="bottomImage" Grid.Row="2" Stretch="Uniform"> <Image.Source> <BitmapImage> <BitmapImage.UriSource> pack://application:,,/sample/penguins.jpg </BitmapImage.UriSource> </BitmapImage> </Image.Source> </Image> </Grid> </Window> |
▶ MainWindow.xaml.cs
1 2 3 4 5 6 7 8 9 10 11 12 13 14 15 16 17 18 19 20 21 22 23 24 25 26 27 28 29 30 31 32 33 34 35 36 37 38 39 40 41 42 43 44 45 46 47 48 49 50 51 52 53 54 55 56 57 58 59 60 61 62 63 64 65 66 67 68 69 70 71 72 73 74 75 76 77 |
using System; using System.Windows; using System.Windows.Media.Imaging; namespace TestProject { /// <summary> /// 메인 윈도우 /// </summary> public partial class MainWindow : Window { //////////////////////////////////////////////////////////////////////////////////////////////////// Constructor ////////////////////////////////////////////////////////////////////////////////////////// Public #region 생성자 - MainWindow() /// <summary> /// 생성자 /// </summary> public MainWindow() { InitializeComponent(); Loaded += Window_Loaded; } #endregion //////////////////////////////////////////////////////////////////////////////////////////////////// Method ////////////////////////////////////////////////////////////////////////////////////////// Private //////////////////////////////////////////////////////////////////////////////// Event #region 윈도우 로드시 처리하기 - Window_Loaded(sender, e) /// <summary> /// 윈도우 로드시 처리하기 /// </summary> /// <param name="sender">이벤트 발생자</param> /// <param name="e">이벤트 인자</param> private void Window_Loaded(object sender, RoutedEventArgs e) { Uri uri = GetResourceUri(null, "sample/koala.jpg"); BitmapImage bitmapImage = new BitmapImage(uri); this.topImage.Source = bitmapImage; } #endregion //////////////////////////////////////////////////////////////////////////////// Function #region 리소스 URI 구하기 - GetResourceUri(assemblyName, resourcePath) /// <summary> /// 리소스 URI 구하기 /// </summary> /// <param name="assemblyName">어셈블리명</param> /// <param name="resourcePath">리소스 경로</param> /// <returns>리소스 URI</returns> private Uri GetResourceUri(string assemblyName, string resourcePath) { if(string.IsNullOrEmpty(assemblyName)) { return new Uri(string.Format("pack://application:,,,/{0}", resourcePath)); } else { return new Uri(string.Format("pack://application:,,,/{0};component/{1}", assemblyName, resourcePath)); } } #endregion } } |
TestProject.zip
■ BitmapImage 클래스의 UriSource 속성을 사용해 리소스 이미지를 표시하는 방법을 보여준다. ▶ MainPage.xaml
|
|
<Page x:Class="TestProject.MainPage" xmlns="http://schemas.microsoft.com/winfx/2006/xaml/presentation" xmlns:x="http://schemas.microsoft.com/winfx/2006/xaml" FontFamily="나눔고딕코딩" FontSize="16"> <Grid Name="rootGrid" Background="{StaticResource ApplicationPageBackgroundThemeBrush}"> </Grid> </Page> |
▶ MainPage.xaml.cs
1 2 3 4 5 6 7 8 9 10 11 12 13 14 15 16 17 18 19 20 21 22 23 24 25 26 27 28 29 30 31 32 33 34 35 36 37 38 39 40 41 |
using System; using Windows.UI.Xaml.Controls; using Windows.UI.Xaml.Media.Imaging; namespace TestProject { /// <summary> /// 메인 페이지 /// </summary> public sealed partial class MainPage : Page { //////////////////////////////////////////////////////////////////////////////////////////////////// Constructor ////////////////////////////////////////////////////////////////////////////////////////// Public #region 생성자 - MainPage() /// <summary> /// 생성자 /// </summary> public MainPage() { InitializeComponent(); Uri uri = new Uri("ms-appx:///Image/sample.jpg"); BitmapImage bitmapImage = new BitmapImage(); bitmapImage.UriSource = uri; Image image = new Image(); image.Source = bitmapImage; this.rootGrid.Children.Add(image); } #endregion } } |
※ Image 폴더의 sample.jpg 파일의
더 읽기
■ BitmapImage 엘리먼트의 UriSource 속성을 사용하는 방법을 보여준다. ▶ 예제 코드 (XAML)
|
|
<Image Stretch="None"> <Image.Source> <BitmapImage UriSource="Images/employee.png" /> </Image.Source> </Image> |
※ 동일 어셈블리 내 Images 폴더의 employee.png 파일을 리소스
더 읽기


