[C#/WPF] VisualTreeHelper 클래스 : GetOffset 정적 메소드를 사용해 비주얼 객체의 오프셋 구하기
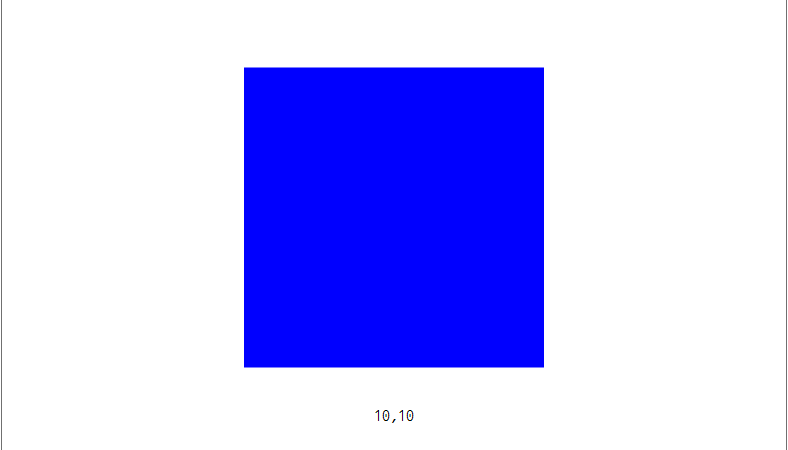
■ VisualTreeHelper 클래스의 GetOffset 정적 메소드를 사용해 비주얼 객체의 오프셋을 구하는 방법을 보여준다. 오프셋은 마진 값을 고려하며 비주얼 객체의 부모를 기준으로 한다.

■ VisualTreeHelper 클래스의 GetOffset 정적 메소드를 사용해 비주얼 객체의 오프셋을 구하는 방법을 보여준다. 오프셋은 마진 값을 고려하며 비주얼 객체의 부모를 기준으로 한다.

■ VisualBrush 엘리먼트를 사용해 돋보기를 만드는 방법을 보여준다. ▶ MainWindow.xaml
|
1 2 3 4 5 6 7 8 9 10 11 12 13 14 15 16 17 18 19 20 21 22 23 24 25 26 27 28 29 30 31 32 33 34 35 36 37 38 39 40 41 42 43 44 45 46 47 48 49 50 51 52 53 54 55 56 57 58 59 60 61 62 63 64 65 66 67 68 69 70 71 72 73 74 75 76 77 78 79 80 81 82 83 84 85 86 |
<Window x:Class="TestProject.MainWindow" xmlns="http://schemas.microsoft.com/winfx/2006/xaml/presentation" xmlns:x="http://schemas.microsoft.com/winfx/2006/xaml" Width="800" Height="600" Title="TestProject" FontFamily="나눔고딕코딩" FontSize="16"> <Window.Resources> <DrawingBrush x:Key="GridBackgroundDrawingBrushKey" ViewportUnits="Absolute" Viewport="0 0 10 10" TileMode="Tile"> <DrawingBrush.Drawing> <DrawingGroup> <DrawingGroup.Children> <GeometryDrawing Brush="White"> <GeometryDrawing.Geometry> <RectangleGeometry Rect="0 0 1 1" /> </GeometryDrawing.Geometry> </GeometryDrawing> <GeometryDrawing Brush="#e6e8f6" Geometry="M 0 0 L 0 1 0.1 1 0.1 0.1 1 0.1 1 0 Z" /> </DrawingGroup.Children> </DrawingGroup> </DrawingBrush.Drawing> </DrawingBrush> <Style TargetType="{x:Type Paragraph}"> <Setter Property="Margin" Value="10" /> </Style> </Window.Resources> <Grid> <ScrollViewer> <StackPanel Name="contentStackPanel" VerticalAlignment="Stretch" Background="{StaticResource GridBackgroundDrawingBrushKey}"> <FlowDocumentScrollViewer> <FlowDocument> <Paragraph>Lorem ipsum dolor sit amet, consectetuer adipiscing elit. Cras sit amet arcu ullamcorper sem volutpat facilisis. Donec posuere. Cras lectus dolor, euismod sit amet, aliquet ut, scelerisque in, tortor. Donec vulputate. Nunc mauris sem, blandit ut, imperdiet eu, eleifend a, tortor. Donec sed purus ut pede luctus commodo. Duis et quam vitae quam rhoncus sollicitudin. Nam rhoncus ullamcorper sapien. Aenean blandit, erat a ultricies imperdiet, mauris risus fermentum wisi, ac aliquet orci libero non felis. Fusce felis. Maecenas cursus. </Paragraph> <Paragraph><Button>Lorem ipsum dolor sit amet, consectetuer adipiscing elit.</Button></Paragraph> <Paragraph>Nunc semper cursus est. Aenean ultrices venenatis odio. Nam condimentum leo ut libero. Cras nibh tellus, euismod non, blandit et, porta vel, justo. Praesent consequat porta est. Fusce nonummy congue augue. Sed tristique quam elementum augue. Donec lobortis molestie sapien. Vivamus dictum. Duis congue consectetuer leo. In pharetra pharetra tellus. Proin suscipit feugiat lacus. Nunc lobortis sollicitudin tortor. Nulla sem magna, egestas vel, accumsan posuere, rhoncus non, wisi. Suspendisse viverra enim non dui. Sed a lectus. Nam rhoncus bibendum ipsum. Aliquam lectus.</Paragraph> <Paragraph>Praesent suscipit ornare velit. Vestibulum tortor. Fusce eleifend, nisl ultricies iaculis vehicula, justo dolor tincidunt quam, in bibendum wisi libero nonummy massa. Nullam elit eros, blandit ac, porta et, iaculis eget, nisl. In varius. Nam a sapien. Praesent vel elit. Pellentesque quam. Mauris et nisl molestie arcu lobortis viverra. Vestibulum lorem justo, viverra a, condimentum at, adipiscing non, justo. Donec iaculis tellus nec dui aliquam suscipit. Pellentesque ante. Integer pretium, metus non convallis dapibus, arcu diam iaculis neque, et luctus justo odio vel nunc. Quisque fringilla. Integer ac tortor vitae felis aliquam bibendum. Suspendisse iaculis, magna et pellentesque fringilla, sapien est sagittis magna, id dignissim erat purus vitae pede. Maecenas fringilla libero sed odio. Aliquam erat volutpat.</Paragraph> <Paragraph><Border BorderBrush="Black" BorderThickness="1"><Image Source="IMAGE\bananas.jpg" Stretch="None" /></Border></Paragraph> <Paragraph>Praesent vitae leo. Donec et elit vitae orci suscipit ornare. Proin tincidunt enim eget nisl. Nam arcu. Donec vitae odio sit amet enim semper accumsan. Nullam molestie interdum diam. Sed elit metus, interdum ac, condimentum at, pellentesque nec, metus. Aenean nec augue. Vestibulum lorem eros, tempus et, rutrum et, gravida sed, nunc. Suspendisse lacus velit, rhoncus non, euismod sit amet, viverra at, quam. Curabitur ut turpis a lacus laoreet condimentum. Nunc egestas nunc sit amet risus. Aliquam erat volutpat. In id velit. Sed augue. Vestibulum pretium gravida lacus. Ut neque erat, convallis non, feugiat eu, venenatis sit amet, tellus. Nullam ac felis a ipsum volutpat vestibulum.</Paragraph> <Paragraph>Duis condimentum sem id dui. Nam ullamcorper orci ut lorem. Aenean et diam in erat adipiscing auctor. Integer congue orci ac diam. Morbi tempor elit nec elit. Maecenas porttitor. Aenean accumsan. Aliquam erat volutpat. Quisque metus. Maecenas neque. Aliquam erat volutpat. Cras massa. Duis in lorem sed justo pulvinar egestas.</Paragraph> </FlowDocument> </FlowDocumentScrollViewer> </StackPanel> </ScrollViewer> <Canvas Name="magnifyingGlassCanvas"> <Ellipse Name="magnifyingGlassEllipse" Width="100" Height="100" Stroke="Black"> <Ellipse.Fill> <DrawingBrush> <DrawingBrush.Drawing> <DrawingGroup> <DrawingGroup.Children> <GeometryDrawing Brush="White"> <GeometryDrawing.Geometry> <RectangleGeometry Rect="0 0 1 1" /> </GeometryDrawing.Geometry> </GeometryDrawing> <GeometryDrawing> <GeometryDrawing.Brush> <VisualBrush x:Name="visualBrush" ViewboxUnits="Absolute" Visual="{Binding ElementName=contentStackPanel}" /> </GeometryDrawing.Brush> <GeometryDrawing.Geometry> <RectangleGeometry Rect="0 0 1 1" /> </GeometryDrawing.Geometry> </GeometryDrawing> </DrawingGroup.Children> </DrawingGroup> </DrawingBrush.Drawing> </DrawingBrush> </Ellipse.Fill> </Ellipse> </Canvas> </Grid> </Window> |
▶ MainWindow.xaml.cs
|
1 2 3 4 5 6 7 8 9 10 11 12 13 14 15 16 17 18 19 20 21 22 23 24 25 26 27 28 29 30 31 32 33 34 35 36 37 38 39 40 41 42 43 44 45 46 47 48 49 50 51 52 53 54 55 56 57 58 59 60 61 62 63 64 65 66 67 68 69 70 71 72 73 74 75 76 77 78 79 80 81 82 83 |
using System.Windows; using System.Windows.Controls; using System.Windows.Input; namespace TestProject { /// <summary> /// 메인 윈도우 /// </summary> public partial class MainWindow : Window { //////////////////////////////////////////////////////////////////////////////////////////////////// Field ////////////////////////////////////////////////////////////////////////////////////////// Static //////////////////////////////////////////////////////////////////////////////// Private #region Field /// <summary> /// 마우스 거리 /// </summary> private static readonly double _distanceFromMouse = 5; #endregion //////////////////////////////////////////////////////////////////////////////////////////////////// Constructor ////////////////////////////////////////////////////////////////////////////////////////// Public #region 생성자 - MainWindow() /// <summary> /// 생성자 /// </summary> public MainWindow() { InitializeComponent(); this.contentStackPanel.MouseMove += contentStackPanel_MouseMove; } #endregion //////////////////////////////////////////////////////////////////////////////////////////////////// Constructor ////////////////////////////////////////////////////////////////////////////////////////// Public #region 컨텐트 스택 패널 마우스 이동시 처리하기 - contentStackPanel_MouseMove(sender, e) /// <summary> /// 컨텐트 스택 패널 마우스 이동시 처리하기 /// </summary> /// <param name="sender">이벤트 발생자</param> /// <param name="e">이벤트 인자</param> private void contentStackPanel_MouseMove(object sender, MouseEventArgs e) { Mouse.SetCursor(Cursors.Cross); Point currentMousePosition = e.GetPosition(this); if(ActualWidth - currentMousePosition.X > magnifyingGlassEllipse.Width + _distanceFromMouse) { Canvas.SetLeft(magnifyingGlassEllipse, currentMousePosition.X + _distanceFromMouse); } else { Canvas.SetLeft(magnifyingGlassEllipse, currentMousePosition.X - _distanceFromMouse - magnifyingGlassEllipse.Width); } if(ActualHeight - currentMousePosition.Y > magnifyingGlassEllipse.Height + _distanceFromMouse) { Canvas.SetTop(magnifyingGlassEllipse, currentMousePosition.Y + _distanceFromMouse); } else { Canvas.SetTop(magnifyingGlassEllipse, currentMousePosition.Y - _distanceFromMouse - magnifyingGlassEllipse.Height); } this.visualBrush.Viewbox = new Rect(currentMousePosition.X - 10, currentMousePosition.Y - 10, 20, 20); } #endregion } } |
TestProject.zip
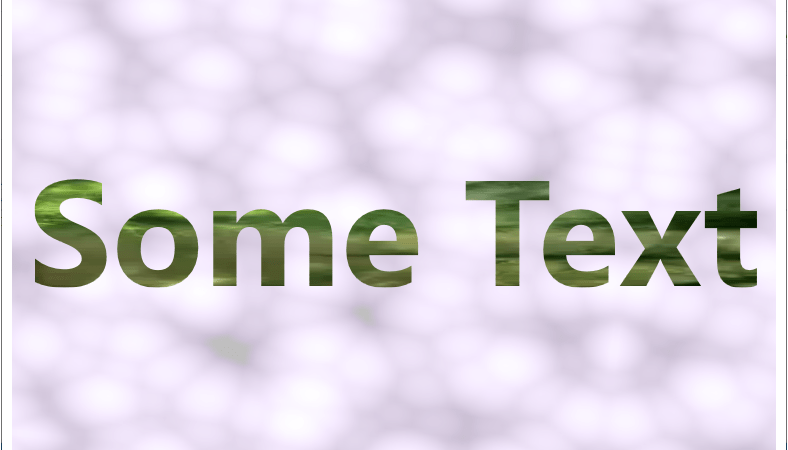
■ VisualBrush 엘리먼트의 Visual 속성에서 MediaElement 객체를 설정해 비디오로 영역을 칠하는 방법을 보여준다. ▶ MainWindow.xaml
|
1 2 3 4 5 6 7 8 9 10 11 12 13 14 15 16 17 18 19 20 21 22 23 24 25 26 27 28 29 30 31 32 33 34 35 36 37 38 39 40 41 42 43 44 45 46 47 48 49 50 51 52 53 54 55 56 57 58 59 60 61 62 63 64 65 66 67 68 69 70 71 72 |
<Window x:Class="TestProject.MainWindow" xmlns="http://schemas.microsoft.com/winfx/2006/xaml/presentation" xmlns:x="http://schemas.microsoft.com/winfx/2006/xaml" Width="800" Height="600" Title="TestProject" FontFamily="나눔고딕코딩" FontSize="16"> <Window.Resources> <Style x:Key="AnimatedRectangleStyleKey"> <Setter Property="Rectangle.Fill"> <Setter.Value> <ImageBrush TileMode="FlipXY" Opacity="0.25" ImageSource="IMAGE\purpleblock.jpg"> <ImageBrush.Transform> <RotateTransform Angle="0" /> </ImageBrush.Transform> </ImageBrush> </Setter.Value> </Setter> <Style.Triggers> <EventTrigger RoutedEvent="Rectangle.Loaded"> <EventTrigger.Actions> <BeginStoryboard> <Storyboard SpeedRatio="1.25"> <RectAnimation Storyboard.TargetProperty="(Rectangle.Fill).(ImageBrush.Viewport)" Duration="00:00:20" To="0 0 0.5 0.5" RepeatBehavior="Forever" AutoReverse="True" /> <DoubleAnimation Storyboard.TargetProperty="(Rectangle.Fill).(ImageBrush.Transform).(RotateTransform.Angle)" Duration="00:01:00" To="360" RepeatBehavior="Forever" AccelerationRatio="0.5" DecelerationRatio="0.5" /> </Storyboard> </BeginStoryboard> </EventTrigger.Actions> </EventTrigger> </Style.Triggers> </Style> </Window.Resources> <Grid> <Rectangle Style="{StaticResource AnimatedRectangleStyleKey}" Margin="10" /> <TextBlock HorizontalAlignment="Center" VerticalAlignment="Center" FontFamily="Verdna" FontSize="150" Text="Some Text" FontWeight="Bold"> <TextBlock.Foreground> <VisualBrush> <VisualBrush.Visual> <MediaElement Name="mediaElement" Source="VIDEO\xbox.wmv" IsMuted="True" /> </VisualBrush.Visual> </VisualBrush> </TextBlock.Foreground> </TextBlock> </Grid> </Window> |
▶ MainWindow.xaml.cs
|
1 2 3 4 5 6 7 8 9 10 11 12 13 14 15 16 17 18 19 20 21 22 23 24 25 26 27 28 29 30 31 32 33 34 35 36 37 38 39 40 41 42 43 44 45 46 47 48 49 |
using System; using System.Windows; namespace TestProject { /// <summary> /// 메인 윈도우 /// </summary> public partial class MainWindow : Window { //////////////////////////////////////////////////////////////////////////////////////////////////// Constructor ////////////////////////////////////////////////////////////////////////////////////////// Public #region 생성자 - MainWindow() /// <summary> /// 생성자 /// </summary> public MainWindow() { InitializeComponent(); this.mediaElement.MediaEnded += mediaElement_MediaEnded; } #endregion //////////////////////////////////////////////////////////////////////////////////////////////////// Method ////////////////////////////////////////////////////////////////////////////////////////// Private #region 미디어 엘리먼트 미디어 종료시 처리하기 - mediaElement_MediaEnded(sender, e) /// <summary> /// 미디어 엘리먼트 미디어 종료시 처리하기 /// </summary> /// <param name="sender">이벤트 발생자</param> /// <param name="e">이벤트 인자</param> private void mediaElement_MediaEnded(object sender, RoutedEventArgs e) { this.mediaElement.Position = TimeSpan.Zero; this.mediaElement.Play(); } #endregion } } |
TestProject.zip

■ Visual 클래스의 PointToScreen 메소드를 사용해 마우스의 화면 좌표를 구하는 방법을 보여준다. ▶ MainWindow.xaml
|
1 2 3 4 5 6 7 8 9 10 11 12 13 14 15 16 |
<Window x:Class="TestProject.MainWindow" xmlns="http://schemas.microsoft.com/winfx/2006/xaml/presentation" xmlns:x="http://schemas.microsoft.com/winfx/2006/xaml" Width="800" Height="600" Title="Visual 클래스 : PointToScreen 메소드를 사용해 마우스 화면 좌표 구하기" FontFamily="나눔고딕코딩" FontSize="16"> <Grid> <TextBlock Name="textBlock" HorizontalAlignment="Center" VerticalAlignment="Center" /> </Grid> </Window> |
▶ MainWindow.xaml.cs
|
1 2 3 4 5 6 7 8 9 10 11 12 13 14 15 16 17 18 19 20 21 22 23 24 25 26 27 28 29 30 31 32 33 34 35 36 37 38 39 40 41 42 43 44 45 46 47 48 49 50 51 52 53 54 55 56 57 58 59 60 61 62 63 64 65 66 67 68 69 70 71 72 73 74 75 76 77 78 79 |
using System; using System.Windows; using System.Windows.Input; using System.Windows.Threading; namespace TestProject { /// <summary> /// 메인 윈도우 /// </summary> public partial class MainWindow : Window { //////////////////////////////////////////////////////////////////////////////////////////////////// Field ////////////////////////////////////////////////////////////////////////////////////////// Private #region Field /// <summary> /// 타이머 /// </summary> private DispatcherTimer timer; #endregion //////////////////////////////////////////////////////////////////////////////////////////////////// Constructor ////////////////////////////////////////////////////////////////////////////////////////// Public #region 생성자 - MainWindow() /// <summary> /// 생성자 /// </summary> public MainWindow() { InitializeComponent(); this.timer = new DispatcherTimer(); this.timer.Interval = TimeSpan.FromMilliseconds(100); this.timer.Tick += timer_Tick; this.timer.Start(); } #endregion //////////////////////////////////////////////////////////////////////////////////////////////////// Method ////////////////////////////////////////////////////////////////////////////////////////// Private #region 타이머 틱 처리하기 - timer_Tick(sender, e) /// <summary> /// 타이머 틱 처리하기 /// </summary> /// <param name="sender">이벤트 발생자</param> /// <param name="e">이벤트 인자</param> private void timer_Tick(object sender, EventArgs e) { try { Mouse.Capture(this); Point relativePoint = Mouse.GetPosition(this); Point screenPoint = PointToScreen(relativePoint); this.textBlock.Text = $"마우스 화면 좌표 : {screenPoint}"; } finally { Mouse.Capture(null); } } #endregion } } |
TestProject.zip
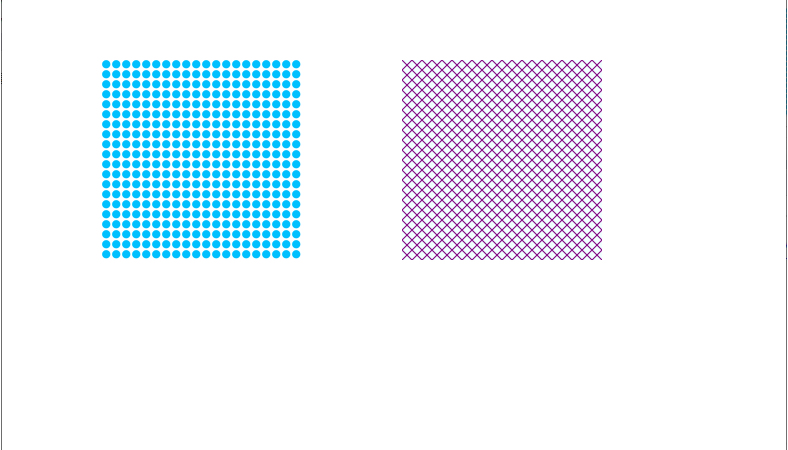
■ VisualBrush 엘리먼트를 사용해 해시 패턴을 만드는 방법을 보여준다. ▶ MainWindow.xaml
|
1 2 3 4 5 6 7 8 9 10 11 12 13 14 15 16 17 18 19 20 21 22 23 24 25 26 27 28 29 30 31 32 33 34 35 36 37 38 39 40 41 42 43 44 45 46 47 48 49 50 51 52 53 54 55 56 57 |
<Window x:Class="TestProject.MainWindow" xmlns="http://schemas.microsoft.com/winfx/2006/xaml/presentation" xmlns:x="http://schemas.microsoft.com/winfx/2006/xaml" Width="800" Height="600" Title="VisualBrush 엘리먼트 : 해시 패턴 사용하기" FontFamily="나눔고딕코딩" FontSize="16"> <Window.Resources> <VisualBrush x:Key="DotFillVisualBrushKey" TileMode="Tile" ViewportUnits="Absolute" Viewport="0 0 10 10" ViewboxUnits="Absolute" Viewbox="0 0 12 12"> <VisualBrush.Visual> <Ellipse Width="10" Height="10" Fill="#00c0ff" /> </VisualBrush.Visual> </VisualBrush> <VisualBrush x:Key="HatchVisualBrushKey" TileMode="Tile" ViewportUnits="Absolute" Viewport="0 0 10 10" ViewboxUnits="Absolute" Viewbox="0 0 10 10"> <VisualBrush.Visual> <Canvas> <Rectangle Width="10" Height="10" Fill="Azure" /> <Path Stroke="Purple" Data="M 0 0 L 10 10" /> <Path Stroke="Purple" Data="M 10 0 L 0 10" /> </Canvas> </VisualBrush.Visual> </VisualBrush> </Window.Resources> <Canvas> <Rectangle Canvas.Left="100" Canvas.Top="100" Width="200" Height="200" Fill="{StaticResource DotFillVisualBrushKey}" /> <Rectangle Canvas.Left="400" Canvas.Top="100" Width="200" Height="200" Fill="{StaticResource HatchVisualBrushKey}" /> </Canvas> </Window> |
TestProject.zip

■ VisualBrush 엘리먼트를 사용해 엘리먼트 반사 그림자 이미지를 만드는 방법을 보여준다. ▶ MainWindow.xaml
|
1 2 3 4 5 6 7 8 9 10 11 12 13 14 15 16 17 18 19 20 21 22 23 24 25 26 27 28 29 30 31 32 33 34 35 36 37 38 39 40 41 42 43 44 45 46 47 48 49 50 51 52 53 54 55 56 57 58 59 60 61 62 63 64 |
<Window x:Class="TestProject.MainWindow" xmlns="http://schemas.microsoft.com/winfx/2006/xaml/presentation" xmlns:x="http://schemas.microsoft.com/winfx/2006/xaml" Width="800" Height="600" Title="VisualBrush 엘리먼트 : 엘리먼트 반사 그림자 이미지 만들기" FontFamily="나눔고딕코딩" FontSize="16"> <Window.Resources> <Style TargetType="{x:Type TextBlock}"> <Setter Property="VerticalAlignment" Value="Bottom" /> <Setter Property="FontFamily" Value="Lucida Calligraphy" /> <Setter Property="FontSize" Value="36" /> </Style> <Style TargetType="{x:Type CheckBox}"> <Setter Property="Margin" Value="19" /> <Setter Property="FontSize" Value="24" /> </Style> </Window.Resources> <Grid> <StackPanel HorizontalAlignment="Center" VerticalAlignment="Center"> <StackPanel Name="stackPanel" HorizontalAlignment="Center" Orientation="Horizontal"> <TextBlock Text="Check..." /> <StackPanel HorizontalAlignment="Center"> <CheckBox Content="CheckBox 1" /> <CheckBox Content="CheckBox 2" /> <CheckBox Content="CheckBox 3" /> </StackPanel> <TextBlock Text="...Boxes" /> </StackPanel> <StackPanel Height="{Binding ElementName=stackPanel, Path=ActualHeight}"> <StackPanel.Background> <VisualBrush Visual="{Binding ElementName=stackPanel}" Stretch="None"> <VisualBrush.RelativeTransform> <TransformGroup> <ScaleTransform ScaleX="1" ScaleY="-1" /> <TranslateTransform Y="1" /> </TransformGroup> </VisualBrush.RelativeTransform> </VisualBrush> </StackPanel.Background> <StackPanel.OpacityMask> <LinearGradientBrush StartPoint="0 0" EndPoint="0 1"> <GradientStop Offset="0" Color="#80000000" /> <GradientStop Offset="1" Color="#00000000" /> </LinearGradientBrush> </StackPanel.OpacityMask> </StackPanel> </StackPanel> </Grid> </Window> |
TestProject.zip
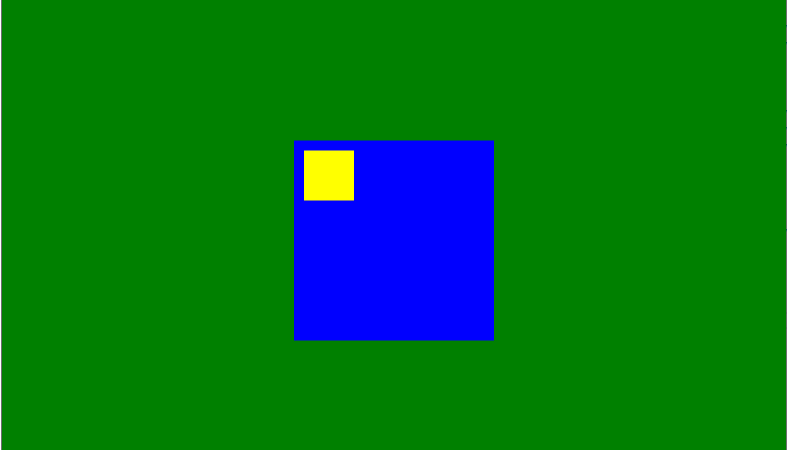
■ Visual 클래스의 PointToScreen 메소드를 사용해 부모 엘리먼트 기준 자식 엘리먼트의 상대적 위치를 구하는 방법을 보여준다. ▶ MainWindow.xaml
|
1 2 3 4 5 6 7 8 9 10 11 12 13 14 15 16 17 18 19 20 21 22 23 24 25 26 |
<Window x:Class="TestProject.MainWindow" xmlns="http://schemas.microsoft.com/winfx/2006/xaml/presentation" xmlns:x="http://schemas.microsoft.com/winfx/2006/xaml" Width="800" Height="600" Title="Visual 클래스 : PointToScreen 메소드를 사용해 부모 엘리먼트 기준 자식 엘리먼트의 상대적 위치 구하기" FontFamily="나눔고딕코딩" FontSize="16"> <Grid Background="Green"> <Canvas Name="canvas" Width="200" Height="200" Background="Blue"> <Rectangle Name="rectangle" Canvas.Left="10" Canvas.Top="10" Width="50" Height="50" Fill="Yellow" /> </Canvas> <TextBlock Name="textBlock" Margin="10" HorizontalAlignment="Center" VerticalAlignment="Bottom" /> </Grid> </Window> |
▶ MainWindow.xaml.cs
|
1 2 3 4 5 6 7 8 9 10 11 12 13 14 15 16 17 18 19 20 21 22 23 24 25 26 27 28 29 30 31 32 33 34 35 36 37 38 39 40 41 42 43 44 45 46 47 48 49 50 51 52 53 54 55 56 57 58 59 60 61 62 63 64 65 66 67 68 69 70 71 72 73 74 75 76 77 78 79 80 81 82 83 84 85 86 87 88 89 90 91 92 93 94 95 96 97 98 |
using System; using System.Windows; using System.Windows.Media; namespace TestProject { /// <summary> /// 메인 윈도우 /// </summary> public partial class MainWindow : Window { //////////////////////////////////////////////////////////////////////////////////////////////////// Constructor ////////////////////////////////////////////////////////////////////////////////////////// Public #region 생성자 - MainWindow() /// <summary> /// 생성자 /// </summary> public MainWindow() { InitializeComponent(); Loaded += Window_Loaded; LocationChanged += Window_LocationChanged; } #endregion //////////////////////////////////////////////////////////////////////////////////////////////////// Method ////////////////////////////////////////////////////////////////////////////////////////// Private //////////////////////////////////////////////////////////////////////////////// Event #region 윈도우 로드시 처리하기 - Window_Loaded(sender, e) /// <summary> /// 윈도우 로드시 처리하기 /// </summary> /// <param name="sender">이벤트 발생자</param> /// <param name="e">이벤트 인자</param> private void Window_Loaded(object sender, RoutedEventArgs e) { DisplayPoint(); } #endregion #region 윈도우 위치 변경시 처리하기 - Window_LocationChanged(sender, e) /// <summary> /// 윈도우 위치 변경시 처리하기 /// </summary> /// <param name="sender">이벤트 발생자</param> /// <param name="e">이벤트 인자</param> private void Window_LocationChanged(object sender, EventArgs e) { DisplayPoint(); } #endregion //////////////////////////////////////////////////////////////////////////////// Function #region 상대적 위치 구하기 - GetRelativePoint(parent, child) /// <summary> /// 상대적 위치 구하기 /// </summary> /// <param name="parent">부모</param> /// <param name="child">자식</param> /// <returns>상대적 위치</returns> private Point GetRelativePoint(Visual parent, Visual child) { Point originPoint = new Point(0, 0); Point childPoint = child.PointToScreen (originPoint); Point parentPoint = parent.PointToScreen(originPoint); return new Point(childPoint.X - parentPoint.X, childPoint.Y - parentPoint.Y); } #endregion #region 포인트 표시하기 - DisplayPoint() /// <summary> /// 포인트 표시하기 /// </summary> private void DisplayPoint() { Point point = GetRelativePoint(this.canvas, this.rectangle); this.textBlock.Text = point.ToString(); } #endregion } } |

■ Visual 클래스의 PointToScreen 메소드를 사용해 절대적 위치를 구하는 방법을 보여준다. ▶ MainWindow.xaml
|
1 2 3 4 5 6 7 8 9 10 11 12 13 14 15 16 17 18 19 20 21 22 23 24 25 26 |
<Window x:Class="TestProject.MainWindow" xmlns="http://schemas.microsoft.com/winfx/2006/xaml/presentation" xmlns:x="http://schemas.microsoft.com/winfx/2006/xaml" Width="800" Height="600" Title="Visual 클래스 : PointToScreen 메소드를 사용해 절대적 위치 구하기" FontFamily="나눔고딕코딩" FontSize="16"> <Grid Background="Green"> <Canvas Name="canvas" Width="200" Height="200" Background="Blue"> <Rectangle Name="rectangle" Canvas.Left="10" Canvas.Top="10" Width="50" Height="50" Fill="Yellow" /> </Canvas> <TextBlock Name="textBlock" Margin="10" HorizontalAlignment="Center" VerticalAlignment="Bottom" /> </Grid> </Window> |
▶ MainWindow.xaml.cs
|
1 2 3 4 5 6 7 8 9 10 11 12 13 14 15 16 17 18 19 20 21 22 23 24 25 26 27 28 29 30 31 32 33 34 35 36 37 38 39 40 41 42 43 44 45 46 47 48 49 50 51 52 53 54 55 56 57 58 59 60 61 62 63 64 65 66 67 68 69 70 71 72 73 74 75 76 77 78 |
using System; using System.Windows; namespace TestProject { /// <summary> /// 메인 윈도우 /// </summary> public partial class MainWindow : Window { //////////////////////////////////////////////////////////////////////////////////////////////////// Constructor ////////////////////////////////////////////////////////////////////////////////////////// Public #region 생성자 - MainWindow() /// <summary> /// 생성자 /// </summary> public MainWindow() { InitializeComponent(); Loaded += Window_Loaded; LocationChanged += Window_LocationChanged; } #endregion //////////////////////////////////////////////////////////////////////////////////////////////////// Method ////////////////////////////////////////////////////////////////////////////////////////// Private //////////////////////////////////////////////////////////////////////////////// Event #region 윈도우 로드시 처리하기 - Window_Loaded(sender, e) /// <summary> /// 윈도우 로드시 처리하기 /// </summary> /// <param name="sender">이벤트 발생자</param> /// <param name="e">이벤트 인자</param> private void Window_Loaded(object sender, RoutedEventArgs e) { DisplayPoint(); } #endregion #region 윈도우 위치 변경시 처리하기 - Window_LocationChanged(sender, e) /// <summary> /// 윈도우 위치 변경시 처리하기 /// </summary> /// <param name="sender">이벤트 발생자</param> /// <param name="e">이벤트 인자</param> private void Window_LocationChanged(object sender, EventArgs e) { DisplayPoint(); } #endregion //////////////////////////////////////////////////////////////////////////////// Function #region 포인트 표시하기 - DisplayPoint() /// <summary> /// 포인트 표시하기 /// </summary> private void DisplayPoint() { Point point = this.rectangle.PointToScreen(new Point(0, 0)); this.textBlock.Text = point.ToString(); } #endregion } } |
TestProject.zip

■ Visual 클래스의 TransformToDescendant 메소드를 사용해 하위 엘리먼트를 기준으로 한 상대적 위치를 구하는 방법을 보여준다. ▶ MainWindow.xaml
|
1 2 3 4 5 6 7 8 9 10 11 12 13 14 15 16 17 18 19 20 21 22 23 24 25 26 |
<Window x:Class="TestProject.MainWindow" xmlns="http://schemas.microsoft.com/winfx/2006/xaml/presentation" xmlns:x="http://schemas.microsoft.com/winfx/2006/xaml" Width="800" Height="600" Title="Visual 클래스 : TransformToDescendant 메소드를 사용해 하위 엘리먼트를 기준으로 한 상대적 위치 구하기" FontFamily="나눔고딕코딩" FontSize="16"> <Grid Background="Green"> <Canvas Name="canvas" Width="200" Height="200" Background="Blue"> <Rectangle Name="rectangle" Canvas.Left="10" Canvas.Top="10" Width="50" Height="50" Fill="Yellow" /> </Canvas> <TextBlock Name="textBlock" Margin="10" HorizontalAlignment="Center" VerticalAlignment="Bottom" /> </Grid> </Window> |
▶ MainWindow.xaml.cs
|
1 2 3 4 5 6 7 8 9 10 11 12 13 14 15 16 17 18 19 20 21 22 23 24 25 26 27 28 29 30 31 32 33 34 35 36 37 38 39 40 41 42 43 44 45 46 47 48 |
using System.Windows; namespace TestProject { /// <summary> /// 메인 윈도우 /// </summary> public partial class MainWindow : Window { //////////////////////////////////////////////////////////////////////////////////////////////////// Constructor ////////////////////////////////////////////////////////////////////////////////////////// Public #region 생성자 - MainWindow() /// <summary> /// 생성자 /// </summary> public MainWindow() { InitializeComponent(); Loaded += Window_Loaded; } #endregion //////////////////////////////////////////////////////////////////////////////////////////////////// Method ////////////////////////////////////////////////////////////////////////////////////////// Private #region 윈도우 로드시 처리하기 - Window_Loaded(sender, e) /// <summary> /// 윈도우 로드시 처리하기 /// </summary> /// <param name="sender">이벤트 발생자</param> /// <param name="e">이벤트 인자</param> private void Window_Loaded(object sender, RoutedEventArgs e) { Point point = this.canvas.TransformToDescendant(this.rectangle).Transform(new Point(0, 0)); this.textBlock.Text = point.ToString(); } #endregion } } |
TestProject.zip

■ Visual 클래스의 TransformToAncestor 메소드를 사용해 상위 엘리먼트를 기준으로 한 상대적 위치를 구하는 방법을 보여준다. ▶ MainWindow.xaml
|
1 2 3 4 5 6 7 8 9 10 11 12 13 14 15 16 17 18 19 20 21 22 23 24 25 26 |
<Window x:Class="TestProject.MainWindow" xmlns="http://schemas.microsoft.com/winfx/2006/xaml/presentation" xmlns:x="http://schemas.microsoft.com/winfx/2006/xaml" Width="800" Height="600" Title="Visual 클래스 : TransformToAncestor 메소드를 사용해 상위 엘리먼트를 기준으로 한 상대적 위치 구하기" FontFamily="나눔고딕코딩" FontSize="16"> <Grid Background="Green"> <Canvas Width="200" Height="200" Background="Blue"> <Rectangle Name="rectangle" Canvas.Left="10" Canvas.Top="10" Width="50" Height="50" Fill="Yellow" /> </Canvas> <TextBlock Name="textBlock" Margin="10" HorizontalAlignment="Center" VerticalAlignment="Bottom" /> </Grid> </Window> |
▶ MainWindow.xaml.cs
|
1 2 3 4 5 6 7 8 9 10 11 12 13 14 15 16 17 18 19 20 21 22 23 24 25 26 27 28 29 30 31 32 33 34 35 36 37 38 39 40 41 42 43 44 45 46 47 48 |
using System.Windows; namespace TestProject { /// <summary> /// 메인 윈도우 /// </summary> public partial class MainWindow : Window { //////////////////////////////////////////////////////////////////////////////////////////////////// Constructor ////////////////////////////////////////////////////////////////////////////////////////// Public #region 생성자 - MainWindow() /// <summary> /// 생성자 /// </summary> public MainWindow() { InitializeComponent(); Loaded += Window_Loaded; } #endregion //////////////////////////////////////////////////////////////////////////////////////////////////// Method ////////////////////////////////////////////////////////////////////////////////////////// Private #region 윈도우 로드시 처리하기 - Window_Loaded(sender, e) /// <summary> /// 윈도우 로드시 처리하기 /// </summary> /// <param name="sender">이벤트 발생자</param> /// <param name="e">이벤트 인자</param> private void Window_Loaded(object sender, RoutedEventArgs e) { Point point = this.rectangle.TransformToAncestor(this).Transform(new Point(0, 0)); this.textBlock.Text = point.ToString(); } #endregion } } |
TestProject.zip

■ VisualBrush 클래스를 사용하는 방법을 보여준다. ▶ MainWindow.xaml
|
1 2 3 4 5 6 7 8 9 10 11 12 13 14 15 16 17 |
<Window x:Class="TestProject.MainWindow" xmlns="http://schemas.microsoft.com/winfx/2006/xaml/presentation" xmlns:x="http://schemas.microsoft.com/winfx/2006/xaml" Width="800" Height="600" Title="VisualBrush 클래스 사용하기" FontFamily="나눔고딕코딩" FontSize="16"> <Grid> <Rectangle Name="rectangle" Width="100" Height="100" Stroke="Black" /> </Grid> </Window> |
▶ MainWindow.xaml.cs
|
1 2 3 4 5 6 7 8 9 10 11 12 13 14 15 16 17 18 19 20 21 22 23 24 25 26 27 28 29 30 31 32 33 34 35 36 37 38 39 40 41 42 43 44 45 46 47 48 49 50 51 52 53 54 55 56 57 58 59 60 61 62 |
using System.Windows; using System.Windows.Controls; using System.Windows.Media; using System.Windows.Shapes; namespace TestProject { /// <summary> /// 메인 윈도우 /// </summary> public partial class MainWindow : Window { //////////////////////////////////////////////////////////////////////////////////////////////////// Constructor ////////////////////////////////////////////////////////////////////////////////////////// Public #region 생성자 - MainWindow() /// <summary> /// 생성자 /// </summary> public MainWindow() { InitializeComponent(); Rectangle rectangle = new Rectangle(); rectangle.Margin = new Thickness(2); rectangle.Width = 25; rectangle.Height = 25; rectangle.Fill = Brushes.Red; TextBlock textBlock = new TextBlock(); textBlock.Margin = new Thickness(2); textBlock.FontSize = (double)new FontSizeConverter().ConvertFrom("10pt"); textBlock.Text = "Hello, World!"; Button button = new Button(); button.Margin = new Thickness(2); button.Content = "Test"; StackPanel stackPanel = new StackPanel(); stackPanel.Background = Brushes.White; stackPanel.Children.Add(rectangle); stackPanel.Children.Add(textBlock); stackPanel.Children.Add(button ); VisualBrush visualBrush = new VisualBrush(); visualBrush.Visual = stackPanel; this.rectangle.Fill = visualBrush; } #endregion } } |
TestProject.zip
■ Visual 클래스를 사용해 속성 값을 갖는 자손을 찾는 방법을 보여준다. ▶ 예제 코드 (C#)
|
1 2 3 4 5 6 7 8 9 10 11 12 13 14 15 16 17 18 19 20 21 22 23 24 25 26 27 28 29 30 31 32 33 34 35 36 37 38 39 40 41 42 43 44 45 46 47 48 49 50 51 52 53 54 |
using System.Windows; using System.Windows.Media; #region 속성 값을 갖는 자손 찾기 - FindDescendantWithPropertyValue(source, property, value) /// <summary> /// 속성 값을 갖는 자손 찾기 /// </summary> /// <param name="source">소스 객체</param> /// <param name="property">속성</param> /// <param name="value">값</param> /// <returns>자손 객체</returns> public Visual FindDescendantWithPropertyValue(Visual source, DependencyProperty property, object value) { if(source == null) { return null; } if(source.GetValue(property) == null) { return null; } if(source.GetValue(property).Equals(value)) { return source; } Visual target = null; if(source is FrameworkElement) { (source as FrameworkElement).ApplyTemplate(); } for(int i = 0; i < VisualTreeHelper.GetChildrenCount(source); i++) { Visual child = VisualTreeHelper.GetChild(source, i) as Visual; target = FindDescendantWithPropertyValue(child, property, value); if(target != null) { break; } } return target; } #endregion |
■ Visual 클래스를 사용해 타입으로 자손을 찾는 방법을 보여준다. ▶ 예제 코드 (C#)
|
1 2 3 4 5 6 7 8 9 10 11 12 13 14 15 16 17 18 19 20 21 22 23 24 25 26 27 28 29 30 31 32 33 34 35 36 37 38 39 40 41 42 43 44 45 46 47 48 49 50 51 52 53 54 55 56 57 58 59 60 61 62 63 64 65 66 67 68 69 70 71 72 73 74 75 76 77 78 79 80 |
using System; using System.Windows; using System.Windows.Media; #region 타입으로 자손 찾기 - FindDescendantByType(source, descendantType, specificTypeOnly) /// <summary> /// 타입으로 자손 찾기 /// </summary> /// <param name="source">소스 객체</param> /// <param name="descendantType">자손 타입</param> /// <param name="specificTypeOnly">특정 타입만 찾기 여부</param> /// <returns>자손 객체</returns> public Visual FindDescendantByType(Visual source, Type descendantType, bool specificTypeOnly) { if(source == null) { return null; } if(specificTypeOnly ? (source.GetType() == descendantType) : (source.GetType() == descendantType) || (source.GetType().IsSubclassOf(descendantType))) { return source; } Visual target = null; if(source is FrameworkElement) { (source as FrameworkElement).ApplyTemplate(); } for(int i = 0; i < VisualTreeHelper.GetChildrenCount(source); i++) { Visual visual = VisualTreeHelper.GetChild(source, i) as Visual; target = FindDescendantByType(visual, descendantType, specificTypeOnly); if(target != null) { break; } } return target; } #endregion #region 타입으로 자손 찾기 - FindDescendantByType(source, descendantType) /// <summary> /// 타입으로 자손 찾기 /// </summary> /// <param name="source">소스 객체</param> /// <param name="descendantType">자손 타입</param> /// <returns>자손 객체</returns> public Visual FindDescendantByType(Visual source, Type descendantType) { return FindDescendantByType(source, descendantType, true); } #endregion #region 타입으로 자손 찾기 - FindDescendantByType<TDescendant>(source) /// <summary> /// 타입으로 자손 찾기 /// </summary> /// <typeparam name="TDescendant">자손 타입</typeparam> /// <param name="source">소스 객체</param> /// <returns>자손 객체</returns> public TDescendant FindDescendantByType<TDescendant>(Visual source) where TDescendant : Visual { Visual target = VisualHelper.FindDescendantByType(source, typeof(TDescendant)); return (TDescendant)target; } #endregion |
■ Visual 클래스를 사용해 명칭으로 자손을 찾는 방법을 보여준다. ▶ 예제 코드 (C#)
|
1 2 3 4 5 6 7 8 9 10 11 12 13 14 15 16 17 18 19 20 21 22 23 24 25 26 27 28 29 30 31 32 33 34 35 36 37 38 39 40 41 42 43 |
using System.Windows; using System.Windows.Media; #region 명칭으로 자손 찾기 - FindDescendantByName(source, name) /// <summary> /// 명칭으로 자손 찾기 /// </summary> /// <param name="source">소스 객체</param> /// <param name="name">명칭</param> /// <returns>자속 객체</returns> public Visual FindDescendantByName(Visual source, string name) { if(source != null && (source is FrameworkElement) && (source as FrameworkElement).Name == name) { return source; } Visual target = null; if(source is FrameworkElement) { (source as FrameworkElement).ApplyTemplate(); } for(int i = 0; i < VisualTreeHelper.GetChildrenCount(source); i++) { Visual child = VisualTreeHelper.GetChild(source, i) as Visual; target = FindDescendantByName(child, name); if(target != null) { break; } } return target; } #endregion |

■ VisualBrush 엘리먼트를 사용하는 방법을 보여준다. ▶ MainWindow.xaml
|
1 2 3 4 5 6 7 8 9 10 11 12 13 14 15 16 17 18 19 20 21 22 23 24 25 26 27 28 29 30 31 32 33 34 35 36 37 38 39 40 41 42 43 44 45 46 47 48 49 50 51 52 53 54 55 56 57 58 59 60 61 62 63 64 65 66 67 68 69 70 71 72 73 74 75 76 77 78 79 80 81 82 83 84 85 86 87 88 89 90 91 92 93 94 95 96 97 98 99 100 101 102 103 104 105 106 107 108 109 110 111 112 113 114 115 116 117 118 119 120 121 122 123 124 125 126 127 128 |
<Window x:Class="TestProject.MainWindow" xmlns="http://schemas.microsoft.com/winfx/2006/xaml/presentation" xmlns:x="http://schemas.microsoft.com/winfx/2006/xaml" Width="800" Height="600" Title="VisualBrush 엘리먼트 사용하기" FontFamily="나눔고딕코딩" FontSize="16"> <Window.Resources> <MeshGeometry3D x:Key="CubeMeshGeometry3DKey" Positions="-0.5 0.5 0.5, 0.5 0.5 0.5, -0.5 -0.5 0.5, 0.5 -0.5 0.5, 0.5 0.5 -0.5, -0.5 0.5 -0.5, 0.5 -0.5 -0.5, -0.5 -0.5 -0.5, -0.5 0.5 -0.5, -0.5 0.5 0.5, -0.5 -0.5 -0.5, -0.5 -0.5 0.5, 0.5 0.5 0.5, 0.5 0.5 -0.5, 0.5 -0.5 0.5, 0.5 -0.5 -0.5, -0.5 0.5 -0.5, 0.5 0.5 -0.5, -0.5 0.5 0.5, 0.5 0.5 0.5, 0.5 -0.5 -0.5, -0.5 -0.5 -0.5, 0.5 -0.5 0.5, -0.5 -0.5 0.5" TriangleIndices=" 0 2 1, 1 2 3 4 6 5, 5 6 7, 8 10 9, 9 10 11, 12 14 13, 13 14 15 16 18 17, 17 18 19 20 22 21, 21 22 23" TextureCoordinates="0 0, 1 0, 0 1, 1 1, 0 0, 1 0, 0 1, 1 1, 0 0, 1 0, 0 1, 1 1, 0 0, 1 0, 0 1, 1 1, 0 0, 1 0, 0 1, 1 1, 0 0, 1 0, 0 1, 1 1" /> <Viewport3D x:Key="Viewport3DKey" Width="100" Height="100"> <ModelVisual3D> <ModelVisual3D.Content> <Model3DGroup> <GeometryModel3D Geometry="{StaticResource CubeMeshGeometry3DKey}" > <GeometryModel3D.Material> <DiffuseMaterial Brush="RoyalBlue" /> </GeometryModel3D.Material> </GeometryModel3D> <AmbientLight Color="#404040" /> <DirectionalLight Color="#c0c0c0" Direction="2 -3 -1" /> </Model3DGroup> </ModelVisual3D.Content> </ModelVisual3D> <Viewport3D.Camera> <PerspectiveCamera Position="-2 2 4" LookDirection="2 -2 -4" UpDirection="0 1 0" FieldOfView="22.5" /> </Viewport3D.Camera> </Viewport3D> </Window.Resources> <DockPanel> <ScrollBar Name="horizontalScrollBar" DockPanel.Dock="Bottom" Orientation="Horizontal" Minimum="-180" Maximum="180" LargeChange="10" SmallChange="1" /> <ScrollBar Name="verticalScrollBar" DockPanel.Dock="Right" Orientation="Vertical" Minimum="-180" Maximum="180" LargeChange="10" SmallChange="1" /> <Viewport3D> <ModelVisual3D> <ModelVisual3D.Content> <Model3DGroup> <GeometryModel3D Geometry="{StaticResource CubeMeshGeometry3DKey}"> <GeometryModel3D.Material> <DiffuseMaterial> <DiffuseMaterial.Brush> <VisualBrush RenderOptions.CachingHint="Cache" Viewport="0 0 0.2 0.2" TileMode="Tile" Visual= "{StaticResource Viewport3DKey}" /> </DiffuseMaterial.Brush> </DiffuseMaterial> </GeometryModel3D.Material> <GeometryModel3D.Transform> <Transform3DGroup> <RotateTransform3D> <RotateTransform3D.Rotation> <AxisAngleRotation3D Axis="0 1 0" Angle="{Binding ElementName=horizontalScrollBar, Path=Value}" /> </RotateTransform3D.Rotation> </RotateTransform3D> <RotateTransform3D> <RotateTransform3D.Rotation> <AxisAngleRotation3D Axis="1 0 0" Angle="{Binding ElementName=verticalScrollBar, Path=Value}" /> </RotateTransform3D.Rotation> </RotateTransform3D> </Transform3DGroup> </GeometryModel3D.Transform> </GeometryModel3D> <AmbientLight Color="White" /> <DirectionalLight Color="Gray" Direction="2 -3 -1" /> </Model3DGroup> </ModelVisual3D.Content> </ModelVisual3D> <Viewport3D.Camera> <PerspectiveCamera Position="-2 2 4" LookDirection="2 -2 -4" UpDirection="0 1 0" FieldOfView="30" /> </Viewport3D.Camera> </Viewport3D> </DockPanel> </Window> |
TestProject.zip

■ VisualBrush 엘리먼트를 사용하는 방법을 보여준다. ▶ MainWindow.xaml
|
1 2 3 4 5 6 7 8 9 10 11 12 13 14 15 16 17 18 19 20 21 22 23 24 25 26 27 28 29 30 31 32 33 34 35 36 37 38 39 40 41 42 43 44 45 46 47 48 49 50 51 52 53 54 55 56 57 58 59 60 61 62 63 64 65 66 67 68 69 70 71 72 73 74 75 76 77 78 79 80 81 82 83 84 85 86 87 88 89 90 91 92 93 94 95 96 97 98 99 100 101 102 103 104 105 106 107 108 109 110 |
<Window x:Class="TestProject.MainWindow" xmlns="http://schemas.microsoft.com/winfx/2006/xaml/presentation" xmlns:x="http://schemas.microsoft.com/winfx/2006/xaml" Width="800" Height="600" Title="VisualBrush 엘리먼트 사용하기" FontFamily="나눔고딕코딩" FontSize="16"> <DockPanel> <ScrollBar Name="horizontalScrollBar" DockPanel.Dock="Bottom" Orientation="Horizontal" Minimum="-180" Maximum="180" LargeChange="10" SmallChange="1" /> <ScrollBar Name="verticalScrollBar" DockPanel.Dock="Right" Orientation="Vertical" Minimum="-180" Maximum="180" LargeChange="10" SmallChange="1" /> <Viewport3D> <ModelVisual3D> <ModelVisual3D.Content> <Model3DGroup> <GeometryModel3D> <GeometryModel3D.Geometry> <MeshGeometry3D Positions="-0.5 0.5 0.5, 0.5 0.5 0.5, -0.5 -0.5 0.5, 0.5 -0.5 0.5, 0.5 0.5 -0.5, -0.5 0.5 -0.5, 0.5 -0.5 -0.5, -0.5 -0.5 -0.5, -0.5 0.5 -0.5, -0.5 0.5 0.5, -0.5 -0.5 -0.5, -0.5 -0.5 0.5, 0.5 0.5 0.5, 0.5 0.5 -0.5, 0.5 -0.5 0.5, 0.5 -0.5 -0.5, -0.5 0.5 -0.5, 0.5 0.5 -0.5, -0.5 0.5 0.5, 0.5 0.5 0.5, 0.5 -0.5 -0.5, -0.5 -0.5 -0.5, 0.5 -0.5 0.5, -0.5 -0.5 0.5" TriangleIndices=" 0 2 1, 1 2 3 4 6 5, 5 6 7, 8 10 9, 9 10 11, 12 14 13, 13 14 15 16 18 17, 17 18 19 20 22 21, 21 22 23" TextureCoordinates="0.000 0, 0.167 0, 0.000 1, 0.167 1, 0.167 0, 0.333 0, 0.167 1, 0.333 1, 0.333 0, 0.500 0, 0.333 1, 0.500 1, 0.500 0, 0.667 0, 0.500 1, 0.667 1, 0.667 0, 0.833 0, 0.667 1, 0.833 1, 0.833 0, 1.000 0, 0.833 1, 1.000 1" /> </GeometryModel3D.Geometry> <GeometryModel3D.Material> <DiffuseMaterial> <DiffuseMaterial.Brush> <VisualBrush RenderOptions.CachingHint="Cache"> <VisualBrush.Visual> <UniformGrid Columns="6"> <Rectangle Width="10" Height="10" Fill="#ff0000" /> <Rectangle Width="10" Height="10" Fill="#ffff00" /> <Rectangle Width="10" Height="10" Fill="#00ff00" /> <Rectangle Width="10" Height="10" Fill="#00ffff" /> <Rectangle Width="10" Height="10" Fill="#0000ff" /> <Rectangle Width="10" Height="10" Fill="#ff00ff" /> </UniformGrid> </VisualBrush.Visual> </VisualBrush> </DiffuseMaterial.Brush> </DiffuseMaterial> </GeometryModel3D.Material> <GeometryModel3D.Transform> <Transform3DGroup> <RotateTransform3D> <RotateTransform3D.Rotation> <AxisAngleRotation3D Axis="0 1 0" Angle="{Binding ElementName=horizontalScrollBar, Path=Value}" /> </RotateTransform3D.Rotation> </RotateTransform3D> <RotateTransform3D> <RotateTransform3D.Rotation> <AxisAngleRotation3D Axis="1 0 0" Angle="{Binding ElementName=verticalScrollBar, Path=Value}" /> </RotateTransform3D.Rotation> </RotateTransform3D> </Transform3DGroup> </GeometryModel3D.Transform> </GeometryModel3D> <AmbientLight Color="Gray" /> <DirectionalLight Color="Gray" Direction="2 -3 -1" /> </Model3DGroup> </ModelVisual3D.Content> </ModelVisual3D> <Viewport3D.Camera> <PerspectiveCamera Position="-2.5 2.5 5" LookDirection="2 -2 -4" UpDirection="0 1 0" FieldOfView="35" /> </Viewport3D.Camera> </Viewport3D> </DockPanel> </Window> |
TestProject.zip
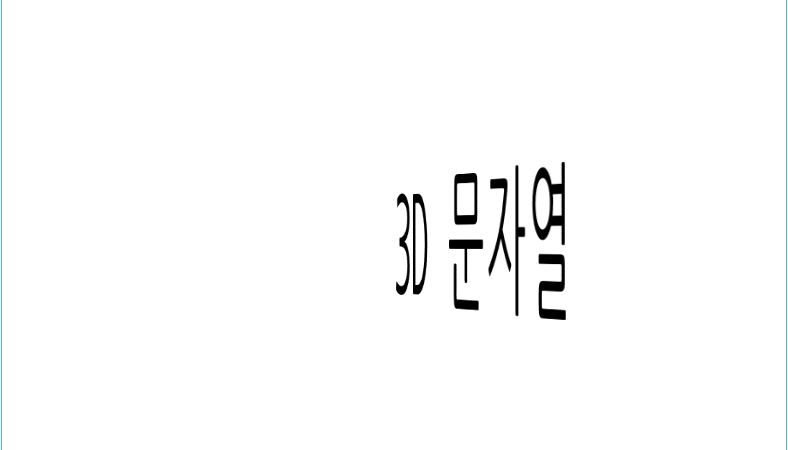
■ VisualBrush 엘리먼트의 Visual 속성을 사용해 텍스트를 표시하는 방법을 보여준다. ▶ MainWindow.xaml
|
1 2 3 4 5 6 7 8 9 10 11 12 13 14 15 16 17 18 19 20 21 22 23 24 25 26 27 28 29 30 31 32 33 34 35 36 37 38 39 40 41 42 43 44 45 46 47 48 49 50 51 52 53 54 55 56 57 58 59 60 61 62 63 64 65 66 67 68 69 70 71 72 73 |
<Window x:Class="TestProject.MainWindow" xmlns="http://schemas.microsoft.com/winfx/2006/xaml/presentation" xmlns:x="http://schemas.microsoft.com/winfx/2006/xaml" Width="800" Height="600" Title="VisualBrush 엘리먼트 : Visual 속성을 사용해 텍스트 표시하기" FontFamily="나눔고딕코딩" FontSize="16"> <Window.Resources> <DiffuseMaterial x:Key="TextDiffuseMaterialKey"> <DiffuseMaterial.Brush> <VisualBrush RenderOptions.CachingHint="Cache"> <VisualBrush.Visual> <TextBlock Text="3D 문자열" /> </VisualBrush.Visual> </VisualBrush> </DiffuseMaterial.Brush> </DiffuseMaterial> </Window.Resources> <Viewport3D> <ModelVisual3D> <ModelVisual3D.Content> <GeometryModel3D Material="{StaticResource TextDiffuseMaterialKey}" BackMaterial="{StaticResource TextDiffuseMaterialKey}"> <GeometryModel3D.Geometry> <MeshGeometry3D Positions="0 0 0, 0 1 0, 1 0 0, 1 1 0" TriangleIndices="0 2 3, 0 3 1" TextureCoordinates="0 1, 0 0, 1 1, 1 0" /> </GeometryModel3D.Geometry> <GeometryModel3D.Transform> <RotateTransform3D> <RotateTransform3D.Rotation> <AxisAngleRotation3D x:Name="axisAngleRotation3D" Axis="0 1 0" /> </RotateTransform3D.Rotation> </RotateTransform3D> </GeometryModel3D.Transform> </GeometryModel3D> </ModelVisual3D.Content> </ModelVisual3D> <ModelVisual3D> <ModelVisual3D.Content> <AmbientLight Color="White" /> </ModelVisual3D.Content> </ModelVisual3D> <Viewport3D.Camera> <PerspectiveCamera Position="0 0.5 1.5" LookDirection="0 0 -1" UpDirection="0 1 0" FieldOfView="120" /> </Viewport3D.Camera> </Viewport3D> <Window.Triggers> <EventTrigger RoutedEvent="Window.Loaded"> <BeginStoryboard> <Storyboard TargetName="axisAngleRotation3D" TargetProperty="Angle"> <DoubleAnimation From="360" To="0" Duration="0:0:10" RepeatBehavior="Forever" /> </Storyboard> </BeginStoryboard> </EventTrigger> </Window.Triggers> </Window> |
TestProject.zip

■ VisualBrush 엘리먼트를 사용해 격자를 그리는 방법을 보여준다. ▶ MainWindow.xaml
|
1 2 3 4 5 6 7 8 9 10 11 12 13 14 15 16 17 18 19 20 21 22 23 24 25 26 27 28 29 |
<Window x:Class="TestProject.MainWindow" xmlns="http://schemas.microsoft.com/winfx/2006/xaml/presentation" xmlns:x="http://schemas.microsoft.com/winfx/2006/xaml" Width="800" Height="600" Title="VisualBrush 엘리먼트 : 격자 그리기" FontFamily="나눔고딕코딩" FontSize="16"> <Canvas> <Canvas.Background> <VisualBrush TileMode="Tile" Viewport="0 0 50 50" ViewportUnits="Absolute" Viewbox="0 0 50 50" ViewboxUnits="Absolute"> <VisualBrush.Visual> <Rectangle Width="50" Height="50" Stroke="Darkgray" StrokeThickness="1" StrokeDashArray="2 2" /> </VisualBrush.Visual> </VisualBrush> </Canvas.Background> </Canvas> </Window> |
TestProject.zip
■ Visual 클래스의 TransformToAncestor 메소드를 사용해 부모 엘리먼트 기준 좌표를 구하는 방법을 보여준다. ———————————————————————————————————————— Point mousePoint = e.GetPosition(this.rectangle); Point parentMousePoint = this.rectangle.TransformToAncestor(this.canvas).Transform(mousePoint);
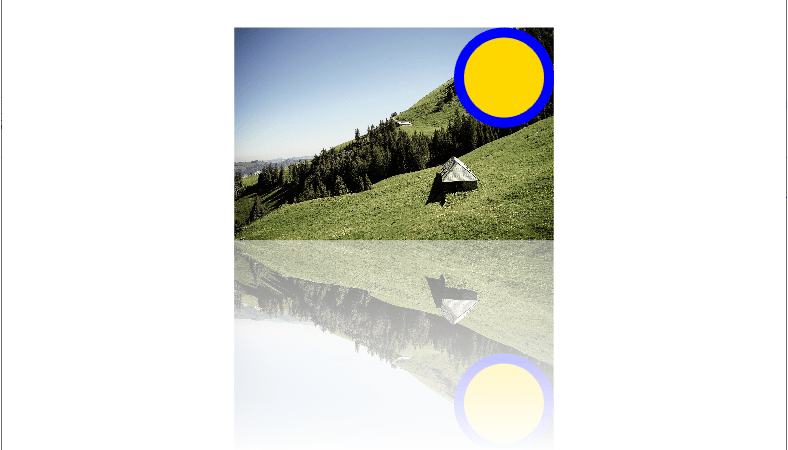
■ VisualBrush 엘리먼트의 RelativeTransform 속성을 사용해 엘리먼트 반사 이미지를 만드는 방법을 보여준다. ▶ MainWindow.xaml
|
1 2 3 4 5 6 7 8 9 10 11 12 13 14 15 16 17 18 19 20 21 22 23 24 25 26 27 28 29 30 31 32 33 34 35 36 37 38 39 40 41 42 43 44 45 46 47 48 49 50 51 52 |
<Window x:Class="TestProject.MainWindow" xmlns="http://schemas.microsoft.com/winfx/2006/xaml/presentation" xmlns:x="http://schemas.microsoft.com/winfx/2006/xaml" Width="800" Height="600" Title="VisualBrush 엘리먼트 : RelativeTransform 속성을 사용해 엘리먼트 반사 이미지 만들기" FontFamily="나눔고딕코딩" FontSize="16"> <StackPanel HorizontalAlignment="Center" VerticalAlignment="Center"> <Grid Name="sourceGrid" HorizontalAlignment="Center"> <Image Width="320" Height="213" Source="IMAGE/sample.jpg" /> <Ellipse HorizontalAlignment="Right" VerticalAlignment="Top" Width="100" Height="100" Stroke="Blue" StrokeThickness="10" Fill="Gold" /> </Grid> <Grid Width="{Binding ElementName=sourceGrid, Path=ActualWidth}" Height="{Binding ElementName=sourceGrid, Path=ActualHeight}"> <Grid.Background> <VisualBrush Visual="{Binding ElementName=sourceGrid}" Stretch="None"> <VisualBrush.RelativeTransform> <TransformGroup> <ScaleTransform ScaleX="1" ScaleY="-1" /> <TranslateTransform Y="1" /> </TransformGroup> </VisualBrush.RelativeTransform> </VisualBrush> </Grid.Background> <Grid.OpacityMask> <LinearGradientBrush StartPoint="0 0" EndPoint="0 1"> <GradientStop Offset="0" Color="#80000000" /> <GradientStop Offset="1" Color="#00000000" /> </LinearGradientBrush> </Grid.OpacityMask> </Grid> </StackPanel> </Window> |
TestProject.zip

■ VisualBrush 엘리먼트의 Visual 속성을 사용하는 방법을 보여준다. ▶ MainWindow.xaml
|
1 2 3 4 5 6 7 8 9 10 11 12 13 14 15 16 17 18 |
<Window x:Class="TestProject.MainWindow" xmlns="http://schemas.microsoft.com/winfx/2006/xaml/presentation" xmlns:x="http://schemas.microsoft.com/winfx/2006/xaml" Width="800" Height="600" Title="VisualBrush 엘리먼트 : Visual 속성을 사용하기" FontFamily="나눔고딕코딩" FontSize="16"> <Window.Background> <VisualBrush> <VisualBrush.Visual> <Button Content="Button?" /> </VisualBrush.Visual> </VisualBrush> </Window.Background> </Window> |
TestProject.zip

■ VisualBrush 엘리먼트를 사용하는 방법을 보여준다. ▶ 예제 코드 (XAML)
|
1 2 3 4 5 6 7 8 9 10 11 12 13 14 15 16 17 18 19 20 21 22 23 24 25 26 27 28 29 30 31 32 33 34 35 36 37 38 39 40 41 42 43 44 45 46 47 48 49 50 51 52 53 54 55 56 57 58 59 60 61 62 63 64 65 66 67 68 69 70 71 72 73 74 75 76 77 78 79 80 81 82 83 84 85 86 87 88 89 90 91 92 93 94 95 96 97 98 99 100 101 102 103 104 105 106 107 108 109 |
<Page xmlns="http://schemas.microsoft.com/winfx/2006/xaml/presentation" xmlns:x="http://schemas.microsoft.com/winfx/2006/xaml"> <Page.Resources> <Style TargetType="{x:Type Rectangle}"> <Setter Property="Margin" Value="5" /> <Setter Property="Width" Value="150" /> <Setter Property="Height" Value="150" /> <Setter Property="Stroke" Value="Black" /> <Setter Property="StrokeThickness" Value="1" /> </Style> </Page.Resources> <StackPanel Margin="10 10 10 10" Orientation="Horizontal" VerticalAlignment="Top"> <Rectangle> <Rectangle.Fill> <VisualBrush TileMode="Tile"> <VisualBrush.Visual> <StackPanel> <StackPanel.Background> <DrawingBrush> <DrawingBrush.Drawing> <GeometryDrawing> <GeometryDrawing.Brush> <RadialGradientBrush> <GradientStop Offset="0.0" Color="MediumBlue" /> <GradientStop Offset="1.0" Color="White" /> </RadialGradientBrush> </GeometryDrawing.Brush> <GeometryDrawing.Geometry> <GeometryGroup> <RectangleGeometry Rect="0 0 0.5 0.5" /> <RectangleGeometry Rect="0.5 0.5 0.5 0.5" /> </GeometryGroup> </GeometryDrawing.Geometry> </GeometryDrawing> </DrawingBrush.Drawing> </DrawingBrush> </StackPanel.Background> <TextBlock Margin="10" FontSize="10pt"> Hello, World! </TextBlock> </StackPanel> </VisualBrush.Visual> </VisualBrush> </Rectangle.Fill> </Rectangle> <Rectangle> <Rectangle.Fill> <VisualBrush Stretch="Uniform" TileMode="Tile" Viewport="0 0 1 0.25"> <VisualBrush.Visual> <StackPanel Background="White"> <TextBlock Margin="1" FontSize="10pt"> Hello, World! </TextBlock> </StackPanel> </VisualBrush.Visual> </VisualBrush> </Rectangle.Fill> </Rectangle> <Rectangle> <Rectangle.Fill> <VisualBrush Stretch="Uniform" Viewport="0 0 1 0.25" TileMode="Tile"> <VisualBrush.Visual> <StackPanel Background="White"> <TextBlock FontSize="10pt" Margin="1"> Hello, World! </TextBlock> </StackPanel> </VisualBrush.Visual> <VisualBrush.RelativeTransform> <RotateTransform CenterX="0.5" CenterY="0.5" Angle="-45" /> </VisualBrush.RelativeTransform> </VisualBrush> </Rectangle.Fill> </Rectangle> <Rectangle> <Rectangle.Fill> <VisualBrush> <VisualBrush.Visual> <StackPanel Background="White"> <Button Margin="1">Button Control</Button> <Button Margin="1">Another Button</Button> </StackPanel> </VisualBrush.Visual> </VisualBrush> </Rectangle.Fill> </Rectangle> </StackPanel> </Page> |