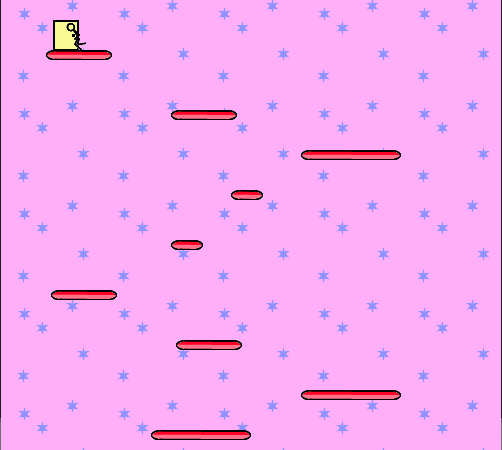
■ tkinter 모듈을 사용해 미스터 스틱맨 게임을 만드는 방법을 보여준다. ▶ location.py
1 2 3 4 5 6 7 8 9 10 11 12 13 14 15 16 17 18 19 20 21 22 23 24 25 26 27 28 29 30 31 32 33 34 35 36 37 38 39 40 41 42 43 44 45 46 47 48 49 50 51 52 |
class Location: def __init__(self, x1 = 0, y1 = 0, x2 = 0, y2 = 0): self.x1 = x1 self.y1 = y1 self.x2 = x2 self.y2 = y2 def isWithinX(location1, location2): if (location1.x1 > location2.x1 and location1.x1 < location2.x2) or \ (location1.x2 > location2.x1 and location1.x2 < location2.x2) or \ (location2.x1 > location1.x1 and location2.x1 < location1.x2) or \ (location2.x2 > location1.x1 and location2.x2 < location1.x1): return True else: return False def isWithinY(location1, location2): if (location1.y1 > location2.y1 and location1.y1 < location2.y2) or \ (location1.y2 > location2.y1 and location1.y2 < location2.y2) or \ (location2.y1 > location1.y1 and location2.y1 < location1.y2) or \ (location2.y2 > location1.y1 and location2.y2 < location1.y1): return True else: return False def isLeftCollided(location1, location2): if isWithinY(location1, location2): if location1.x1 <= location2.x2 and location1.x1 >= location2.x1: return True return False def isRightCollided(location1, location2): if isWithinY(location1, location2): if location1.x2 >= location2.x1 and location1.x2 <= location2.x2: return True return False def isTopCollided(location1, location2): if isWithinX(location1, location2): if location1.y1 <= location2.y2 and location1.y1 >= location2.y1: return True return False def isBottomCollided(bottom, location1, location2): if isWithinX(location1, location2): baseY = location1.y2 + bottom if baseY >= location2.y1 and baseY <= location2.y2: return True return False |
▶ sprite.py
|
|
class Sprite: def __init__(self, game): self.game = game self.isFinished = False self.location = None def move(self): pass def getLocation(self): return self.location |
▶ platformsprite.py
|
|
from location import * from sprite import * class PlatformSprite(Sprite): def __init__(self, game, photoImage, x, y, width, height): Sprite.__init__(self, game) self.photoImage = photoImage self.image = game.canvas.create_image(x, y, image = self.photoImage, anchor = "nw") self.location = Location(x, y, x + width, y + height) |
▶ doorsprite.py
|
|
from location import * from sprite import * class DoorSprite(Sprite): def __init__(self, game, photoImage, x, y, width, height): Sprite.__init__(self, game) self.photoImage = photoImage self.image = game.canvas.create_image(x, y, image = self.photoImage, anchor = "nw") self.location = Location(x, y, x + (width / 2), y + height) self.isFinished = True |
더 읽기
■ PhotoImage 클래스의 width/height 메소드를 사용해 이미지 크기를 구하는 방법을 보여준다. ▶ 예제 코드 (PYTHON)
1 2 3 4 5 6 7 8 9 10 11 12 13 14 15 16 17 18 19 20 21 |
from tkinter import * tk = Tk() canvas = Canvas(tk, width = 500, height = 500) canvas.pack() photoImage = PhotoImage(file = "images/background.png") print("이미지 크기 : %dx%d" % (photoImage.width(), photoImage.height())) canvas.create_image(0, 0, anchor = NW, image = photoImage) tk.mainloop() """ 이미지 크기 : 100x100 """ |
background.png
■ tkinter 모듈을 사용해 바운스 게임을 만드는 방법을 보여준다. ▶ ball.py
1 2 3 4 5 6 7 8 9 10 11 12 13 14 15 16 17 18 19 20 21 22 23 24 25 26 27 28 29 30 31 32 33 34 35 36 37 38 39 40 41 42 43 44 45 46 47 48 49 50 |
import random class Ball: def __init__(self, canvas, paddle, color): self.canvas = canvas self.paddle = paddle self.id = canvas.create_oval(10, 10, 25, 25, fill = color) self.canvas.move(self.id, 245, 100) startXList = [-3, -2, -1, 1, 2, 3] random.shuffle(startXList) self.x = startXList[0] self.y = -3 self.canvas_height = self.canvas.winfo_height() self.canvas_width = self.canvas.winfo_width() self.hitBottom = False def draw(self): self.canvas.move(self.id, self.x, self.y) position = self.canvas.coords(self.id) if position[1] <= 0: self.y = 3 if self.hitPaddle(position) == True: self.y = -3 if position[3] >= self.canvas_height: self.hitBottom = True if position[0] <= 0: self.x = 3 if position[2] >= self.canvas_width: self.x = -3 def hitPaddle(self, position): paddle_pos = self.canvas.coords(self.paddle.id) if position[2] >= paddle_pos[0] and position[0] <= paddle_pos[2]: if position[3] >= paddle_pos[1] and position[3] <= paddle_pos[3]: return True return False |
▶ paddle.py
1 2 3 4 5 6 7 8 9 10 11 12 13 14 15 16 17 18 19 20 21 22 23 24 25 26 27 28 29 30 |
class Paddle: def __init__(self, canvas, color): self.canvas = canvas self.id = canvas.create_rectangle(0, 0, 100, 10, fill = color) self.canvas.move(self.id, 200, 450) self.x = 0 self.canvas_width = self.canvas.winfo_width() self.canvas.bind_all('<KeyPress-Left>' , self.moveLeft ) self.canvas.bind_all('<KeyPress-Right>', self.moveRight) def moveLeft(self, evt): self.x = -2 def moveRight(self, evt): self.x = 2 def draw(self): self.canvas.move(self.id, self.x, 0) position = self.canvas.coords(self.id) if position[0] <= 0: self.x = 0 elif position[2] >= self.canvas_width: self.x = 0 |
▶ main.py
1 2 3 4 5 6 7 8 9 10 11 12 13 14 15 16 17 18 19 20 21 22 23 24 25 26 27 28 29 30 31 32 33 34 35 |
import random import time from tkinter import * from ball import * from paddle import * tk = Tk() tk.title("Game") tk.resizable(False, False) tk.wm_attributes("-topmost", True) canvas = Canvas(tk, width = 500, height = 500, bd = 0, highlightthickness = 0) canvas.pack() tk.update() paddle = Paddle(canvas, "blue") ball = Ball(canvas, paddle, "red") while True: if ball.hitBottom == False: ball.draw() paddle.draw() tk.update_idletasks() tk.update() time.sleep(0.01) |
TestProject.zip
■PyInstaller 모듈에서 .spec 파일을 사용해 실행 프로그램을 생성하는 방법을 보여준다. 1. 아래와 같이 .spec 파일을 작성한다. ▶ TestProject.spec
1 2 3 4 5 6 7 8 9 10 11 12 13 14 15 16 17 18 19 20 21 22 23 24 25 26 27 28 29 30 31 32 33 34 35 36 37 38 39 40 |
# -*- mode: python ; coding: utf-8 -*- a = Analysis( ['main.py'], pathex=[], binaries=[], datas=[('./images/*', './images')], hiddenimports=[], hookspath=[], hooksconfig={}, runtime_hooks=[], excludes=[], noarchive=False, optimize=0, ) pyz = PYZ(a.pure) exe = EXE( pyz, a.scripts, a.binaries, a.datas, [], name='TestProject', debug=False, bootloader_ignore_signals=False, strip=False, upx=True, upx_exclude=[], runtime_tmpdir=None, console=False, disable_windowed_traceback=False, argv_emulation=False, target_arch=None, codesign_identity=None, entitlements_file=None, icon=['images\\mars.ico'], ) |
2. 아래와 같이
더 읽기
■ PyInstaller 모듈 : 실행 파일 생성시 –exclude 옵션을 사용해 실행 프로그램 용량 줄이기 ▶ 실행 명령
|
|
pyinstaller -F -w --exclude pandas --exclude numpy main.py |
※ pandas와 numpy 모듈은
더 읽기
■ PyInstaller 모듈을 사용해 TkInter GUI 프로그램을 배포하는 방법을 보여준다. 1. PyInstaller 모듈 설치 (미설치시) 1.1 명령 프롬프트를 실행한다. 1.2 명령 프롬프트에서
더 읽기
■ Tk 클래스의 iconbitmap 메소드를 사용해 아이콘을 설정하는 방법을 보여준다. ▶ 예제 코드 (PYTHON)
|
|
from tkinter import * tk = Tk() tk.geometry("500x500") tk.iconbitmap("./images/mars.ico") |
※ 첨부 파일은 .ico 파일을 .zip 파일로
더 읽기
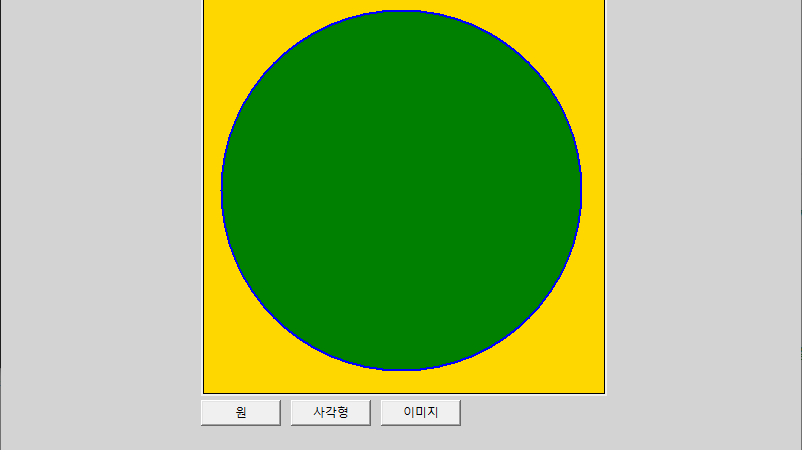
■ Tk 클래스의 configure 메소드를 사용해 윈도우 배경색을 설정하는 방법을 보여준다. ▶ 예제 코드 (PY)
|
|
from tkinter import * tk = Tk() tk.geometry("500x500") tk.configure(bg = "gold") tk.mainloop() |
■ Canvas 클래스의 pack 메소드를 사용해 컨트롤 마진을 설정하는 방법을 보여준다. ▶ 예제 코드 (PY)
|
|
from tkinter import * tk = Tk() tk.geometry("500x500") canvas = Canvas(tk, width = 300, height = 300, background = "gray") canvas.pack(padx = 100, pady = 100) tk.mainloop() |
■ Label 클래스의 place_info 메소드를 사용해 레이블 위치를 구하는 방법을 보여준다. ▶ 예제 코드 (PY)
1 2 3 4 5 6 7 8 9 10 11 12 13 14 15 16 17 18 19 20 21 22 23 24 25 |
from tkinter import * tk = Tk() tk.geometry("500x500") label = Label(tk, text = "테스트") label.place(x = 100, y = 100) placeInfoDictionary = label.place_info() print(placeInfoDictionary) print("x = ", placeInfoDictionary["x"]) print("y = ", placeInfoDictionary["y"]) tk.mainloop() """ {'in': <tkinter.Tk object .>, 'x': '100', 'relx': '0', 'y': '100', 'rely': '0', 'width': '', 'relwidth': '', 'height': '', 'relheight': '', 'anchor': 'nw', 'bordermode': 'inside'} x = 100 y = 100 """ |
■ Tk 클래스의 winfo_screenwidth/winfo_screenheight 메소드를 사용해 화면 크기를 구하는 방법을 보여준다. ▶ 예제 코드 (PY)
1 2 3 4 5 6 7 8 9 10 11 12 13 14 15 16 17 18 19 20 21 22 23 |
from tkinter import * tk = Tk() tk.geometry("500x500") label = Label(tk, text = "Width = , Height = ") label.place(x = 100, y = 100) def showScreenSize(): width = tk.winfo_screenwidth() height = tk.winfo_screenheight() label.config(text = "Width = %d, Height = %d" % (width, height)) button = Button(tk, text = "click", command = showScreenSize) button.place(x = 100, y = 130) tk.mainloop() |
■ Label 클래스의 config 메소드를 사용해 텍스트를 설정하는 방법을 보여준다. ▶ 예제 코드 (PY)
|
|
from tkinter import * tk = Tk() tk.geometry("500x500") label = Label(tk, text = "테스트 문자열 1입니다.") label.place(x = 100, y = 100) label.config(text = "테스트 문자열 2입니다.") tk.mainloop() |
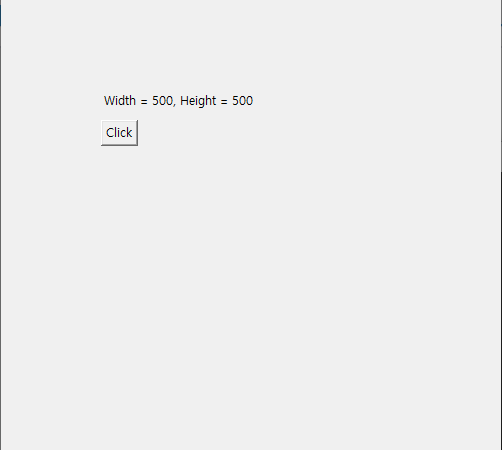
■ Tk 클래스의 winfo_width/winfo_height 함수를 사용해 윈도우 크기를 구하는 방법을 보여준다. ▶ 예제 코드 (PY)
1 2 3 4 5 6 7 8 9 10 11 12 13 14 15 16 17 18 19 20 21 22 23 |
from tkinter import * tk = Tk() tk.geometry("500x500") label = Label(tk, text = "Width = , Height = ") label.place(x = 100, y = 100) def showWindowSize(): width = tk.winfo_width() height = tk.winfo_height() label.config(text = "Width = %d, Height = %d" % (width, height)) button = Button(tk, text = "Click", command = showWindowSize) button.place(x = 100, y = 130) tk.mainloop() |
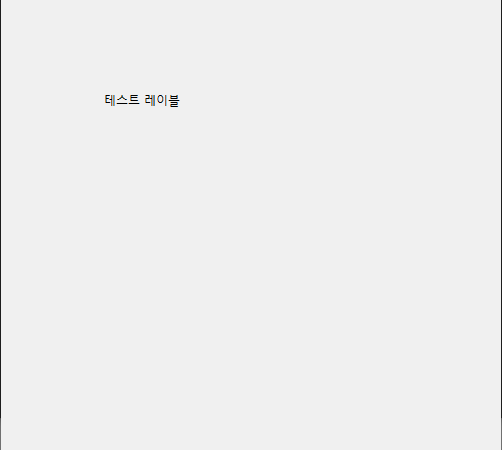
■ Label 클래스를 사용해 텍스트 레이블을 생성하는 방법을 보여준다. ▶ 예제 코드 (PY)
1 2 3 4 5 6 7 8 9 10 11 12 13 14 15 16 17 |
from tkinter import * tk = Tk() tk.geometry("500x500") canvas = Canvas(tk) canvas.pack() label = Label(tk, text = "테스트 레이블") label.place(x = 100, y = 100) tk.mainloop() |
■ Canvas 클래스의 place 메소드를 사용해 캔버스 위치를 설정하는 방법을 보여준다. ▶ 예제 코드 (PY)
|
|
import tkinter tk = tkinter.Tk() tk.geometry("500x500") canvas = tkinter.Canvas(tk, width = 400, height = 400, relief="solid", bd = 1) canvas.pack() canvas.place(x = 50, y = 50) tk.mainloop() |
■ Tk 클래스의 geometry 메소드를 사용해 윈도우 크기를 설정하는 방법을 보여준다. ▶ 예제 코드 (PY)
|
|
from tkinter import * tk = Tk() tk.geometry("500x500+100+100") # 윈도우 너비x윈도우 높이+윈도우 X+윈도우 Y tk.mainloop() |
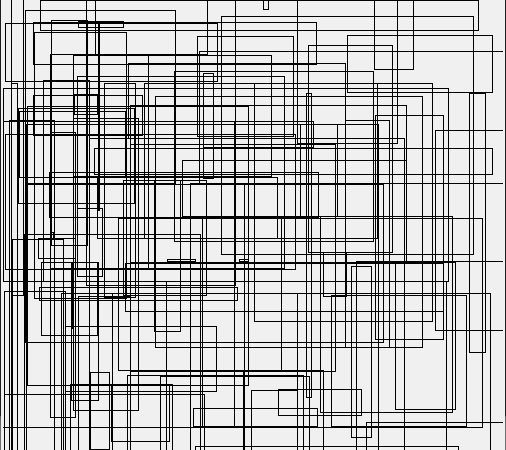
■ Canvas 클래스의 create_rectangle 메소드를 사용해 임의 사각형들을 그리는 방법을 보여준다. ▶ 예제 코드 (PY)
1 2 3 4 5 6 7 8 9 10 11 12 13 14 15 16 17 18 19 20 |
import random from tkinter import * def drawRandomRectangle(canvas, width, height): x1 = random.randrange(width) y1 = random.randrange(height) x2 = random.randrange(x1 + random.randrange(width)) y2 = random.randrange(y1 + random.randrange(height)) canvas.create_rectangle(x1, y1, x2, y2) tk = Tk() canvas = Canvas(tk, width = 500, height = 500) canvas.pack() for i in range(0, 100): drawRandomRectangle(canvas, 500, 500) |
■ Canvas 클래스를 사용해 캔버스 객체 생성시 외곽선을 제거하고 배경색을 설정하는 방법을 보여준다. ▶ 예제 코드 (PY)
|
|
from tkinter import * tk = Tk() tk.geometry("500x500+100+100") canvas = Canvas(tk, width = 400, height = 400, bd = 0, highlightthickness = 0, bg = "gold") canvas.pack() canvas.place(x = 50, y = 50) tk.mainloop() |
■ Canvas 클래스의 coords 메소드를 사용해 해당 ID 객체의 좌상단/우하단 좌표를 구하는 방법을 보여준다. ▶ 예제 코드 (PY)
1 2 3 4 5 6 7 8 9 10 11 12 13 14 15 16 17 18 19 |
from tkinter import * tk = Tk() canvas = Canvas(tk, width = 400, height = 400) canvas.pack() oval = canvas.create_oval(10, 10, 50, 50, fill = "red") position = canvas.coords(oval) print(position) """ [10.0, 10.0, 50.0, 50.0] """ |
■ Canvas 클래스의 winfo_width/winfo_height 메소드를 사용해 캔버스 너비/높이를 구하는 방법을 보여준다. ▶ 예제 코드 (PY)
|
|
from tkinter import * tk = Tk() canvas = Canvas(tk, width = 400, height = 400) canvas.pack() canvasWidth = canvas.winfo_width() canvasHeight = canvas.winfo_height() |
■ Tk 클래스의 update_idletasks 함수를 사용해 유휴 태스크를 처리하는 방법을 보여준다. ▶ 예제 코드 (PY)
|
|
from tkinter import * tk = Tk() tk.update_idletasks() |
■ Canvas 클래스의 create_oval 메소드를 사용해 원을 그리는 방법을 보여준다. ▶ 예제 코드 (PY)
|
|
from tkinter import * tk = Tk() canvas = Canvas(tk, width = 500, height = 500) canvas.pack() canvas.create_oval(100, 100, 400, 400, fill = "red") tk.mainloop() |
■ Canvas 클래스를 사용해 캔버스 객체 생성시 캔버스 크기/테두리 너비를 설정하는 방법을 보여준다. ▶ 예제 코드 (PY)
1 2 3 4 5 6 7 8 9 10 11 12 13 14 15 16 17 18 19 20 |
import tkinter tk = tkinter.Tk() tk.geometry("500x500") canvas = tkinter.Canvas(tk, width = 400, height = 400, relief="solid", bd = 1) canvas.pack() canvas.place(x = 50, y = 50) canvas.create_line(10, 10, 20, 20, 20, 130, 30, 140, fill = "red") canvas.create_polygon(50, 50, 170, 170, 100, 170, outline = "yellow") canvas.create_oval(100, 200, 150, 250, fill = "blue", width = 3) canvas.create_arc(100, 100, 300, 300, start = 0, extent = 150, fill = "red") tk.mainloop() |
■ Tk 클래스의 wm_attributes 함수를 사용해 최상위 윈도우를 설정하는 방법을 보여준다. ▶ 예제 코드 (PY)
|
|
from tkinter import * tk = Tk() tk.wm_attributes("-topmost", 1) canvas = Canvas(tk, width = 500, height = 500) canvas.pack() tk.mainloop() |
■ resizable 함수를 사용해 윈도우 크기를 고정하는 방법을 보여준다. ▶ 예제 코드 (PY)
|
|
from tkinter import * tk = Tk() tk.resizable(False, False) # X축 크기 조절, Y축 크기 조절 canvas = Canvas(tk, width = 500, height = 500) canvas.pack() tk.mainloop() |
