[C#/COMMON/SHARPDX] SharpDX.Direct3D11 누겟 설치하기
■ SharpDX.Direct3D11 누겟을 설치하는 방법을 보여준다. 1. Visual Studio를 실행한다. 2. [도구] / [NuGet 패키지 관리자] / [패키지 관리자 콘솔] 메뉴를 실행한다.
■ SharpDX.Direct3D11 누겟을 설치하는 방법을 보여준다. 1. Visual Studio를 실행한다. 2. [도구] / [NuGet 패키지 관리자] / [패키지 관리자 콘솔] 메뉴를 실행한다.
■ SharpDX.Direct2D1 누겟을 설치하는 방법을 보여준다. 1. Visual Studio를 실행한다. 2. [도구] / [NuGet 패키지 관리자] / [패키지 관리자 콘솔] 메뉴를 실행한다.
■ SharpDX 누겟을 설치하는 방법을 보여준다. 1. Visual Studio를 실행한다. 2. [도구] / [NuGet 패키지 관리자] / [패키지 관리자 콘솔] 메뉴를 실행한다.
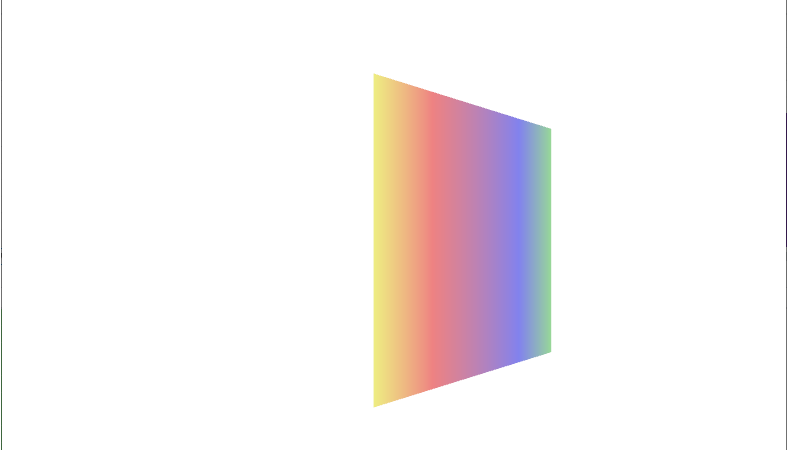
■ GeometryModel3D 엘리먼트의 Material 속성에서 재료 속성의 애니메이션을 만드는 방법을 보여준다. ▶ MainWindow.xaml
|
1 2 3 4 5 6 7 8 9 10 11 12 13 14 15 16 17 18 19 20 21 22 23 24 25 26 27 28 29 30 31 32 33 34 35 36 37 38 39 40 41 42 43 44 45 46 47 48 49 50 51 52 53 54 55 56 57 58 59 60 61 62 63 64 65 66 67 68 69 70 71 72 73 74 75 76 77 78 79 80 81 82 83 84 |
<Window x:Class="TestProject.MainWindow" xmlns="http://schemas.microsoft.com/winfx/2006/xaml/presentation" xmlns:x="http://schemas.microsoft.com/winfx/2006/xaml" Width="800" Height="600" Title="TestProject" FontFamily="나눔고딕코딩" FontSize="16"> <Viewport3D Width="500" Height="500" ClipToBounds="True"> <Viewport3D.Camera> <PerspectiveCamera Position="0 0 2" LookDirection="0 0 -1" FieldOfView="60" /> </Viewport3D.Camera> <Viewport3D.Children> <ModelVisual3D> <ModelVisual3D.Content> <DirectionalLight Direction="-0.612372 -0.5 -0.612372" Color="#ffffff" /> </ModelVisual3D.Content> </ModelVisual3D> <ModelVisual3D> <ModelVisual3D.Content> <GeometryModel3D> <GeometryModel3D.Geometry> <MeshGeometry3D TriangleIndices="0 1 2 3 4 5 " Normals="0 0 1 0 0 1 0 0 1 0 0 1 0 0 1 0 0 1 " TextureCoordinates="0 0 1 0 1 1 1 1 0 1 0 0 " Positions="-0.5 -0.5 0.5 0.5 -0.5 0.5 0.5 0.5 0.5 0.5 0.5 0.5 -0.5 0.5 0.5 -0.5 -0.5 0.5 " /> </GeometryModel3D.Geometry> <GeometryModel3D.Material> <DiffuseMaterial> <DiffuseMaterial.Brush> <LinearGradientBrush x:Name="linearGradientBrush" StartPoint="0 0.5" EndPoint="1 0.5"> <LinearGradientBrush.GradientStops> <GradientStop Offset="0" Color="Yellow" /> <GradientStop Offset="0.25" Color="Red" /> <GradientStop Offset="0.75" Color="Blue" /> <GradientStop Offset="1" Color="LimeGreen" /> </LinearGradientBrush.GradientStops> </LinearGradientBrush> </DiffuseMaterial.Brush> </DiffuseMaterial> </GeometryModel3D.Material> <GeometryModel3D.Transform> <RotateTransform3D> <RotateTransform3D.Rotation> <AxisAngleRotation3D Axis="0 3 0" Angle="40" /> </RotateTransform3D.Rotation> </RotateTransform3D> </GeometryModel3D.Transform> </GeometryModel3D> </ModelVisual3D.Content> </ModelVisual3D> </Viewport3D.Children> <Viewport3D.Triggers> <EventTrigger RoutedEvent="Viewport3D.Loaded"> <BeginStoryboard> <Storyboard> <DoubleAnimation Storyboard.TargetName="linearGradientBrush" Storyboard.TargetProperty="Opacity" Duration="00:00:02" To="0.1" AutoReverse="True" RepeatBehavior="Forever" /> </Storyboard> </BeginStoryboard> </EventTrigger> </Viewport3D.Triggers> </Viewport3D> </Window> |
TestProject.zip
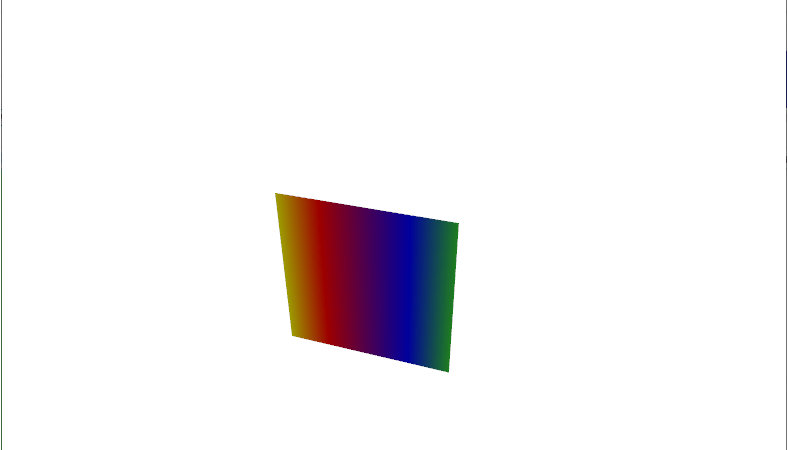
■ PerspectiveCamera 엘리먼트에 대해 Point3DAnimationUsingKeyFrames/Vector3DAnimationUsingKeyFrames 객체를 사용해 카메라 위치와 방향을 움직이는 애니메니션을 만드는 방법을 보여준다. ▶ MainWindow.xaml
|
1 2 3 4 5 6 7 8 9 10 11 12 13 14 15 16 17 18 19 20 21 22 23 24 25 26 27 28 29 30 31 32 33 34 35 36 37 38 39 40 41 42 43 44 45 46 47 48 49 50 51 52 53 54 55 56 57 58 59 60 61 62 63 64 65 66 67 68 69 70 71 72 73 74 75 76 77 78 79 80 81 82 83 84 85 86 87 88 89 90 91 92 93 94 95 96 97 98 99 100 101 102 103 104 105 106 107 108 109 110 111 112 113 114 115 |
<Window x:Class="TestProject.MainWindow" xmlns="http://schemas.microsoft.com/winfx/2006/xaml/presentation" xmlns:x="http://schemas.microsoft.com/winfx/2006/xaml" Width="800" Height="600" Title="TestProject" FontFamily="나눔고딕코딩" FontSize="16"> <Viewport3D Width="500" Height="500" ClipToBounds="True"> <Viewport3D.Camera> <PerspectiveCamera x:Name="perspectiveCamera" Position="0 0 2" LookDirection="0 0 -1" FieldOfView="45" /> </Viewport3D.Camera> <Viewport3D.Children> <ModelVisual3D> <ModelVisual3D.Children> <ModelVisual3D> <ModelVisual3D.Content> <DirectionalLight Direction="-0.612372 -0.5 -0.612372" Color="#ffffff" /> </ModelVisual3D.Content> </ModelVisual3D> <ModelVisual3D> <ModelVisual3D.Content> <GeometryModel3D> <GeometryModel3D.Geometry> <MeshGeometry3D TriangleIndices="0 1 2 3 4 5 " Normals="0 0 1 0 0 1 0 0 1 0 0 1 0 0 1 0 0 1 " TextureCoordinates="0 0 1 0 1 1 1 1 0 1 0 0 " Positions="-0.5 -0.5 0.5 0.5 -0.5 0.5 0.5 0.5 0.5 0.5 0.5 0.5 -0.5 0.5 0.5 -0.5 -0.5 0.5 " /> </GeometryModel3D.Geometry> <GeometryModel3D.Material> <MaterialGroup> <DiffuseMaterial> <DiffuseMaterial.Brush> <LinearGradientBrush StartPoint="0 0.5" EndPoint="1 0.5"> <LinearGradientBrush.GradientStops> <GradientStop Offset="0" Color="Yellow" /> <GradientStop Offset="0.25" Color="Red" /> <GradientStop Offset="0.75" Color="Blue" /> <GradientStop Offset="1" Color="LimeGreen" /> </LinearGradientBrush.GradientStops> </LinearGradientBrush> </DiffuseMaterial.Brush> </DiffuseMaterial> </MaterialGroup> </GeometryModel3D.Material> <GeometryModel3D.Transform> <RotateTransform3D> <RotateTransform3D.Rotation> <QuaternionRotation3D x:Name="quaternionRotation3D" /> </RotateTransform3D.Rotation> </RotateTransform3D> </GeometryModel3D.Transform> </GeometryModel3D> </ModelVisual3D.Content> </ModelVisual3D> </ModelVisual3D.Children> </ModelVisual3D> </Viewport3D.Children> <Viewport3D.Triggers> <EventTrigger RoutedEvent="Viewport3D.Loaded"> <BeginStoryboard> <Storyboard AutoReverse="True" RepeatBehavior="Forever"> <Point3DAnimationUsingKeyFrames Storyboard.TargetName="perspectiveCamera" Storyboard.TargetProperty="Position" > <Point3DAnimationUsingKeyFrames.KeyFrames> <LinearPoint3DKeyFrame KeyTime="00:00:01" Value="1 2 3" /> <DiscretePoint3DKeyFrame KeyTime="00:00:01.5" Value="1 2 5" /> <SplinePoint3DKeyFrame KeyTime="00:00:04" KeySpline="0.6 0.0 0.9 0.00" Value="0 0 2" /> </Point3DAnimationUsingKeyFrames.KeyFrames> </Point3DAnimationUsingKeyFrames> <Vector3DAnimationUsingKeyFrames Storyboard.TargetName="perspectiveCamera" Storyboard.TargetProperty="LookDirection"> <Vector3DAnimationUsingKeyFrames.KeyFrames> <LinearVector3DKeyFrame KeyTime="00:00:01" Value="-1 -2 -3" /> <DiscreteVector3DKeyFrame KeyTime="00:00:01.5" Value="-1 -1 -3" /> <SplineVector3DKeyFrame KeyTime="00:00:04" KeySpline="0.6 0.0 0.9 0.00" Value="0 0 -1" /> </Vector3DAnimationUsingKeyFrames.KeyFrames> </Vector3DAnimationUsingKeyFrames> </Storyboard> </BeginStoryboard> </EventTrigger> </Viewport3D.Triggers> </Viewport3D> </Window> |
TestProject.zip
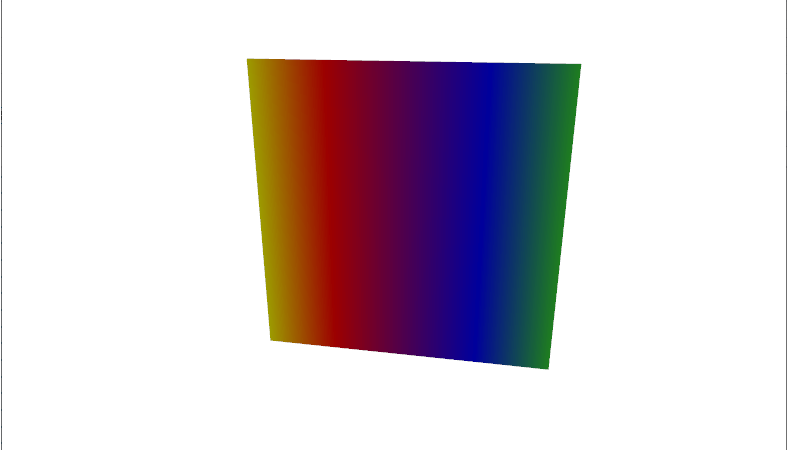
■ PerspectiveCamera 엘리먼트에 대해 Point3DAnimation/Vector3DAnimation 객체를 사용해 카메라 위치와 방향을 움직이는 애니메니션을 만드는 방법을 보여준다. ▶ MainWindow.xaml
|
1 2 3 4 5 6 7 8 9 10 11 12 13 14 15 16 17 18 19 20 21 22 23 24 25 26 27 28 29 30 31 32 33 34 35 36 37 38 39 40 41 42 43 44 45 46 47 48 49 50 51 52 53 54 55 56 57 58 59 60 61 62 63 64 65 66 67 68 69 70 71 72 73 74 75 76 77 78 79 80 81 82 83 84 85 86 87 88 89 90 91 92 93 94 95 |
<Window x:Class="TestProject.MainWindow" xmlns="http://schemas.microsoft.com/winfx/2006/xaml/presentation" xmlns:x="http://schemas.microsoft.com/winfx/2006/xaml" Width="800" Height="600" Title="TestProject" FontFamily="나눔고딕코딩" FontSize="16"> <Viewport3D Width="500" Height="500" ClipToBounds="True"> <Viewport3D.Camera> <PerspectiveCamera x:Name="perspectiveCamera" Position="0 0 2" LookDirection="0 0 -1" FieldOfView="45" /> </Viewport3D.Camera> <Viewport3D.Children> <ModelVisual3D> <ModelVisual3D.Children> <ModelVisual3D> <ModelVisual3D.Content> <DirectionalLight Direction="-0.612372 -0.5 -0.612372" Color="#ffffff" /> </ModelVisual3D.Content> </ModelVisual3D> <ModelVisual3D> <ModelVisual3D.Content> <GeometryModel3D> <GeometryModel3D.Geometry> <MeshGeometry3D TriangleIndices="0 1 2 3 4 5 " Normals="0 0 1 0 0 1 0 0 1 0 0 1 0 0 1 0 0 1 " TextureCoordinates="0 0 1 0 1 1 1 1 0 1 0 0 " Positions="-0.5 -0.5 0.5 0.5 -0.5 0.5 0.5 0.5 0.5 0.5 0.5 0.5 -0.5 0.5 0.5 -0.5 -0.5 0.5 " /> </GeometryModel3D.Geometry> <GeometryModel3D.Material> <MaterialGroup> <DiffuseMaterial> <DiffuseMaterial.Brush> <LinearGradientBrush StartPoint="0 0.5" EndPoint="1 0.5"> <LinearGradientBrush.GradientStops> <GradientStop Offset="0" Color="Yellow" /> <GradientStop Offset="0.25" Color="Red" /> <GradientStop Offset="0.75" Color="Blue" /> <GradientStop Offset="1" Color="LimeGreen" /> </LinearGradientBrush.GradientStops> </LinearGradientBrush> </DiffuseMaterial.Brush> </DiffuseMaterial> </MaterialGroup> </GeometryModel3D.Material> <GeometryModel3D.Transform> <RotateTransform3D> <RotateTransform3D.Rotation> <QuaternionRotation3D x:Name="quaternionRotation3D" /> </RotateTransform3D.Rotation> </RotateTransform3D> </GeometryModel3D.Transform> </GeometryModel3D> </ModelVisual3D.Content> </ModelVisual3D> </ModelVisual3D.Children> </ModelVisual3D> </Viewport3D.Children> <Viewport3D.Triggers> <EventTrigger RoutedEvent="Viewport3D.Loaded"> <BeginStoryboard> <Storyboard> <Point3DAnimation Storyboard.TargetName="perspectiveCamera" Storyboard.TargetProperty="Position" Duration="00:00:04" From="0 0 2" To="1 2 3" RepeatBehavior="Forever" /> <Vector3DAnimation Storyboard.TargetName="perspectiveCamera" Storyboard.TargetProperty="LookDirection" Duration="00:00:04" From="0 0 -1" To="-1 -2 -3" RepeatBehavior="Forever" /> </Storyboard> </BeginStoryboard> </EventTrigger> </Viewport3D.Triggers> </Viewport3D> </Window> |
TestProject.zip
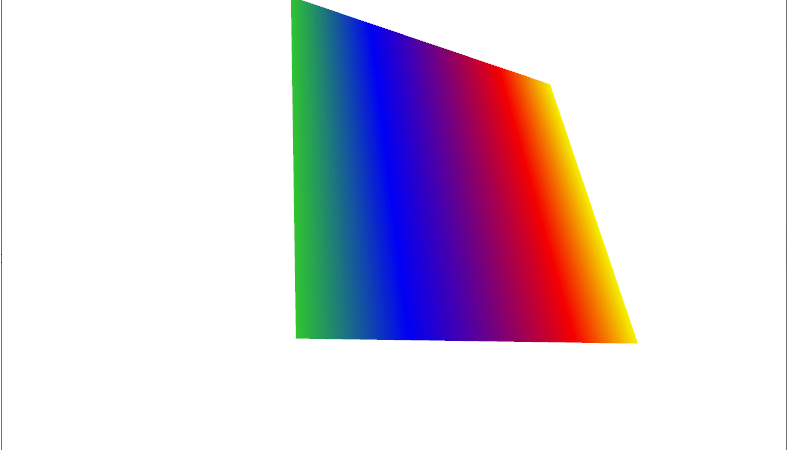
■ QuaternionAnimationUsingKeyFrames 엘리먼트를 사용해 3D 회전 애니메이션을 만드는 방법을 보여준다. ▶ MainWindow.xaml
|
1 2 3 4 5 6 7 8 9 10 11 12 13 14 15 16 17 18 19 20 21 22 23 24 25 26 27 28 29 30 31 32 33 34 35 36 37 38 39 40 41 42 43 44 45 46 47 48 49 50 51 52 53 54 55 56 57 58 59 60 61 62 63 64 65 66 67 68 69 70 71 72 73 74 75 76 77 78 79 80 81 82 83 84 85 86 87 88 89 90 91 92 93 94 95 |
<Window x:Class="TestProject.MainWindow" xmlns="http://schemas.microsoft.com/winfx/2006/xaml/presentation" xmlns:x="http://schemas.microsoft.com/winfx/2006/xaml" Width="800" Height="600" Title="TestProject" FontFamily="나눔고딕코딩" FontSize="16"> <Viewport3D Width="500" Height="500" ClipToBounds="True"> <Viewport3D.Camera> <PerspectiveCamera Position="0 0 2" LookDirection="0 0 -1" FieldOfView="60" /> </Viewport3D.Camera> <Viewport3D.Children> <ModelVisual3D> <ModelVisual3D.Content> <DirectionalLight Direction="-0.612372 -0.5 -0.612372" Color="#ffffff" /> </ModelVisual3D.Content> </ModelVisual3D> <ModelVisual3D> <ModelVisual3D.Content> <GeometryModel3D> <GeometryModel3D.Geometry> <MeshGeometry3D TriangleIndices="0 1 2 3 4 5 " Normals="0 0 1 0 0 1 0 0 1 0 0 1 0 0 1 0 0 1 " TextureCoordinates="0 0 1 0 1 1 1 1 0 1 0 0 " Positions="-0.5 -0.5 0.5 0.5 -0.5 0.5 0.5 0.5 0.5 0.5 0.5 0.5 -0.5 0.5 0.5 -0.5 -0.5 0.5 " /> </GeometryModel3D.Geometry> <GeometryModel3D.Material> <MaterialGroup> <DiffuseMaterial> <DiffuseMaterial.Brush> <LinearGradientBrush StartPoint="0 0.5" EndPoint="1 0.5"> <LinearGradientBrush.GradientStops> <GradientStop Offset="0" Color="Yellow" /> <GradientStop Offset="0.25" Color="Red" /> <GradientStop Offset="0.75" Color="Blue" /> <GradientStop Offset="1" Color="LimeGreen" /> </LinearGradientBrush.GradientStops> </LinearGradientBrush> </DiffuseMaterial.Brush> </DiffuseMaterial> </MaterialGroup> </GeometryModel3D.Material> <GeometryModel3D.Transform> <RotateTransform3D> <RotateTransform3D.Rotation> <QuaternionRotation3D x:Name="quaternionRotation3D" /> </RotateTransform3D.Rotation> </RotateTransform3D> </GeometryModel3D.Transform> </GeometryModel3D> </ModelVisual3D.Content> </ModelVisual3D> </Viewport3D.Children> <Viewport3D.Triggers> <EventTrigger RoutedEvent="Viewport3D.Loaded"> <BeginStoryboard> <Storyboard AutoReverse="True" RepeatBehavior="Forever"> <QuaternionAnimationUsingKeyFrames Storyboard.TargetName="quaternionRotation3D" Storyboard.TargetProperty="Quaternion"> <QuaternionAnimationUsingKeyFrames.KeyFrames> <LinearQuaternionKeyFrame KeyTime="00:00:01" Value="0 0 1 0" /> <DiscreteQuaternionKeyFrame KeyTime="00:00:01.5" Value="0.3 0.3 1 0" /> <SplineQuaternionKeyFrame KeySpline="0.6 0.0 0.9 0.00" KeyTime="00:00:04" Value="0 0 1 0" /> </QuaternionAnimationUsingKeyFrames.KeyFrames> </QuaternionAnimationUsingKeyFrames> </Storyboard> </BeginStoryboard> </EventTrigger> </Viewport3D.Triggers> </Viewport3D> </Window> |
TestProject.zip
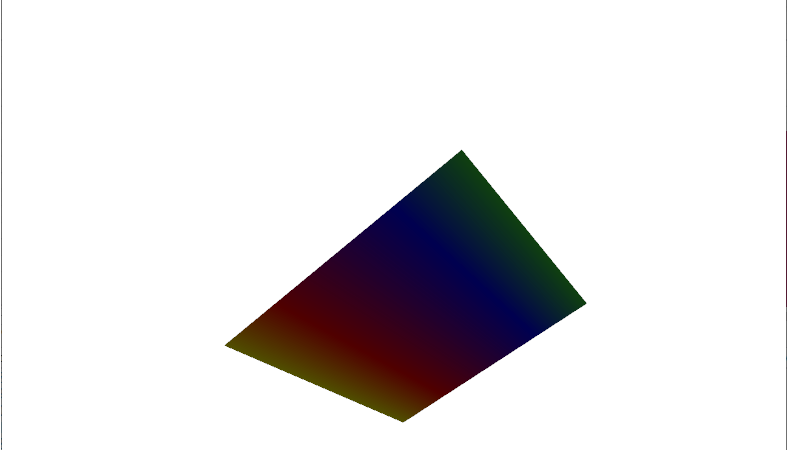
■ Rotation3DAnimation 엘리먼트를 사용해 3D 회전 애니메이션을 만드는 방법을 보여준다. ▶ MainWindow.xaml
|
1 2 3 4 5 6 7 8 9 10 11 12 13 14 15 16 17 18 19 20 21 22 23 24 25 26 27 28 29 30 31 32 33 34 35 36 37 38 39 40 41 42 43 44 45 46 47 48 49 50 51 52 53 54 55 56 57 58 59 60 61 62 63 64 65 66 67 68 69 70 71 72 73 74 75 76 77 78 79 80 81 82 83 84 85 86 87 88 89 90 91 92 93 94 95 96 97 98 99 100 101 102 |
<Window x:Class="TestProject.MainWindow" xmlns="http://schemas.microsoft.com/winfx/2006/xaml/presentation" xmlns:x="http://schemas.microsoft.com/winfx/2006/xaml" Width="800" Height="600" Title="TestProject" FontFamily="나눔고딕코딩" FontSize="16"> <Viewport3D Width="500" Height="500" ClipToBounds="True"> <Viewport3D.Camera> <PerspectiveCamera Position="0 0 2" LookDirection="0 0 -1" FieldOfView="60" /> </Viewport3D.Camera> <Viewport3D.Children> <ModelVisual3D> <ModelVisual3D.Content> <DirectionalLight Direction="-0.612372 -0.5 -0.612372" Color="#ffffff" /> </ModelVisual3D.Content> </ModelVisual3D> <ModelVisual3D> <ModelVisual3D.Content> <DirectionalLight Direction="0.612372 -0.5 -0.612372" Color="#ffffff" /> </ModelVisual3D.Content> </ModelVisual3D> <ModelVisual3D> <ModelVisual3D.Content> <GeometryModel3D> <GeometryModel3D.Geometry> <MeshGeometry3D TriangleIndices="0 1 2 3 4 5 " Normals="0 0 1 0 0 1 0 0 1 0 0 1 0 0 1 0 0 1 " TextureCoordinates="0 0 1 0 1 1 1 1 0 1 0 0 " Positions="-0.5 -0.5 0.5 0.5 -0.5 0.5 0.5 0.5 0.5 0.5 0.5 0.5 -0.5 0.5 0.5 -0.5 -0.5 0.5 " /> </GeometryModel3D.Geometry> <GeometryModel3D.Material> <MaterialGroup> <DiffuseMaterial> <DiffuseMaterial.Brush> <LinearGradientBrush StartPoint="0 0.5" EndPoint="1 0.5"> <LinearGradientBrush.GradientStops> <GradientStop Offset="0" Color="Yellow" /> <GradientStop Offset="0.25" Color="Red" /> <GradientStop Offset="0.75" Color="Blue" /> <GradientStop Offset="1" Color="LimeGreen" /> </LinearGradientBrush.GradientStops> </LinearGradientBrush> </DiffuseMaterial.Brush> </DiffuseMaterial> </MaterialGroup> </GeometryModel3D.Material> <GeometryModel3D.Transform> <RotateTransform3D x:Name="rotateTransform3D"> <RotateTransform3D.Rotation> <AxisAngleRotation3D Axis="0 3 0" Angle="40" /> </RotateTransform3D.Rotation> </RotateTransform3D> </GeometryModel3D.Transform> </GeometryModel3D> </ModelVisual3D.Content> </ModelVisual3D> </Viewport3D.Children> <Viewport3D.Triggers> <EventTrigger RoutedEvent="Viewport3D.Loaded"> <BeginStoryboard> <Storyboard> <Rotation3DAnimation Storyboard.TargetName="rotateTransform3D" Storyboard.TargetProperty="Rotation" AutoReverse="True" RepeatBehavior="Forever"> <Rotation3DAnimation.From> <AxisAngleRotation3D Axis="0 3 0" Angle="-60" /> </Rotation3DAnimation.From> <Rotation3DAnimation.To> <AxisAngleRotation3D Axis="1 0 1" Angle="60" /> </Rotation3DAnimation.To> </Rotation3DAnimation> </Storyboard> </BeginStoryboard> </EventTrigger> </Viewport3D.Triggers> </Viewport3D> </Window> |
TestProject.zip
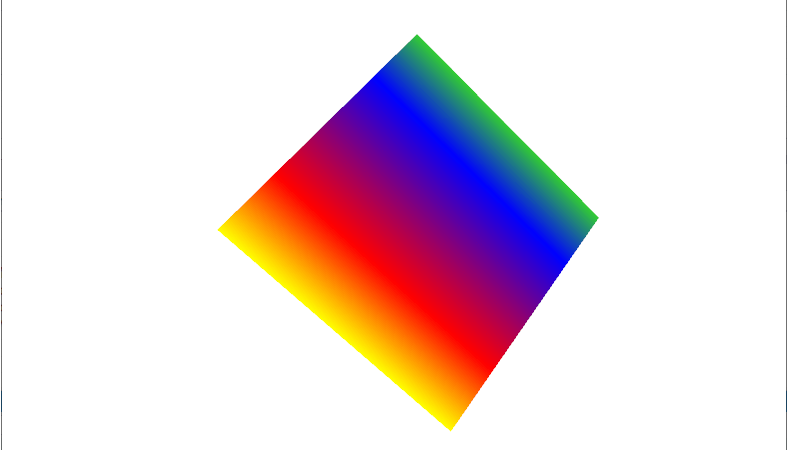
■ Rotation3DAnimationUsingKeyFrames 엘리먼트를 사용해 3D 회전 애니메이션을 만드는 방법을 보여준다. ▶ MainWindow.xaml
|
1 2 3 4 5 6 7 8 9 10 11 12 13 14 15 16 17 18 19 20 21 22 23 24 25 26 27 28 29 30 31 32 33 34 35 36 37 38 39 40 41 42 43 44 45 46 47 48 49 50 51 52 53 54 55 56 57 58 59 60 61 62 63 64 65 66 67 68 69 70 71 72 73 74 75 76 77 78 79 80 81 82 83 84 85 86 87 88 89 90 91 92 93 94 95 96 97 98 99 100 101 102 103 104 105 106 107 108 109 110 111 112 113 114 115 116 117 |
<Window x:Class="TestProject.MainWindow" xmlns="http://schemas.microsoft.com/winfx/2006/xaml/presentation" xmlns:x="http://schemas.microsoft.com/winfx/2006/xaml" Width="800" Height="600" Title="TestProject" FontFamily="나눔고딕코딩" FontSize="16"> <Viewport3D Width="500" Height="500" ClipToBounds="True"> <Viewport3D.Camera> <PerspectiveCamera Position="0 0 2" LookDirection="0 0 -1" FieldOfView="60" /> </Viewport3D.Camera> <Viewport3D.Children> <ModelVisual3D> <ModelVisual3D.Content> <DirectionalLight Direction="-0.612372 -0.5 -0.612372" Color="#ffffff" /> </ModelVisual3D.Content> </ModelVisual3D> <ModelVisual3D> <ModelVisual3D.Content> <DirectionalLight Direction="0.612372 -0.5 -0.612372" Color="#ffffff" /> </ModelVisual3D.Content> </ModelVisual3D> <ModelVisual3D> <ModelVisual3D.Content> <GeometryModel3D> <GeometryModel3D.Geometry> <MeshGeometry3D TriangleIndices="0 1 2 3 4 5 " Normals="0 0 1 0 0 1 0 0 1 0 0 1 0 0 1 0 0 1 " TextureCoordinates="0 0 1 0 1 1 1 1 0 1 0 0 " Positions="-0.5 -0.5 0.5 0.5 -0.5 0.5 0.5 0.5 0.5 0.5 0.5 0.5 -0.5 0.5 0.5 -0.5 -0.5 0.5 " /> </GeometryModel3D.Geometry> <GeometryModel3D.Material> <MaterialGroup> <DiffuseMaterial> <DiffuseMaterial.Brush> <LinearGradientBrush StartPoint="0 0.5" EndPoint="1 0.5"> <LinearGradientBrush.GradientStops> <GradientStop Offset="0" Color="Yellow" /> <GradientStop Offset="0.25" Color="Red" /> <GradientStop Offset="0.75" Color="Blue" /> <GradientStop Offset="1" Color="LimeGreen" /> </LinearGradientBrush.GradientStops> </LinearGradientBrush> </DiffuseMaterial.Brush> </DiffuseMaterial> </MaterialGroup> </GeometryModel3D.Material> <GeometryModel3D.Transform> <RotateTransform3D x:Name="rotateTransform3D"> <RotateTransform3D.Rotation> <AxisAngleRotation3D Axis="0 3 0" Angle="40" /> </RotateTransform3D.Rotation> </RotateTransform3D> </GeometryModel3D.Transform> </GeometryModel3D> </ModelVisual3D.Content> </ModelVisual3D> </Viewport3D.Children> <Viewport3D.Triggers> <EventTrigger RoutedEvent="Viewport3D.Loaded"> <BeginStoryboard> <Storyboard> <Rotation3DAnimationUsingKeyFrames Storyboard.TargetName="rotateTransform3D" Storyboard.TargetProperty="Rotation" AutoReverse="True" RepeatBehavior="Forever"> <Rotation3DAnimationUsingKeyFrames.KeyFrames> <LinearRotation3DKeyFrame KeyTime="00:00:01"> <LinearRotation3DKeyFrame.Value> <AxisAngleRotation3D Axis="1 0 1" Angle="-60" /> </LinearRotation3DKeyFrame.Value> </LinearRotation3DKeyFrame> <DiscreteRotation3DKeyFrame KeyTime="00:00:01.5"> <DiscreteRotation3DKeyFrame.Value> <AxisAngleRotation3D Axis="0 0 1" Angle="80" /> </DiscreteRotation3DKeyFrame.Value> </DiscreteRotation3DKeyFrame> <SplineRotation3DKeyFrame KeyTime="00:00:04" KeySpline="0.6 0.0 0.9 0.00"> <SplineRotation3DKeyFrame.Value> <AxisAngleRotation3D Axis="0 3 0" Angle="40" /> </SplineRotation3DKeyFrame.Value> </SplineRotation3DKeyFrame> </Rotation3DAnimationUsingKeyFrames.KeyFrames> </Rotation3DAnimationUsingKeyFrames> </Storyboard> </BeginStoryboard> </EventTrigger> </Viewport3D.Triggers> </Viewport3D> </Window> |
TestProject.zip
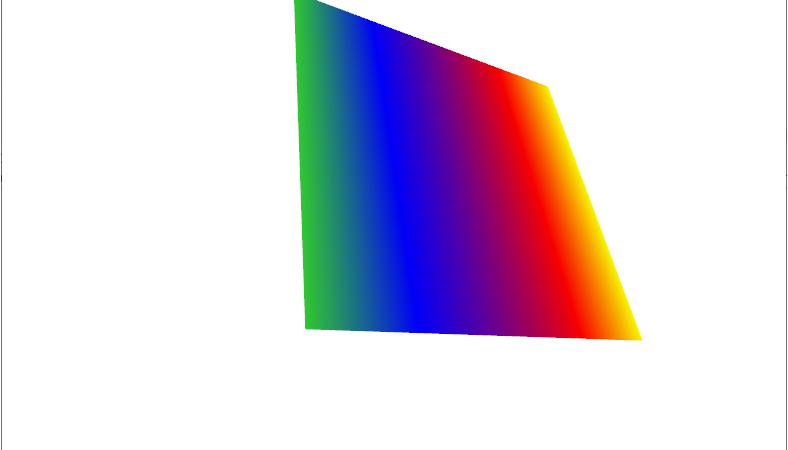
■ QuaternionRotation3D 엘리먼트를 사용해 3D 회전 애니메이션을 만드는 방법을 보여준다. ▶ MainWindow.xaml
|
1 2 3 4 5 6 7 8 9 10 11 12 13 14 15 16 17 18 19 20 21 22 23 24 25 26 27 28 29 30 31 32 33 34 35 36 37 38 39 40 41 42 43 44 45 46 47 48 49 50 51 52 53 54 55 56 57 58 59 60 61 62 63 64 65 66 67 68 69 70 71 72 73 74 75 76 77 78 79 80 81 82 83 84 85 |
<Window x:Class="TestProject.MainWindow" xmlns="http://schemas.microsoft.com/winfx/2006/xaml/presentation" xmlns:x="http://schemas.microsoft.com/winfx/2006/xaml" Width="800" Height="600" Title="TestProject" FontFamily="나눔고딕코딩" FontSize="16"> <Viewport3D Width="500" Height="500" ClipToBounds="True"> <Viewport3D.Camera> <PerspectiveCamera Position="0 0 2" LookDirection="0 0 -1" FieldOfView="60" /> </Viewport3D.Camera> <Viewport3D.Children> <ModelVisual3D> <ModelVisual3D.Content> <DirectionalLight Direction="-0.612372 -0.5 -0.612372" Color="#ffffff" /> </ModelVisual3D.Content> </ModelVisual3D> <ModelVisual3D> <ModelVisual3D.Content> <GeometryModel3D> <GeometryModel3D.Geometry> <MeshGeometry3D TriangleIndices="0 1 2 3 4 5 " Normals="0 0 1 0 0 1 0 0 1 0 0 1 0 0 1 0 0 1 " TextureCoordinates="0 0 1 0 1 1 1 1 0 1 0 0 " Positions="-0.5 -0.5 0.5 0.5 -0.5 0.5 0.5 0.5 0.5 0.5 0.5 0.5 -0.5 0.5 0.5 -0.5 -0.5 0.5 " /> </GeometryModel3D.Geometry> <GeometryModel3D.Material> <MaterialGroup> <DiffuseMaterial> <DiffuseMaterial.Brush> <LinearGradientBrush StartPoint="0 0.5" EndPoint="1 0.5"> <LinearGradientBrush.GradientStops> <GradientStop Offset="0" Color="Yellow" /> <GradientStop Offset="0.25" Color="Red" /> <GradientStop Offset="0.75" Color="Blue" /> <GradientStop Offset="1" Color="LimeGreen" /> </LinearGradientBrush.GradientStops> </LinearGradientBrush> </DiffuseMaterial.Brush> </DiffuseMaterial> </MaterialGroup> </GeometryModel3D.Material> <GeometryModel3D.Transform> <RotateTransform3D> <RotateTransform3D.Rotation> <QuaternionRotation3D x:Name="quaternionRotation3D" /> </RotateTransform3D.Rotation> </RotateTransform3D> </GeometryModel3D.Transform> </GeometryModel3D> </ModelVisual3D.Content> </ModelVisual3D> </Viewport3D.Children> <Viewport3D.Triggers> <EventTrigger RoutedEvent="Viewport3D.Loaded"> <BeginStoryboard> <Storyboard> <QuaternionAnimation Storyboard.TargetName="quaternionRotation3D" Storyboard.TargetProperty="Quaternion" Duration="00:00:02" From="0 0 1 0" To="0.3 0.3 1 0" AutoReverse="True" RepeatBehavior="Forever" /> </Storyboard> </BeginStoryboard> </EventTrigger> </Viewport3D.Triggers> </Viewport3D> </Window> |
TestProject.zip
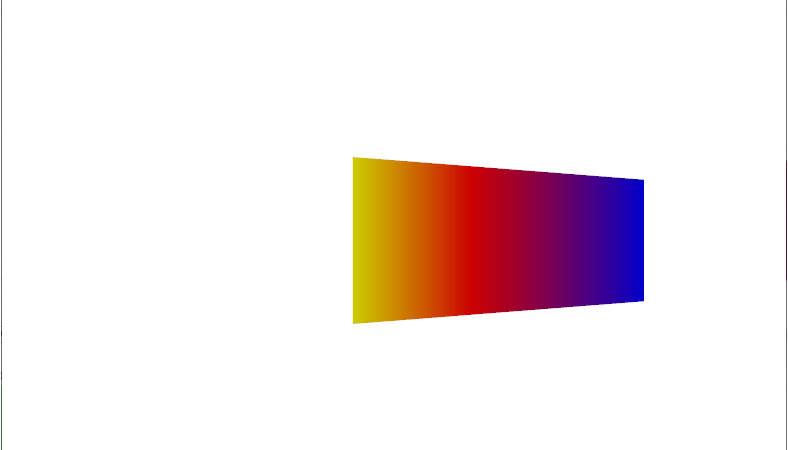
■ GeometryModel3D 엘리먼트의 Transform 속성에서 Transform3DGroup 객체를 사용해 복수 변환을 설정하는 방법을 보여준다. ▶ MainWindow.xaml
|
1 2 3 4 5 6 7 8 9 10 11 12 13 14 15 16 17 18 19 20 21 22 23 24 25 26 27 28 29 30 31 32 33 34 35 36 37 38 39 40 41 42 43 44 45 46 47 48 49 50 51 52 53 54 55 56 57 58 59 60 61 62 63 64 65 66 67 68 69 70 71 72 73 74 75 76 77 78 79 80 81 82 |
<Window x:Class="TestProject.MainWindow" xmlns="http://schemas.microsoft.com/winfx/2006/xaml/presentation" xmlns:x="http://schemas.microsoft.com/winfx/2006/xaml" Width="800" Height="600" Title="TestProject" FontFamily="나눔고딕코딩" FontSize="16"> <Viewport3D Width="500" Height="500" ClipToBounds="True"> <Viewport3D.Camera> <PerspectiveCamera Position="0 0 2" LookDirection="0 0 -1" FieldOfView="60" /> </Viewport3D.Camera> <Viewport3D.Children> <ModelVisual3D> <ModelVisual3D.Content> <DirectionalLight Direction="-0.612372 -0.5 -0.612372" Color="#ffffff" /> </ModelVisual3D.Content> </ModelVisual3D> <ModelVisual3D> <ModelVisual3D.Content> <GeometryModel3D> <GeometryModel3D.Geometry> <MeshGeometry3D TriangleIndices="0 1 2 3 4 5" Normals="0 0 1 0 0 1 0 0 1 0 0 1 0 0 1 0 0 1" TextureCoordinates="0 0 1 0 1 1 1 1 0 1 0 0" Positions="-0.5 -0.5 0.5 0.5 -0.5 0.5 0.5 0.5 0.5 0.5 0.5 0.5 -0.5 0.5 0.5 -0.5 -0.5 0.5" /> </GeometryModel3D.Geometry> <GeometryModel3D.Material> <MaterialGroup> <DiffuseMaterial> <DiffuseMaterial.Brush> <LinearGradientBrush StartPoint="0 0.5" EndPoint="1 0.5"> <LinearGradientBrush.GradientStops> <GradientStop Offset="0" Color="Yellow" /> <GradientStop Offset="0.25" Color="Red" /> <GradientStop Offset="0.75" Color="Blue" /> <GradientStop Offset="1" Color="LimeGreen" /> </LinearGradientBrush.GradientStops> </LinearGradientBrush> </DiffuseMaterial.Brush> </DiffuseMaterial> </MaterialGroup> </GeometryModel3D.Material> <GeometryModel3D.Transform> <Transform3DGroup> <Transform3DGroup.Children> <RotateTransform3D> <RotateTransform3D.Rotation> <AxisAngleRotation3D Axis="0 3 0" Angle="40" /> </RotateTransform3D.Rotation> </RotateTransform3D> <ScaleTransform3D CenterX="0" CenterY="0" CenterZ="0" ScaleX="2" ScaleY="0.5" ScaleZ="1" /> </Transform3DGroup.Children> </Transform3DGroup> </GeometryModel3D.Transform> </GeometryModel3D> </ModelVisual3D.Content> </ModelVisual3D> </Viewport3D.Children> </Viewport3D> </Window> |
TestProject.zip
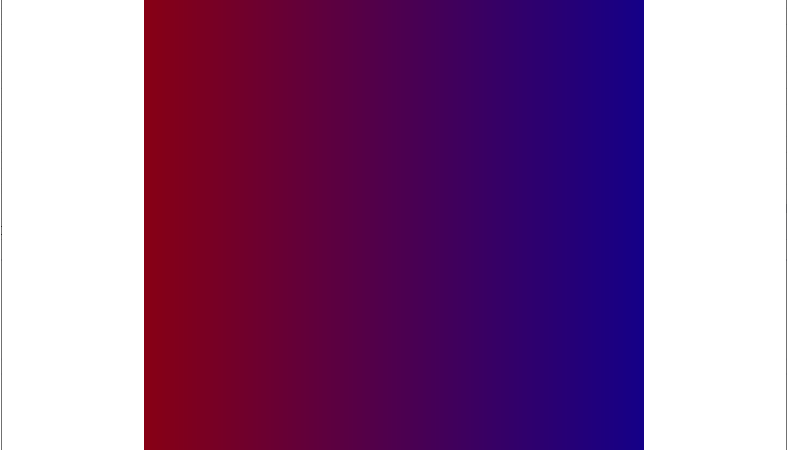
■ GeometryModel3D 엘리먼트의 Transform 속성에서 ScaleTransform3D 객체를 사용해 애니메이션을 만드는 방법을 보여준다. ▶ MainWindow.xaml
|
1 2 3 4 5 6 7 8 9 10 11 12 13 14 15 16 17 18 19 20 21 22 23 24 25 26 27 28 29 30 31 32 33 34 35 36 37 38 39 40 41 42 43 44 45 46 47 48 49 50 51 52 53 54 55 56 57 58 59 60 61 62 63 64 65 66 67 68 69 70 71 72 73 74 75 76 77 78 79 80 81 82 83 84 85 86 87 88 89 90 91 92 93 94 95 |
<Window x:Class="TestProject.MainWindow" xmlns="http://schemas.microsoft.com/winfx/2006/xaml/presentation" xmlns:x="http://schemas.microsoft.com/winfx/2006/xaml" Width="800" Height="600" Title="TestProject" FontFamily="나눔고딕코딩" FontSize="16"> <Viewport3D Width="500" Height="500" ClipToBounds="True"> <Viewport3D.Camera> <PerspectiveCamera Position="0 0 2" LookDirection="0 0 -1" FieldOfView="60" /> </Viewport3D.Camera> <Viewport3D.Children> <ModelVisual3D> <ModelVisual3D.Content> <DirectionalLight Direction="-0.612372 -0.5 -0.612372" Color="#ffffff" /> </ModelVisual3D.Content> </ModelVisual3D> <ModelVisual3D> <ModelVisual3D.Content> <GeometryModel3D> <GeometryModel3D.Geometry> <MeshGeometry3D TriangleIndices="0 1 2 3 4 5" Normals="0 0 1 0 0 1 0 0 1 0 0 1 0 0 1 0 0 1" TextureCoordinates="0 0 1 0 1 1 1 1 0 1 0 0" Positions="-0.5 -0.5 0.5 0.5 -0.5 0.5 0.5 0.5 0.5 0.5 0.5 0.5 -0.5 0.5 0.5 -0.5 -0.5 0.5" /> </GeometryModel3D.Geometry> <GeometryModel3D.Material> <MaterialGroup> <DiffuseMaterial> <DiffuseMaterial.Brush> <LinearGradientBrush StartPoint="0 0.5" EndPoint="1 0.5"> <LinearGradientBrush.GradientStops> <GradientStop Offset="0" Color="Yellow" /> <GradientStop Offset="0.25" Color="Red" /> <GradientStop Offset="0.75" Color="Blue" /> <GradientStop Offset="1" Color="LimeGreen" /> </LinearGradientBrush.GradientStops> </LinearGradientBrush> </DiffuseMaterial.Brush> </DiffuseMaterial> </MaterialGroup> </GeometryModel3D.Material> <GeometryModel3D.Transform> <ScaleTransform3D x:Name="scaleTransform3D" CenterX="0" CenterY="0" CenterZ="0" ScaleX="1" ScaleY="1" ScaleZ="1" /> </GeometryModel3D.Transform> </GeometryModel3D> </ModelVisual3D.Content> </ModelVisual3D> </Viewport3D.Children> <Viewport3D.Triggers> <EventTrigger RoutedEvent="Viewport3D.Loaded"> <BeginStoryboard> <Storyboard> <DoubleAnimation Storyboard.TargetName="scaleTransform3D" Storyboard.TargetProperty="ScaleX" Duration="00:00:03" From="1" To="5" AutoReverse="True" RepeatBehavior="Forever" /> <DoubleAnimation Storyboard.TargetName="scaleTransform3D" Storyboard.TargetProperty="ScaleY" Duration="00:00:03" From="1" To="5" AutoReverse="True" RepeatBehavior="Forever" /> </Storyboard> </BeginStoryboard> </EventTrigger> </Viewport3D.Triggers> </Viewport3D> </Window> |
TestProject.zip
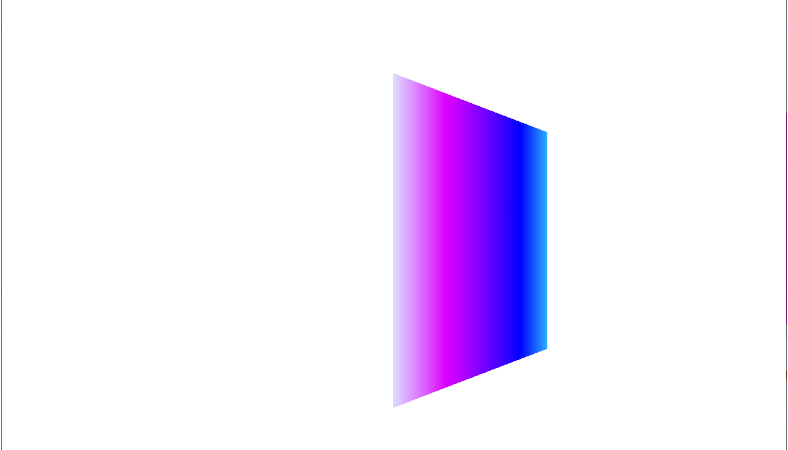
■ EmissiveMaterial 엘리먼트를 사용해 발광 재료를 설정하는 방법을 보여준다. ▶ MainWindow.xaml
|
1 2 3 4 5 6 7 8 9 10 11 12 13 14 15 16 17 18 19 20 21 22 23 24 25 26 27 28 29 30 31 32 33 34 35 36 37 38 39 40 41 42 43 44 45 46 47 48 49 50 51 52 53 54 55 56 57 58 59 60 61 62 63 64 65 66 67 68 69 70 71 72 73 74 75 76 77 78 79 80 81 82 83 84 85 86 87 88 89 90 91 92 93 94 95 96 97 98 99 100 101 |
<Window x:Class="TestProject.MainWindow" xmlns="http://schemas.microsoft.com/winfx/2006/xaml/presentation" xmlns:x="http://schemas.microsoft.com/winfx/2006/xaml" Width="800" Height="600" Title="TestProject" FontFamily="나눔고딕코딩" FontSize="16"> <Viewport3D Width="500" Height="500" ClipToBounds="True"> <Viewport3D.Camera> <PerspectiveCamera Position="0 0 2" LookDirection="0 0 -1" FieldOfView="60" /> </Viewport3D.Camera> <Viewport3D.Children> <ModelVisual3D> <ModelVisual3D.Content> <DirectionalLight Direction="-0.612372 -0.5 -0.612372" Color="#ffffff" /> </ModelVisual3D.Content> </ModelVisual3D> <ModelVisual3D> <ModelVisual3D.Content> <GeometryModel3D> <GeometryModel3D.Geometry> <MeshGeometry3D TriangleIndices="0 1 2 3 4 5" Normals="0 0 1 0 0 1 0 0 1 0 0 1 0 0 1 0 0 1" TextureCoordinates="0 0 1 0 1 1 1 1 0 1 0 0" Positions="-0.5 -0.5 0.5 0.5 -0.5 0.5 0.5 0.5 0.5 0.5 0.5 0.5 -0.5 0.5 0.5 -0.5 -0.5 0.5" /> </GeometryModel3D.Geometry> <GeometryModel3D.Material> <MaterialGroup> <DiffuseMaterial> <DiffuseMaterial.Brush> <LinearGradientBrush StartPoint="0 0.5" EndPoint="1 0.5"> <LinearGradientBrush.GradientStops> <GradientStop Offset="0" Color="Yellow" /> <GradientStop Offset="0.25" Color="Red" /> <GradientStop Offset="0.75" Color="Blue" /> <GradientStop Offset="1" Color="LimeGreen" /> </LinearGradientBrush.GradientStops> </LinearGradientBrush> </DiffuseMaterial.Brush> </DiffuseMaterial> <EmissiveMaterial> <EmissiveMaterial.Brush> <SolidColorBrush Color="Blue" /> </EmissiveMaterial.Brush> </EmissiveMaterial> </MaterialGroup> </GeometryModel3D.Material> <GeometryModel3D.BackMaterial> <MaterialGroup> <DiffuseMaterial> <DiffuseMaterial.Brush> <SolidColorBrush Color="Gray" /> </DiffuseMaterial.Brush> </DiffuseMaterial> </MaterialGroup> </GeometryModel3D.BackMaterial> <GeometryModel3D.Transform> <RotateTransform3D> <RotateTransform3D.Rotation> <AxisAngleRotation3D x:Name="axisAngleRotation3D" Axis="0 3 0" Angle="40" /> </RotateTransform3D.Rotation> </RotateTransform3D> </GeometryModel3D.Transform> </GeometryModel3D> </ModelVisual3D.Content> </ModelVisual3D> </Viewport3D.Children> <Viewport3D.Triggers> <EventTrigger RoutedEvent="Viewport3D.Loaded"> <BeginStoryboard> <Storyboard> <DoubleAnimation Storyboard.TargetName="axisAngleRotation3D" Storyboard.TargetProperty="Angle" Duration="00:00:04" From="0" To="360" AutoReverse="True" RepeatBehavior="Forever" /> </Storyboard> </BeginStoryboard> </EventTrigger> </Viewport3D.Triggers> </Viewport3D> </Window> |
TestProject.zip
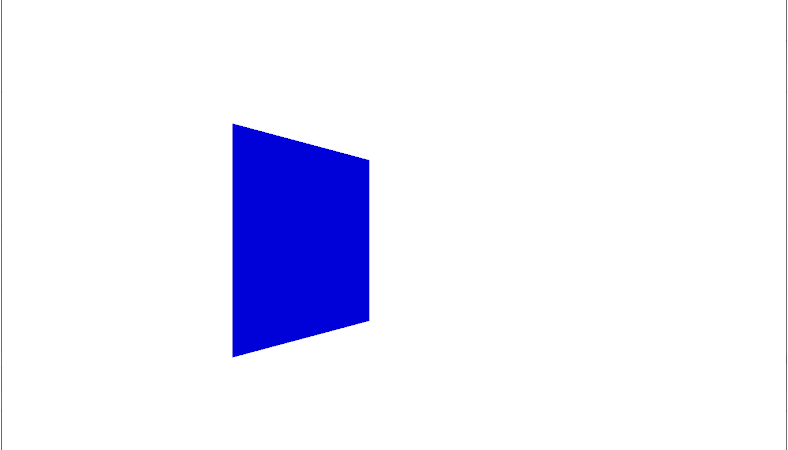
■ GeometryModel3D 엘리먼트의 Material/BackMaterial 속성을 사용해 3D 객체의 앞면/뒷면의 재료를 설정하는 방법을 보여준다. ▶ MainWindow.xaml
|
1 2 3 4 5 6 7 8 9 10 11 12 13 14 15 16 17 18 19 20 21 22 23 24 25 26 27 28 29 30 31 32 33 34 35 36 37 38 39 40 41 42 43 44 45 46 47 48 49 50 51 52 53 54 55 56 57 58 59 60 61 62 63 64 65 66 67 68 69 70 71 72 73 74 75 76 77 78 79 80 81 82 83 84 85 86 87 88 89 90 91 92 93 94 |
<Window x:Class="TestProject.MainWindow" xmlns="http://schemas.microsoft.com/winfx/2006/xaml/presentation" xmlns:x="http://schemas.microsoft.com/winfx/2006/xaml" Width="800" Height="600" Title="TestProject" FontFamily="나눔고딕코딩" FontSize="16"> <Viewport3D Width="500" Height="500" ClipToBounds="True"> <Viewport3D.Camera> <PerspectiveCamera Position="0 0 2" LookDirection="0 0 -1" FieldOfView="60" /> </Viewport3D.Camera> <Viewport3D.Children> <ModelVisual3D> <ModelVisual3D.Content> <DirectionalLight Direction="-0.612372 -0.5 -0.612372" Color="#ffffff" /> </ModelVisual3D.Content> </ModelVisual3D> <ModelVisual3D> <ModelVisual3D.Content> <DirectionalLight Direction="0.612372 -0.5 -0.612372" Color="#ffffff" /> </ModelVisual3D.Content> </ModelVisual3D> <ModelVisual3D> <ModelVisual3D.Content> <GeometryModel3D> <GeometryModel3D.Geometry> <MeshGeometry3D TriangleIndices="0 1 2 3 4 5" Normals="0 0 1 0 0 1 0 0 1 0 0 1 0 0 1 0 0 1" TextureCoordinates="0 0 1 0 1 1 1 1 0 1 0 0" Positions="-0.5 -0.5 0.5 0.5 -0.5 0.5 0.5 0.5 0.5 0.5 0.5 0.5 -0.5 0.5 0.5 -0.5 -0.5 0.5" /> </GeometryModel3D.Geometry> <GeometryModel3D.Material> <MaterialGroup> <DiffuseMaterial> <DiffuseMaterial.Brush> <SolidColorBrush Color="Red" /> </DiffuseMaterial.Brush> </DiffuseMaterial> </MaterialGroup> </GeometryModel3D.Material> <GeometryModel3D.BackMaterial> <MaterialGroup> <DiffuseMaterial> <DiffuseMaterial.Brush> <SolidColorBrush Color="Blue" /> </DiffuseMaterial.Brush> </DiffuseMaterial> </MaterialGroup> </GeometryModel3D.BackMaterial> <GeometryModel3D.Transform> <RotateTransform3D> <RotateTransform3D.Rotation> <AxisAngleRotation3D x:Name="axisAngleRotation3D" Axis="0 3 0" Angle="100" /> </RotateTransform3D.Rotation> </RotateTransform3D> </GeometryModel3D.Transform> </GeometryModel3D> </ModelVisual3D.Content> </ModelVisual3D> </Viewport3D.Children> <Viewport3D.Triggers> <EventTrigger RoutedEvent="Viewport3D.Loaded"> <BeginStoryboard> <Storyboard> <DoubleAnimation Storyboard.TargetName="axisAngleRotation3D" Storyboard.TargetProperty="Angle" Duration="00:00:04" From="0" To="360" AutoReverse="True" RepeatBehavior="Forever" /> </Storyboard> </BeginStoryboard> </EventTrigger> </Viewport3D.Triggers> </Viewport3D> </Window> |
TestProject.zip
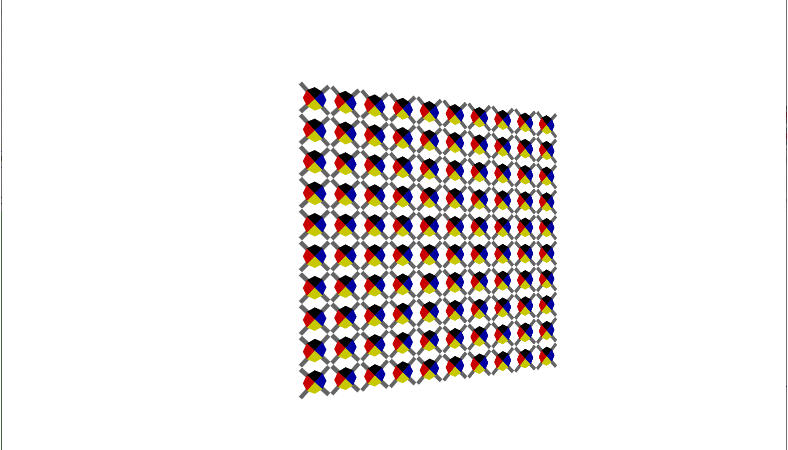
■ GeometryModel3D 엘리먼트의 Material 속성에서 DrawingBrush 객체를 사용해 3D 모델에 드로잉을 적용하는 방법을 보여준다. ▶ MainWindow.xaml
|
1 2 3 4 5 6 7 8 9 10 11 12 13 14 15 16 17 18 19 20 21 22 23 24 25 26 27 28 29 30 31 32 33 34 35 36 37 38 39 40 41 42 43 44 45 46 47 48 49 50 51 52 53 54 55 56 57 58 59 60 61 62 63 64 65 66 67 68 69 70 71 72 73 74 75 76 77 78 79 80 81 82 83 84 85 86 87 88 89 90 91 |
<Window x:Class="TestProject.MainWindow" xmlns="http://schemas.microsoft.com/winfx/2006/xaml/presentation" xmlns:x="http://schemas.microsoft.com/winfx/2006/xaml" Width="800" Height="600" Title="TestProject" FontFamily="나눔고딕코딩" FontSize="16"> <Canvas Width="500" Height="500"> <Viewport3D Width="500" Height="500" ClipToBounds="True"> <Viewport3D.Camera> <PerspectiveCamera Position="0 0 2" LookDirection="0 0 -1" FieldOfView="60" /> </Viewport3D.Camera> <Viewport3D.Children> <ModelVisual3D> <ModelVisual3D.Content> <DirectionalLight Direction="-0.612372 -0.5 -0.612372" Color="#ffffff" /> </ModelVisual3D.Content> </ModelVisual3D> <ModelVisual3D> <ModelVisual3D.Content> <GeometryModel3D> <GeometryModel3D.Geometry> <MeshGeometry3D TriangleIndices="0 1 2 3 4 5" Normals="0 0 1 0 0 1 0 0 1 0 0 1 0 0 1 0 0 1" TextureCoordinates="0 0 1 0 1 1 1 1 0 1 0 0" Positions="-0.5 -0.5 0.5 0.5 -0.5 0.5 0.5 0.5 0.5 0.5 0.5 0.5 -0.5 0.5 0.5 -0.5 -0.5 0.5" /> </GeometryModel3D.Geometry> <GeometryModel3D.Material> <DiffuseMaterial> <DiffuseMaterial.Brush> <DrawingBrush Viewport="0 0 0.1 0.1" TileMode="Tile"> <DrawingBrush.Drawing> <DrawingGroup> <DrawingGroup.Children> <GeometryDrawing Brush="Gray" Geometry="M 0 0.1 L 0.1 0 1 0.9 0.9 1 z" /> <GeometryDrawing Brush="Gray" Geometry="M 0.9 0 L 1 0.1 0.1 1 0 0.9 z" /> <GeometryDrawing Brush="#ffff00" Geometry="M 0.25 0.25 L 0.5 0.125 0.75 0.25 0.5 0.5 z" /> <GeometryDrawing Brush="Black" Geometry="M 0.25 0.75 L 0.5 0.875 0.75 0.75 0.5 0.5 z" /> <GeometryDrawing Brush="#ff0000" Geometry="M 0.25 0.75 L 0.125 0.5 0.25 0.25 0.5 0.5 z" /> <GeometryDrawing Brush="MediumBlue" Geometry="M 0.75 0.25 L 0.875 0.5 0.75 0.75 0.5 0.5 z" /> </DrawingGroup.Children> </DrawingGroup> </DrawingBrush.Drawing> </DrawingBrush> </DiffuseMaterial.Brush> </DiffuseMaterial> </GeometryModel3D.Material> <GeometryModel3D.Transform> <RotateTransform3D> <RotateTransform3D.Rotation> <AxisAngleRotation3D Axis="0 3 0" Angle="20" /> </RotateTransform3D.Rotation> </RotateTransform3D> </GeometryModel3D.Transform> </GeometryModel3D> </ModelVisual3D.Content> </ModelVisual3D> </Viewport3D.Children> </Viewport3D> </Canvas> </Window> |
TestProject.zip
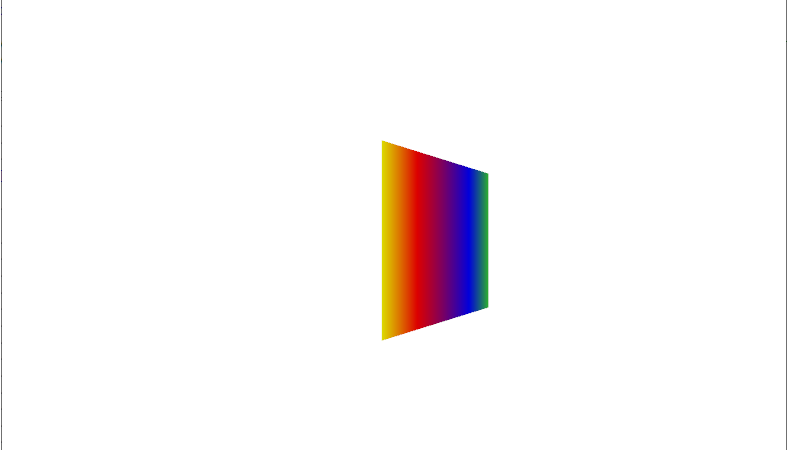
■ Viewport3D 클래스를 사용해 3D 장면을 만드는 방법을 보여준다. ▶ MainWindow.xaml
|
1 2 3 4 5 6 7 8 9 10 11 12 13 14 |
<Window x:Class="TestProject.MainWindow" xmlns="http://schemas.microsoft.com/winfx/2006/xaml/presentation" xmlns:x="http://schemas.microsoft.com/winfx/2006/xaml" Width="800" Height="600" Title="TestProject" FontFamily="나눔고딕코딩" FontSize="16"> <Canvas Name="canvas" Width="300" Height="300" /> </Window> |
▶ MainWindow.xaml.cs
|
1 2 3 4 5 6 7 8 9 10 11 12 13 14 15 16 17 18 19 20 21 22 23 24 25 26 27 28 29 30 31 32 33 34 35 36 37 38 39 40 41 42 43 44 45 46 47 48 49 50 51 52 53 54 55 56 57 58 59 60 61 62 63 64 65 66 67 68 69 70 71 72 73 74 75 76 77 78 79 80 81 82 83 84 85 86 87 88 89 90 91 92 93 94 95 96 97 98 99 100 101 102 103 104 105 106 107 108 109 110 111 112 113 114 115 116 117 118 119 120 121 122 123 124 125 126 127 128 129 130 131 132 133 134 135 136 137 138 139 140 141 142 143 144 145 146 147 148 149 150 151 152 153 154 155 156 157 158 159 160 161 162 163 164 165 166 167 168 169 170 171 172 173 174 175 176 |
using System.Windows; using System.Windows.Controls; using System.Windows.Media; using System.Windows.Media.Media3D; namespace TestProject { /// <summary> /// 메인 윈도우 /// </summary> public partial class MainWindow : Window { //////////////////////////////////////////////////////////////////////////////////////////////////// Constructor ////////////////////////////////////////////////////////////////////////////////////////// Public #region 생성자 - MainWindow() /// <summary> /// 생성자 /// </summary> public MainWindow() { InitializeComponent(); #region 투시 카메라를 생성한다. PerspectiveCamera perspectiveCamera = new PerspectiveCamera(); perspectiveCamera.Position = new Point3D(0, 0, 2); perspectiveCamera.LookDirection = new Vector3D(0, 0, -1); perspectiveCamera.FieldOfView = 60; #endregion #region 지향성 조명을 생성한다. DirectionalLight directionalLight = new DirectionalLight(); directionalLight.Color = Colors.White; directionalLight.Direction = new Vector3D(-0.61, -0.5, -0.61); #endregion #region 위치 포인트 3D 컬렉션을 생성한다. Point3DCollection positionPoint3DCollection = new Point3DCollection(); positionPoint3DCollection.Add(new Point3D(-0.5, -0.5, 0.5)); positionPoint3DCollection.Add(new Point3D( 0.5, -0.5, 0.5)); positionPoint3DCollection.Add(new Point3D( 0.5, 0.5, 0.5)); positionPoint3DCollection.Add(new Point3D( 0.5, 0.5, 0.5)); positionPoint3DCollection.Add(new Point3D(-0.5, 0.5, 0.5)); positionPoint3DCollection.Add(new Point3D(-0.5, -0.5, 0.5)); #endregion #region 법선 벡터 3D 컬렉션을 생성한다. Vector3DCollection normalVector3DCollection = new Vector3DCollection(); normalVector3DCollection.Add(new Vector3D(0, 0, 1)); normalVector3DCollection.Add(new Vector3D(0, 0, 1)); normalVector3DCollection.Add(new Vector3D(0, 0, 1)); normalVector3DCollection.Add(new Vector3D(0, 0, 1)); normalVector3DCollection.Add(new Vector3D(0, 0, 1)); normalVector3DCollection.Add(new Vector3D(0, 0, 1)); #endregion #region 텍스처 좌표 포인트 컬렉션을 생성한다. PointCollection textureCoordinatesPointCollection = new PointCollection(); textureCoordinatesPointCollection.Add(new Point(0, 0)); textureCoordinatesPointCollection.Add(new Point(1, 0)); textureCoordinatesPointCollection.Add(new Point(1, 1)); textureCoordinatesPointCollection.Add(new Point(1, 1)); textureCoordinatesPointCollection.Add(new Point(0, 1)); textureCoordinatesPointCollection.Add(new Point(0, 0)); #endregion #region 삼각형 인덱스 정수 32비트 컬렉션을 생성한다. Int32Collection triangleIndicesInt32Collection = new Int32Collection(); triangleIndicesInt32Collection.Add(0); triangleIndicesInt32Collection.Add(1); triangleIndicesInt32Collection.Add(2); triangleIndicesInt32Collection.Add(3); triangleIndicesInt32Collection.Add(4); triangleIndicesInt32Collection.Add(5); #endregion #region 메시 지오메트리 3D를 생성한다. MeshGeometry3D meshGeometry3D = new MeshGeometry3D(); meshGeometry3D.Positions = positionPoint3DCollection; meshGeometry3D.Normals = normalVector3DCollection; meshGeometry3D.TextureCoordinates = textureCoordinatesPointCollection; meshGeometry3D.TriangleIndices = triangleIndicesInt32Collection; #endregion #region 선형 그라디언트 브러시를 생성한다. LinearGradientBrush linearGradientBrush = new LinearGradientBrush(); linearGradientBrush.StartPoint = new Point(0, 0.5); linearGradientBrush.EndPoint = new Point(1, 0.5); linearGradientBrush.GradientStops.Add(new GradientStop(Colors.Yellow , 0.0 )); linearGradientBrush.GradientStops.Add(new GradientStop(Colors.Red , 0.25)); linearGradientBrush.GradientStops.Add(new GradientStop(Colors.Blue , 0.75)); linearGradientBrush.GradientStops.Add(new GradientStop(Colors.LimeGreen, 1.0 )); #endregion #region 확산 재료를 생성한다. DiffuseMaterial diffuseMaterial = new DiffuseMaterial(linearGradientBrush); #endregion #region 축 각도 회전 3D를 생성한다. AxisAngleRotation3D axisAngleRotation3D = new AxisAngleRotation3D(); axisAngleRotation3D.Axis = new Vector3D(0,3,0); axisAngleRotation3D.Angle = 40; #endregion #region 회전 변환 3D를 생성한다. RotateTransform3D rotateTransform3D = new RotateTransform3D(); rotateTransform3D.Rotation = axisAngleRotation3D; #endregion #region 지오메트리 모델 3D를 생성한다. GeometryModel3D geometryModel3D = new GeometryModel3D(); geometryModel3D.Geometry = meshGeometry3D; geometryModel3D.Material = diffuseMaterial; geometryModel3D.Transform = rotateTransform3D; #endregion #region 모델 3D 그룹을 생성한다. Model3DGroup model3DGroup = new Model3DGroup(); model3DGroup.Children.Add(directionalLight); model3DGroup.Children.Add(geometryModel3D); #endregion #region 모델 비주얼 3D를 생성한다. ModelVisual3D modelVisual3D = new ModelVisual3D(); modelVisual3D.Content = model3DGroup; #endregion #region 뷰포트 3D를 생성한다. Viewport3D viewport3D = new Viewport3D(); viewport3D.Width = 300; viewport3D.Height = 300; viewport3D.Camera = perspectiveCamera; viewport3D.Children.Add(modelVisual3D); #endregion this.canvas.Children.Add(viewport3D); } #endregion } } |
TestProject.zip
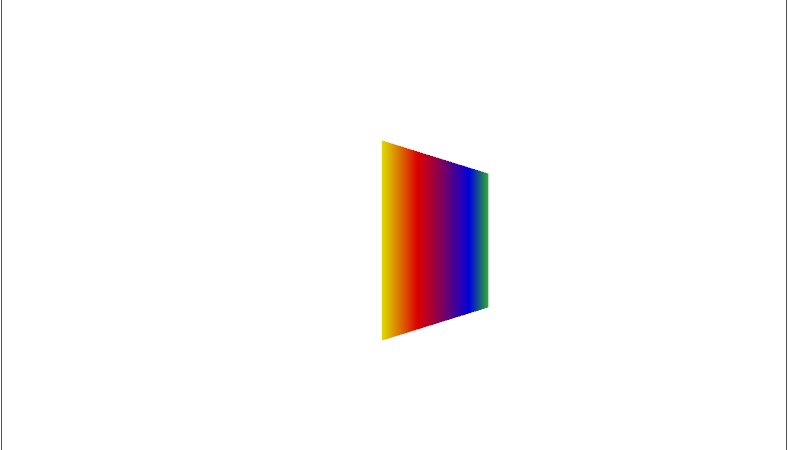
■ Viewport3D 엘리먼트를 사용해 3D 장면을 만드는 방법을 보여준다. ▶ MainWindow.xaml
|
1 2 3 4 5 6 7 8 9 10 11 12 13 14 15 16 17 18 19 20 21 22 23 24 25 26 27 28 29 30 31 32 33 34 35 36 37 38 39 40 41 42 43 44 45 46 47 48 49 50 51 52 53 54 55 56 57 58 59 60 61 62 63 64 65 66 67 68 69 70 71 72 73 74 75 |
<Window x:Class="TestProject.MainWindow" xmlns="http://schemas.microsoft.com/winfx/2006/xaml/presentation" xmlns:x="http://schemas.microsoft.com/winfx/2006/xaml" Width="800" Height="600" Title="TestProject" FontFamily="나눔고딕코딩" FontSize="16"> <Canvas Width="300" Height="300"> <Viewport3D Width="300" Height="300" ClipToBounds="True"> <Viewport3D.Camera> <PerspectiveCamera Position="0 0 2" LookDirection="0 0 -1" FieldOfView="60" /> </Viewport3D.Camera> <Viewport3D.Children> <ModelVisual3D> <ModelVisual3D.Content> <DirectionalLight Direction="-0.612372 -0.5 -0.612372" Color="#ffffff" /> </ModelVisual3D.Content> </ModelVisual3D> <ModelVisual3D> <ModelVisual3D.Content> <GeometryModel3D> <GeometryModel3D.Geometry> <MeshGeometry3D TriangleIndices="0 1 2 3 4 5" Normals="0 0 1 0 0 1 0 0 1 0 0 1 0 0 1 0 0 1" TextureCoordinates="0 0 1 0 1 1 1 1 0 1 0 0" Positions="-0.5 -0.5 0.5 0.5 -0.5 0.5 0.5 0.5 0.5 0.5 0.5 0.5 -0.5 0.5 0.5 -0.5 -0.5 0.5" /> </GeometryModel3D.Geometry> <GeometryModel3D.Material> <MaterialGroup> <DiffuseMaterial> <DiffuseMaterial.Brush> <LinearGradientBrush StartPoint="0 0.5" EndPoint="1 0.5"> <LinearGradientBrush.GradientStops> <GradientStop Offset="0" Color="Yellow" /> <GradientStop Offset="0.25" Color="Red" /> <GradientStop Offset="0.75" Color="Blue" /> <GradientStop Offset="1" Color="LimeGreen" /> </LinearGradientBrush.GradientStops> </LinearGradientBrush> </DiffuseMaterial.Brush> </DiffuseMaterial> </MaterialGroup> </GeometryModel3D.Material> <GeometryModel3D.Transform> <RotateTransform3D> <RotateTransform3D.Rotation> <AxisAngleRotation3D Axis="0 3 0" Angle="40" /> </RotateTransform3D.Rotation> </RotateTransform3D> </GeometryModel3D.Transform> </GeometryModel3D> </ModelVisual3D.Content> </ModelVisual3D> </Viewport3D.Children> </Viewport3D> </Canvas> </Window> |
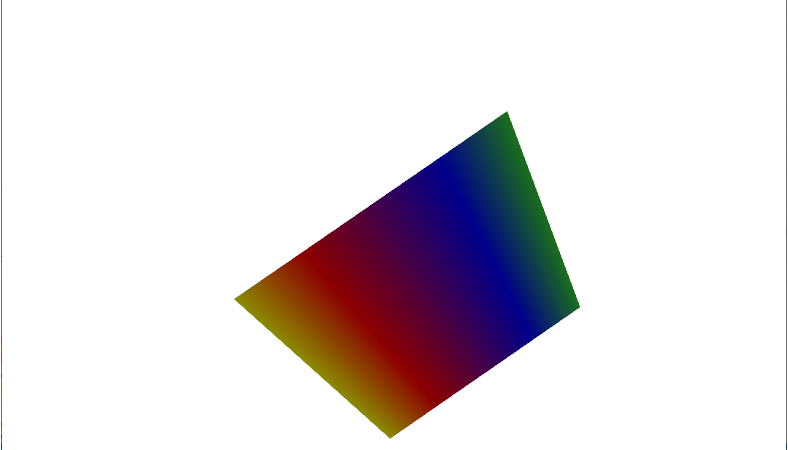
■ GeometryModel3D 엘리먼트의 Transform 속성에서 RotateTransform3D 객체를 사용해 애니메이션을 만드는 방법을 보여준다. ▶ MainWindow.xaml
|
1 2 3 4 5 6 7 8 9 10 11 12 13 14 15 16 17 18 19 20 21 22 23 24 25 26 27 28 29 30 31 32 33 34 35 36 37 38 39 40 41 42 43 44 45 46 47 48 49 50 51 52 53 54 55 56 57 58 59 60 61 62 63 64 65 66 67 68 69 70 71 72 73 74 75 76 77 78 79 80 81 82 83 84 85 86 87 88 89 90 91 92 93 94 95 96 97 98 99 100 101 102 |
<Window x:Class="TestProject.MainWindow" xmlns="http://schemas.microsoft.com/winfx/2006/xaml/presentation" xmlns:x="http://schemas.microsoft.com/winfx/2006/xaml" Width="800" Height="600" Title="TestProject" FontFamily="나눔고딕코딩" FontSize="16"> <Viewport3D Width="500" Height="500" ClipToBounds="True"> <Viewport3D.Camera> <PerspectiveCamera Position="0 0 2" LookDirection="0 0 -1" FieldOfView="60" /> </Viewport3D.Camera> <Viewport3D.Children> <ModelVisual3D> <ModelVisual3D.Content> <DirectionalLight Direction="-0.612372 -0.5 -0.612372" Color="#ffffff" /> </ModelVisual3D.Content> </ModelVisual3D> <ModelVisual3D> <ModelVisual3D.Content> <DirectionalLight Direction="0.612372 -0.5 -0.612372" Color="#ffffff" /> </ModelVisual3D.Content> </ModelVisual3D> <ModelVisual3D> <ModelVisual3D.Content> <GeometryModel3D> <GeometryModel3D.Geometry> <MeshGeometry3D TriangleIndices="0 1 2 3 4 5" Normals="0 0 1 0 0 1 0 0 1 0 0 1 0 0 1 0 0 1" TextureCoordinates="0 0 1 0 1 1 1 1 0 1 0 0" Positions="-0.5 -0.5 0.5 0.5 -0.5 0.5 0.5 0.5 0.5 0.5 0.5 0.5 -0.5 0.5 0.5 -0.5 -0.5 0.5" /> </GeometryModel3D.Geometry> <GeometryModel3D.Material> <MaterialGroup> <DiffuseMaterial> <DiffuseMaterial.Brush> <LinearGradientBrush StartPoint="0 0.5" EndPoint="1 0.5"> <LinearGradientBrush.GradientStops> <GradientStop Offset="0" Color="Yellow" /> <GradientStop Offset="0.25" Color="Red" /> <GradientStop Offset="0.75" Color="Blue" /> <GradientStop Offset="1" Color="LimeGreen" /> </LinearGradientBrush.GradientStops> </LinearGradientBrush> </DiffuseMaterial.Brush> </DiffuseMaterial> </MaterialGroup> </GeometryModel3D.Material> <GeometryModel3D.Transform> <RotateTransform3D> <RotateTransform3D.Rotation> <AxisAngleRotation3D x:Name="axisAngleRotation3D" Axis="0 3 0" Angle="40" /> </RotateTransform3D.Rotation> </RotateTransform3D> </GeometryModel3D.Transform> </GeometryModel3D> </ModelVisual3D.Content> </ModelVisual3D> </Viewport3D.Children> <Viewport3D.Triggers> <EventTrigger RoutedEvent="Viewport3D.Loaded"> <BeginStoryboard> <Storyboard> <DoubleAnimation Storyboard.TargetName="axisAngleRotation3D" Storyboard.TargetProperty="Angle" Duration="00:00:04" From="-60" To="60" AutoReverse="True" RepeatBehavior="Forever" /> <Vector3DAnimation Storyboard.TargetName="axisAngleRotation3D" Storyboard.TargetProperty="Axis" Duration="00:00:04" From="0 3 0" To="1 0 1" AutoReverse="True" RepeatBehavior="Forever" /> </Storyboard> </BeginStoryboard> </EventTrigger> </Viewport3D.Triggers> </Viewport3D> </Window> |
TestProject.zip
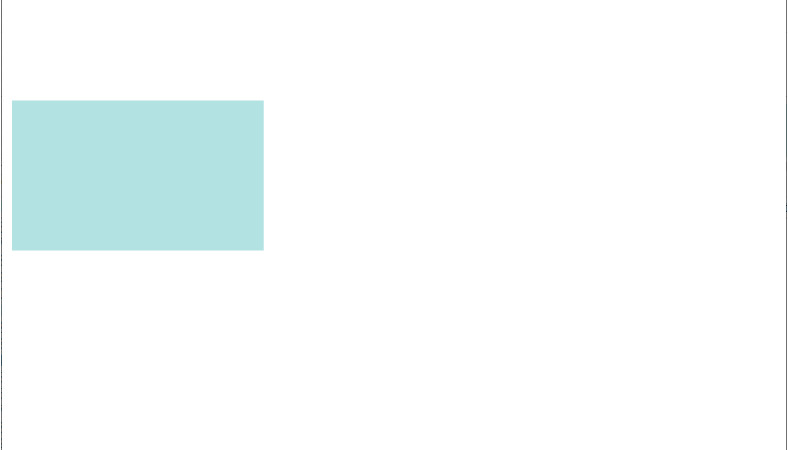
■ GeometryModel3D 엘리먼트의 Transform 속성에서 TranslateTransform3D 객체를 사용해 애니메이션을 만드는 방법을 보여준다. ▶ MainWindow.xaml
|
1 2 3 4 5 6 7 8 9 10 11 12 13 14 15 16 17 18 19 20 21 22 23 24 25 26 27 28 29 30 31 32 33 34 35 36 37 38 39 40 41 42 43 44 45 46 47 48 49 50 51 52 53 54 55 56 57 58 59 60 61 62 63 64 65 66 67 68 69 70 71 72 73 74 75 76 77 78 79 |
<Window x:Class="TestProject.MainWindow" xmlns="http://schemas.microsoft.com/winfx/2006/xaml/presentation" xmlns:x="http://schemas.microsoft.com/winfx/2006/xaml" Width="800" Height="600" Title="TestProject" FontFamily="나눔고딕코딩" FontSize="16"> <Canvas Margin="10" Height="300"> <Viewport3D Width="600" Height="150" ClipToBounds="True"> <Viewport3D.Camera> <PerspectiveCamera Position="0 0 2" LookDirection="0 0 -1" FieldOfView="60" /> </Viewport3D.Camera> <Viewport3D.Children> <ModelVisual3D> <ModelVisual3D.Content> <DirectionalLight Direction="-0.612372 -0.5 -0.612372" Color="#ffffff" /> </ModelVisual3D.Content> </ModelVisual3D> <ModelVisual3D> <ModelVisual3D.Content> <GeometryModel3D> <GeometryModel3D.Geometry> <MeshGeometry3D TriangleIndices="0 1 2 3 4 5" Normals="0 0 1 0 0 1 0 0 1 0 0 1 0 0 1 0 0 1" TextureCoordinates="0 0 1 0 1 1 1 1 0 1 0 0" Positions="-0.5 -0.5 0.5 0.5 -0.5 0.5 0.5 0.5 0.5 0.5 0.5 0.5 -0.5 0.5 0.5 -0.5 -0.5 0.5" /> </GeometryModel3D.Geometry> <GeometryModel3D.Material> <MaterialGroup> <DiffuseMaterial> <DiffuseMaterial.Brush> <SolidColorBrush Opacity="0.3" Color="Cyan" /> </DiffuseMaterial.Brush> </DiffuseMaterial> </MaterialGroup> </GeometryModel3D.Material> <GeometryModel3D.Transform> <TranslateTransform3D x:Name="translateTransform3D" OffsetX="0" OffsetY="0" OffsetZ="0" /> </GeometryModel3D.Transform> </GeometryModel3D> </ModelVisual3D.Content> </ModelVisual3D> </Viewport3D.Children> <Viewport3D.Triggers> <EventTrigger RoutedEvent="Viewport3D.Loaded"> <BeginStoryboard> <Storyboard> <DoubleAnimation Storyboard.TargetName="translateTransform3D" Storyboard.TargetProperty="OffsetX" To="-0.8" AutoReverse="True" RepeatBehavior="Forever" /> </Storyboard> </BeginStoryboard> </EventTrigger> </Viewport3D.Triggers> </Viewport3D> </Canvas> </Window> |
TestProject.zip
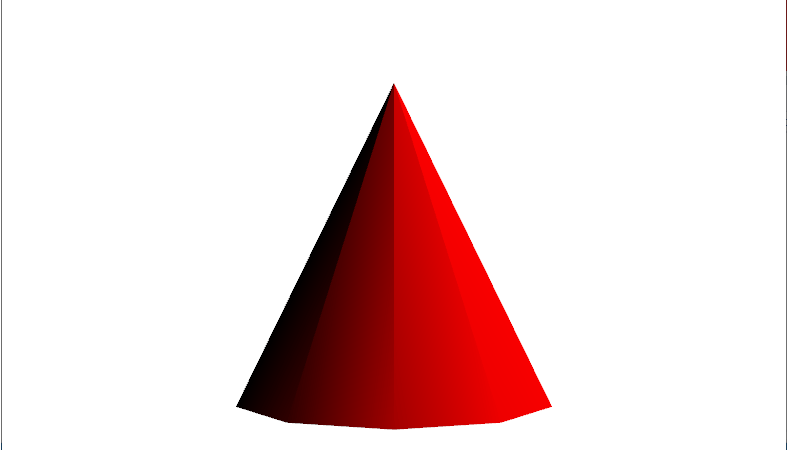
■ Viewport3D 엘리먼트를 사용해 원뿔(cone)을 만드는 방법을 보여준다. ▶ MainWindow.xaml
|
1 2 3 4 5 6 7 8 9 10 11 12 13 14 15 16 17 18 19 20 21 22 23 24 25 26 27 28 29 30 31 32 33 34 35 36 37 38 39 40 41 42 43 44 45 46 47 48 49 50 51 52 53 54 55 56 57 58 59 60 61 62 63 64 65 66 67 68 69 70 71 72 73 74 75 76 77 78 79 80 81 82 83 84 85 86 87 88 89 90 91 92 |
<Window x:Class="TestProject.MainWindow" xmlns="http://schemas.microsoft.com/winfx/2006/xaml/presentation" xmlns:x="http://schemas.microsoft.com/winfx/2006/xaml" Width="800" Height="600" Title="TestProject" FontFamily="나눔고딕코딩" FontSize="16"> <Grid> <Label HorizontalAlignment="Center" TextBlock.TextAlignment="Center" Foreground="Red" FontSize="20" Content="Model : Cone" /> <Viewport3D Name="myViewport" > <Viewport3D.Camera> <PerspectiveCamera FarPlaneDistance="20" LookDirection="0 0 1" UpDirection="0 1 0" NearPlaneDistance="1" Position="0 0 -3" FieldOfView="45" /> </Viewport3D.Camera> <Viewport3D.Children> <ModelVisual3D> <ModelVisual3D.Content> <Model3DGroup > <Model3DGroup.Children> <DirectionalLight Direction="3 -4 5" Color="#ffffffff" /> <GeometryModel3D> <GeometryModel3D.Geometry> <MeshGeometry3D Positions="0.293893 -0.5 0.404509 0.475528 -0.5 0.154509 0 0.5 0 0.475528 -0.5 0.154509 0 0.5 0 0 0.5 0 0.475528 -0.5 0.154509 0.475528 -0.5 -0.154509 0 0.5 0 0.475528 -0.5 -0.154509 0 0.5 0 0 0.5 0 0.475528 -0.5 -0.154509 0.293893 -0.5 -0.404509 0 0.5 0 0.293893 -0.5 -0.404509 0 0.5 0 0 0.5 0 0.293893 -0.5 -0.404509 0 -0.5 -0.5 0 0.5 0 0 -0.5 -0.5 0 0.5 0 0 0.5 0 0 -0.5 -0.5 -0.293893 -0.5 -0.404509 0 0.5 0 -0.293893 -0.5 -0.404509 0 0.5 0 0 0.5 0 -0.293893 -0.5 -0.404509 -0.475528 -0.5 -0.154509 0 0.5 0 -0.475528 -0.5 -0.154509 0 0.5 0 0 0.5 0 -0.475528 -0.5 -0.154509 -0.475528 -0.5 0.154509 0 0.5 0 -0.475528 -0.5 0.154509 0 0.5 0 0 0.5 0 -0.475528 -0.5 0.154509 -0.293892 -0.5 0.404509 0 0.5 0 -0.293892 -0.5 0.404509 0 0.5 0 0 0.5 0 -0.293892 -0.5 0.404509 0 -0.5 0.5 0 0.5 0 0 -0.5 0.5 0 0.5 0 0 0.5 0 0 -0.5 0.5 0.293893 -0.5 0.404509 0 0.5 0 0.293893 -0.5 0.404509 0 0.5 0 0 0.5 0" Normals="0.7236065 0.4472139 0.5257313 0.2763934 0.4472138 0.8506507 0.5308242 0.4294462 0.7306172 0.2763934 0.4472138 0.8506507 0 0.4294458 0.9030925 0.5308242 0.4294462 0.7306172 0.2763934 0.4472138 0.8506507 -0.2763934 0.4472138 0.8506507 0 0.4294458 0.9030925 -0.2763934 0.4472138 0.8506507 -0.5308242 0.4294462 0.7306172 0 0.4294458 0.9030925 -0.2763934 0.4472138 0.8506507 -0.7236065 0.4472139 0.5257313 -0.5308242 0.4294462 0.7306172 -0.7236065 0.4472139 0.5257313 -0.858892 0.429446 0.279071 -0.5308242 0.4294462 0.7306172 -0.7236065 0.4472139 0.5257313 -0.8944269 0.4472139 0 -0.858892 0.429446 0.279071 -0.8944269 0.4472139 0 -0.858892 0.429446 -0.279071 -0.858892 0.429446 0.279071 -0.8944269 0.4472139 0 -0.7236065 0.4472139 -0.5257313 -0.858892 0.429446 -0.279071 -0.7236065 0.4472139 -0.5257313 -0.5308242 0.4294462 -0.7306172 -0.858892 0.429446 -0.279071 -0.7236065 0.4472139 -0.5257313 -0.2763934 0.4472138 -0.8506507 -0.5308242 0.4294462 -0.7306172 -0.2763934 0.4472138 -0.8506507 0 0.4294458 -0.9030925 -0.5308242 0.4294462 -0.7306172 -0.2763934 0.4472138 -0.8506507 0.2763934 0.4472138 -0.8506507 0 0.4294458 -0.9030925 0.2763934 0.4472138 -0.8506507 0.5308249 0.4294459 -0.7306169 0 0.4294458 -0.9030925 0.2763934 0.4472138 -0.8506507 0.7236068 0.4472141 -0.5257306 0.5308249 0.4294459 -0.7306169 0.7236068 0.4472141 -0.5257306 0.8588922 0.4294461 -0.27907 0.5308249 0.4294459 -0.7306169 0.7236068 0.4472141 -0.5257306 0.8944269 0.4472139 0 0.8588922 0.4294461 -0.27907 0.8944269 0.4472139 0 0.858892 0.429446 0.279071 0.8588922 0.4294461 -0.27907 0.8944269 0.4472139 0 0.7236065 0.4472139 0.5257313 0.858892 0.429446 0.279071 0.7236065 0.4472139 0.5257313 0.5308242 0.4294462 0.7306172 0.858892 0.429446 0.279071" TriangleIndices="0 1 2 3 4 5 6 7 8 9 10 11 12 13 14 15 16 17 18 19 20 21 22 23 24 25 26 27 28 29 30 31 32 33 34 35 36 37 38 39 40 41 42 43 44 45 46 47 48 49 50 51 52 53 54 55 56 57 58 59" /> </GeometryModel3D.Geometry> <GeometryModel3D.Material> <DiffuseMaterial> <DiffuseMaterial.Brush> <SolidColorBrush Opacity="1.0" Color="Red" /> </DiffuseMaterial.Brush> </DiffuseMaterial> </GeometryModel3D.Material> </GeometryModel3D> </Model3DGroup.Children> </Model3DGroup> </ModelVisual3D.Content> </ModelVisual3D> </Viewport3D.Children> </Viewport3D> </Grid> </Window> |
TestProject.zip
■ Point4DConverter 클래스의 ConvertFromString 메소드를 사용해 문자열에서 Point4D 객체를 구하는 방법을 보여준다. ▶ 예제 코드 (C#)
|
1 2 3 4 5 6 7 8 9 |
using System.Windows.Media.Media3D; Point4DConverter converter = new Point4DConverter(); string sourceString = "10,20,30,40"; Point4D targetPoint4D = (Point4D)converter.ConvertFromString(sourceString); |
■ Size3DConverter 클래스의 ConvertFromString 메소드를 사용해 문자열에서 Size3D 객체를 구하는 방법을 보여준다. ▶ 예제 코드 (C#)
|
1 2 3 4 5 6 7 8 9 |
using System.Windows.Media.Media3D; Size3DConverter converter = new Size3DConverter(); string sourceString = "10,20,30"; Size3D targetSize3D = (Size3D)converter.ConvertFromString(sourceString); |
■ Vector3DConverter 클래스의 ConvertFromString 메소드를 사용해 문자열에서 Vector3D 객체를 구하는 방법을 보여준다. ▶ 예제 코드 (C#)
|
1 2 3 4 5 6 7 8 9 |
using System.Windows.Media.Media3D; Vector3DConverter converter = new Vector3DConverter(); string sourceString = "10,20,30"; Vector3D targetVector3D = (Vector3D)converter.ConvertFromString(sourceString); |
■ Point3DConverter 클래스의 ConvertFromString 메소드를 사용해 문자열에서 Point3D 객체를 구하는 방법을 보여준다. ▶ 예제 코드 (C#)
|
1 2 3 4 5 6 7 8 9 |
using System.Windows.Media.Media3D; Point3DConverter converter = new Point3DConverter(); string sourceString = "10,20,30"; Point3D targetPoint3D = (Point3D)converter.ConvertFromString(sourceString); |
■ WPF 복합 컨트롤을 만들고 ElementHost 컨트롤을 사용하여 Windows Forms 컨트롤 및 폼에서 호스트하는 방법을 보여준다. 두 개의 자식 컨트롤이 포함된 WPF